Revision 2.2
Operation
5-1
5. OPERATION
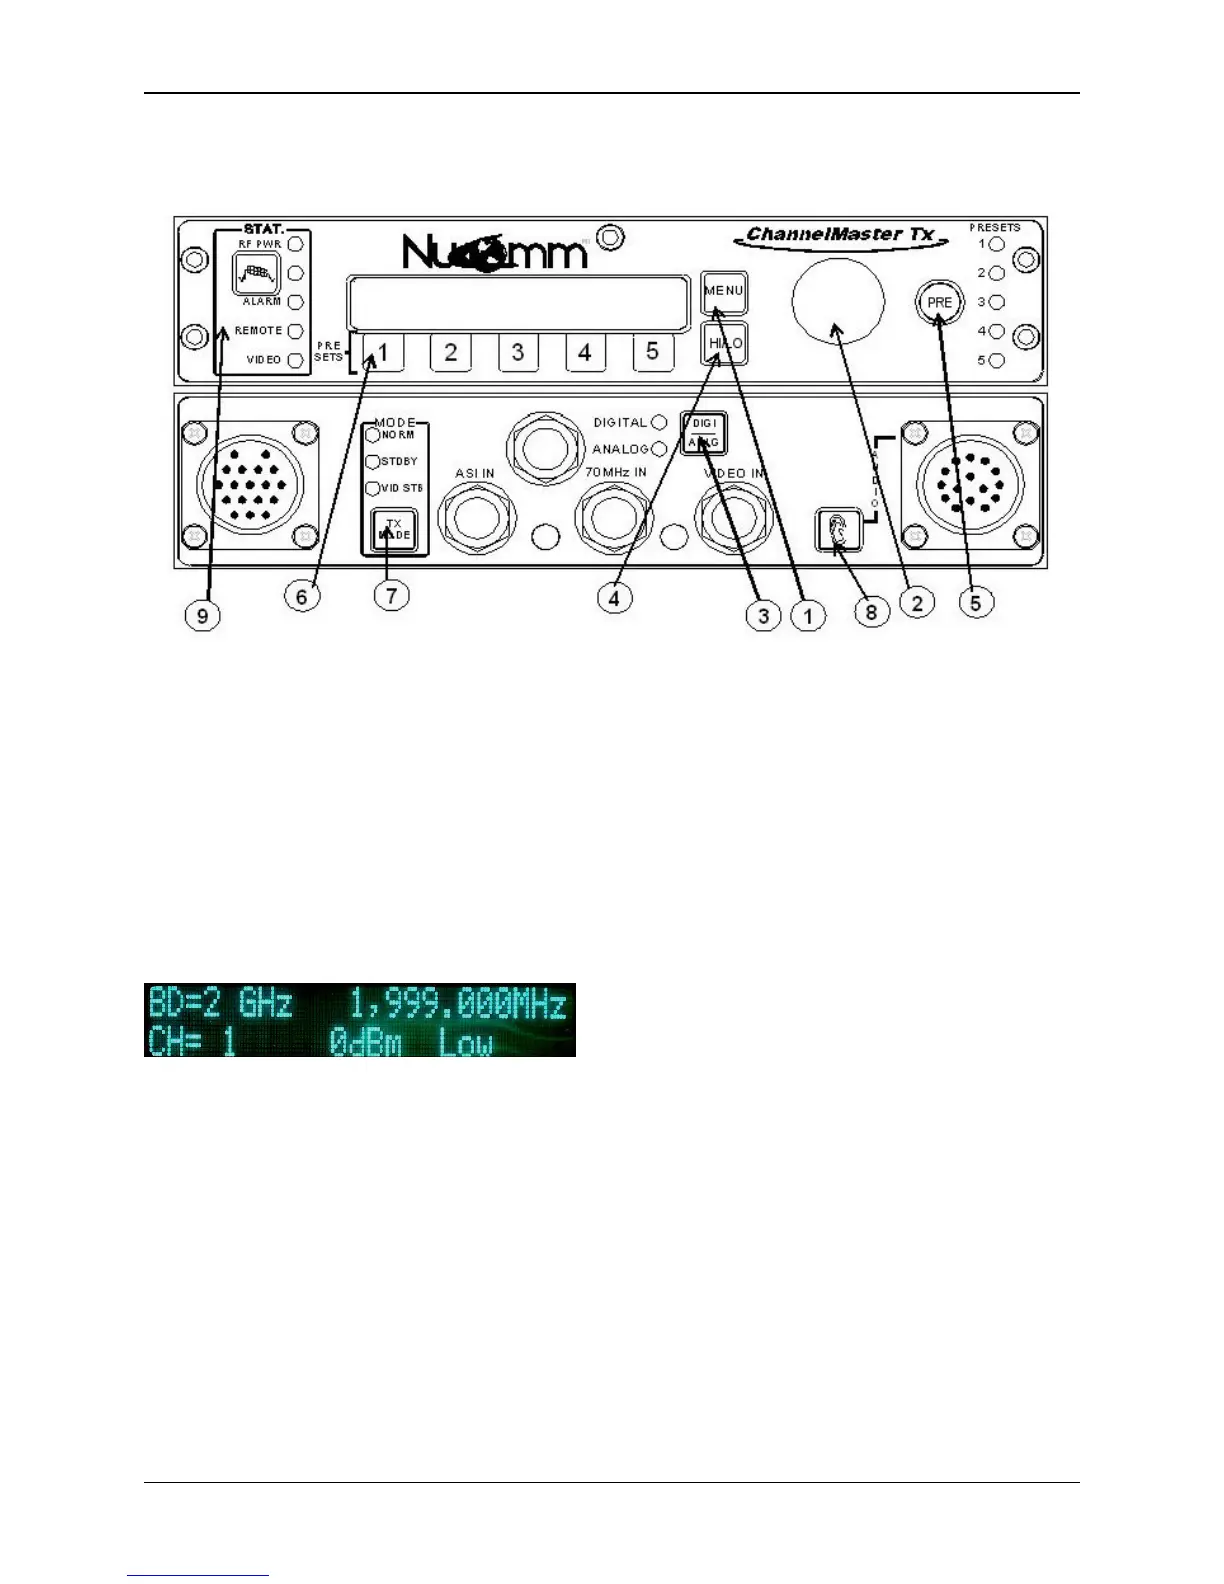
Figure 5-1: ChannelMaster TX1 Front Panel Controls and Indicators
5.1 Power Up
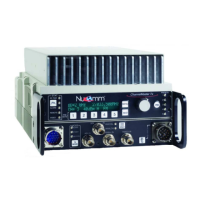
Upon powering up the unit, you will see
three quick screens showing the
equipment type, the model number, and
the serial number. After that, the unit
will display the DEFAULT screen, which
will look similar to the following photo
(depending on your configuration).
Once this screen appears, options and
settings can then be changed and
initialized through the use of the front
panel "Quick-Keys" and pre-set buttons,
or via the menu system. The front panel
of the unit is depicted in Figure 5-1.
Menu navigation is via the rotary "Quick
Knob" switch (2) to the right of the LED
display. Turn the "Quick Knob"
clockwise or counter-clockwise to move
the cursor through the menus. By
pressing the "Quick Knob", you are able
to select, or activate, menu items. As
such, the "Quick Knob" may also be
referred to as the "Enter" button.
5.1.1 Changing Characters
1. Begin by rotating the “Quick
Knob” until the desired screen
item is hightlighted. Press Enter
to select the item.
2. The left-most character position of
the name will then be highlighted.
Rotate the “Quick-Knob” until the
desire alpha-numeric character
appears.
3. Press the “Quick-Knob” to save
the character.
4. Move the cursor to the second
character, rotating the “Quick-
Knob”.
5. Press the “Quick-Knob” to select
the character.
6. Rotate the “Quick-Knob” until the
desire alpha-numeric character
appears.