15
Intercom Operation (continued)
ANSWERING YOUR DOOR
1. Press the DOOR TALK key while you speak.
2. Release the DOOR TALK key to hear the reply.
3. The call and the reply will be heard at all stations in the RADIO INTERCOM and
INTERCOM ONLY modes.
ENDING AN INTERCOM CALL
An intercom call can be ended by simply pressing the END CALL key or allowing the
system to automatically timeout 30 seconds after releasing the INSIDE/PATIO or
DOOR TALK keys.
USING THE MONITOR FUNCTION
The MONITOR function allows you to listen to sounds from selected station locations. It is
most frequently used to monitor an invalid’s or a child’s room. When a station is set to
MONITOR, most sounds in that room will be transmitted to all stations in the RADIO
INTERCOM mode.
1. Determine the station that is to be placed into the MONITOR mode.
2. Set that station’s REMOTE STATION STATUS switch at the master to MONITOR.
3. Set the listening stations’ REMOTE STATION STATUS switches at the master to
RADIO INTERCOM.
4. Reset the REMOTE STATION STATUS switch when the monitoring is no longer
necessary.
Note: If program audio is present during monitor, that audio and sounds heard in monitor
are heard at the same time on all stations selected to RADIO INTERCOM mode. If the
program audio is too loud, it may prevent hearing monitor audio. To improve the balance
between the program audio and monitoring audio, increase the INTERCOM VOLUME
control and/or reduce the SYSTEM VOLUME control.
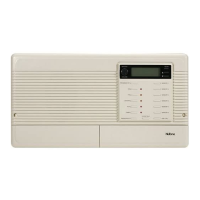
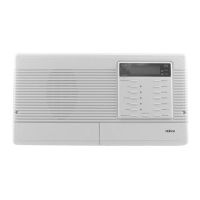
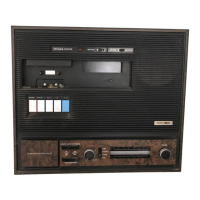
INTERCOM VOLUME CONTROL
The INTERCOM VOLUME control at the master station controls the Intercom and
Monitor volume throughout the system.
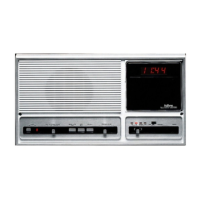
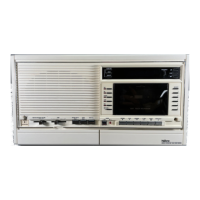
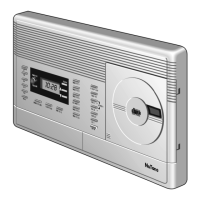
Digital Clock
SETTING THE TIME
The proper clock setting procedure is arranged in 4 segments. Each segment must be
completed in 5 seconds. Follow the procedure below.
1. Press the TIME SET key one time. The ‘Hours’ display will
begin flashing, and the words ‘Set Time’ will display.
2. Within 5 seconds, press the ▲ or ▼ key until the correct
Hour and AM/PM are displayed.
3. Within the next 5 seconds, press the TIME SET key again. The ‘Minutes’ display will
begin flashing.
4. Again, within 5 seconds, press the ▲ and ▼ keys until the correct minute is displayed.
5. Release the keys after entering the correct time. The display will stop flashing in 5
seconds, and the time will be set.
NOTE: Pressing the ▲ or ▼ keys momentarily will cause the time to advance or reverse
one digit. Pressing the ▲ or ▼ keys continuously for more than
1
⁄2 second will cause the
digits to advance or reverse at high speed.
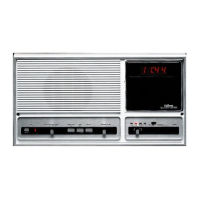
RADIO TIMER
A Timer has been incorporated to turn the radio on or off at preset times. Note: If the
master has been selected to the TAPE, AUX or CD PLAY position, the Radio Timer will
not function.
SETTING THE RADIO ON TIME
1. Press the TIME SET key 3 times. The ‘Hours’ display will
begin flashing, and the words SET RADIO ON
TIME will
display.
2. Within 5 seconds, press the ▲ or ▼ key until the correct
Hour and AM/PM are displayed.
3. Within the next 5 seconds, press the TIME SET key again. The ‘Minutes’ display will
begin flashing.
4. Again, within 5 seconds, press the ▲ and ▼ keys until the correct minute is displayed.
5. Release the key after entering the correct RADIO ON
TIME. The display will stop
flashing in 5 seconds, and the RADIO ON TIME will be stored into memory.
6. The last program radio mode and frequency used will be the frequency played when
the timer turns on the radio. Unless deactivated, the radio will play until the timer turns
off the radio.
SETTING THE RADIO OFF TIME
1. Press the TIME SET key 5 times. The ‘Hours’ display will
begin flashing, and the words “SET RADIO OFF
TIME” will
display.
2. Within 5 seconds, press the ▲ or ▼ key until the correct
‘Hour’ and ‘AM/PM’ are displayed.
3. Within the next 5 seconds, press the TIME SET key again. The ‘Minutes’ display will
begin flashing.
4. Again, within 5 seconds, press the ▲ and ▼ keys until the correct minute is displayed.
5. Release the key after entering the correct RADIO OFF
TIME. The display will stop
flashing in 5 seconds, and the RADIO OFF
TIME will be stored into memory.
6
 Loading...