7
Digital Clock (continued)
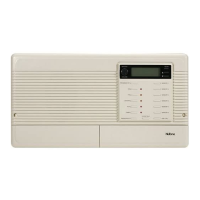
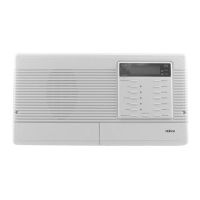
ENABLING/DISABLING THE RADIO TIMER
1. Press the TIMER key. The light next to the key will illuminate and the TIMER is
enabled.
2. To disable the TIMER, press the TIMER key again.
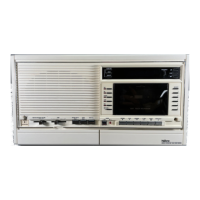
Audio Source Selection
NOTE: Initial operation of the system requires the following settings:
•All Station Status switches set in the RADIO/INTERCOM mode.
• SYSTEM VOLUME set at
1
⁄3 level.
• MASTER VOLUME set at
2
⁄3 level.
• REMOTE STATION VOLUMES set at
2
⁄3
level.
Select any of the audio sources by pressing: AM, FM,TAPE, AUX or CD/PLAY PAUSE
keys. To turn off the selected program audio source, press the PROGRAM OFF key.
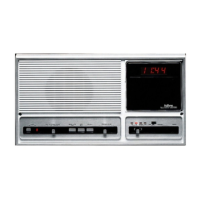
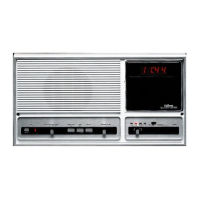
Radio Operation
1. Select AM or FM by pressing the appropriate key.
2. Tune the radio to the desired frequency by using one the following methods:
• RAPID TUNE: Depress and hold either the ▲ or ▼ tuning keys until you reach the
frequency you desire. Release the tuning key.
2. • STEP TUNE: Momentarily touch either the ▲ or ▼ tuning keys. The radio will tune
to the next radio frequency.
2. • SCAN: Momentarily touch the SCAN key. The radio tunes up in frequency to the
nearest strong signal. It remains on this signal for 5 seconds, then moves to the next
strong signal. When the desired station is located, press the SCAN key to stop the
scan operation.
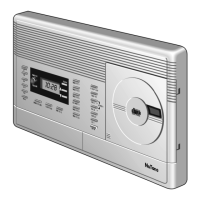
RADIO MEMORY
6 AM and 6 FM radio frequencies may be stored in the system’s memory for instant recall
by using the following procedure.
STORING FREQUENCIES INTO MEMORY
1. Press FM key to set the radio into the FM program mode. Tune to the desired
frequency by using the ▲▼ or SCAN keys.
2. Press the MEMORY SET key, behind the right panel door.The display will begin
flashing. Within 5 seconds, press a MEMORY Channel (1-6) where the frequency will
be stored. The display will stop flashing.
3. Repeat this procedure for all six FM memory channels.
4. Press the AM key to set the radio into the AM program mode. Repeat the
programming procedure for all six AM MEMORY channels.
Note: It is recommended that the lowest frequency be programmed into MEMORY 1 and
the next higher frequency into MEMORY 2, etc.
RECALLING FREQUENCIES
1. Select AM or FM mode.
2. Press one MEMORY CHANNEL 1-6 key. The radio frequency that has been stored
into that selected memory location will be heard.
14
Station Status Switches
The STATION STATUS SWITCHES set the operating mode of each station in the
system. Each station may be set to one of the four following modes: RADIO
INTERCOM, INTERCOM ONLY, OFF, or MONITOR.
1. RADIO INTERCOM: Stations set to this mode will receive all program audio, intercom
audio and monitor audio. Program audio includes the CD PLAYER, AM and FM
RADIO and optional audio sources connected to the TAPE and AUX inputs. An
optional electronic door chime will also be heard over stations selected to this mode.
2. INTERCOM ONLY: A station set to this mode will only receive intercom audio and
chime audio.
3. OFF: Stations set to this mode will not receive program audio and chime audio.
Intercom audio will not be received or transmitted. Remote control of the CD Player
and Radio is not possible while the switch is set to OFF.
4. MONITOR: When a station is selected to this mode, most sounds originating at the
station’s location will be transmitted to stations in the RADIO INTERCOM mode.
When the station is set to MONITOR, program audio, chime audio, intercom operation
and remote control of CD Player and Radio is not possible.
DETERMINING STATION LOCATIONS
1. Set all REMOTE STATION STATUS switches to OFF.
2. Set the MASTER STATION STATUS switch to RADIO INTERCOM.
3. Tune in a radio station and adjust the SYSTEM VOLUME control to approximately
1
⁄2 level.
4. Turn the MASTER SPEAKER VOLUME control to minimum volume
5. Set the REMOTE VOLUME CONTROL at each remote station to maximum.
6. Set a REMOTE STATION STATUS switch to RADIO INTERCOM mode, and locate
the station by sound.
7. At the master, label the station’s REMOTE STATION STATUS switch using the pre-
printed room labels (supplied in the back of this manual). The label should be
positioned in the space provided below the switch that controls that station.
8. Repeat steps 6 and 7 until you locate every station in your system.
Intercom Operation
The initial operation of the intercom requires the following:
• INTERCOM VOLUME control set to approximately
2
⁄3 level.
• MASTER VOLUME control set to approximately
2
⁄3 level.
• REMOTE STATION VOLUMES set to approximately
2
⁄3 level.
• REMOTE STATION STATUS and MASTER STATION STATUS switches set to the
RADIO INTERCOM or INTERCOM ONLY mode.
MAKING A CALL
1. Press and hold the INSIDE/PATIO key while you speak.Your voice will be heard by all
stations, except the door speakers.
2. Release the INSIDE/PATIO key to hear the reply.
3. Continue pressing the key to speak and releasing to listen.
RECEIVING A CALL
This system has a HANDS-FREE answering feature at all remote stations and the
master station. When you receive an intercom call, make your reply without touching a
control. Just respond within a few feet of any remote. The entire intercom conversation is
controlled from the station that initiated the call.
 Loading...