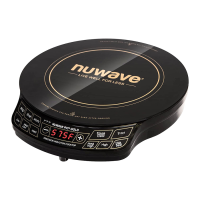
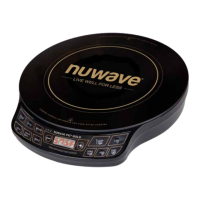
12 | nuwavenow.com
BASIC FUNCTIONS
The Warm Function
After the initial cooking is complete, the
cooktop can be used to keep the food
warm between 100°F–200°F. The default
settings are 120°F for 2 hours.
1. Press Low + Med/Low simultaneously
until the “WARM” indicator ashes.
2. “120F” will display. Press Start.
3. To change the warming time, press
Cook Time and enter the desired time
up to 100 hours.
4. To change the warming temperature,
press Cook Temp, then adjust the
temperature 100˚F–200˚F with the
preset temperature keys, the + or –
keys, or the numeric touchpad.
Once the initial cooking cycle is nished,
the PIC will switch to the Warm function.
Warm will always be the last stage.
• Warm is available for Presets, but it
works after cooking.
The End Time Function
The correct Clock time must be set before
the End Time function can be used (see
Setting Clock on page 10). This feature
is designed to allow cooking to end at a
specic time. It is possible to delay the end
of a program for up to 24 hours.
1. Press End Time. “AM” and “00:00” will
be displayed.
2. Use the numeric touchpad to input the
desired end time.
• For example, 5:00 would be
entered by pressing 5, 0, 0. Press
am/pm to change from “AM”
default if appropriate.
3. After programming the cooking
temperature and time, press Start.
If the End Time is earlier than the end of
the programmed cooking time, cooking
won’t start and the unit will beep for 3
seconds while “End Time” blinks. In that
case, reenter the correct End Time.
After starting the PIC, the remaining time
until cooking begins (delay time) shows on
the screen. The delay time ticks down while
“:” ashes.
The Stage Cooking Function
This function is used when programming
or cooking for more than one time and
temperature setting. You can program up to
9 stages and choose the wattage before or
after you program them. All the stages have
a default temperature of 575˚F.
1. Press Stage. “Stage” will ash and “1”
is displayed.
2. Enter the Cook Temp and Cook Time in
order for each stage. I.e. Stage1: Cook
Temp (Power level can be selected
instead of number)→Input→Cook
Time→Input→Stage (For Stage 2).
• Temperature is automatically
rounded to the nearest “0” or “5”.
• Stage number is increased one
number each stage, but stage
number can be selected.
• When Stage is pressed, “Stage 1”
is displayed and “STAGE” ashes.
• When Cook Temp is pressed,
“STAGE” becomes solidly lit,
“TEMP” ashes and 575F is
displayed. It may be changed by
the number or temperature keys.
• When Cook Time is pressed,
“TIME” ashes and “00:00” is
displayed. To set the Cooking
Time as 2 hours and 35 minutes,
press 2, 3, and 5 in sequence.
3. Cooking is executed according to the
stage sequence even if the input order
is different.
4. Before starting to cook, your stages
and settings can be saved for future
meals by pressing Program. “PROG”
will ash and you will then choose a
memory slot number (from 51–200)
and press Program again to save
your new Preset (“PROG” will become
solidly lit).