Do you have a question about the NXP Semiconductors BLDC and is the answer not in the manual?
Provides instructions for running and controlling BLDC sensorless application with development boards.
Details the Linix 45ZWN24-40 motor used with the application.
Describes the MIGE 60CST-MO1330 motor for PMSM and BLDC applications.
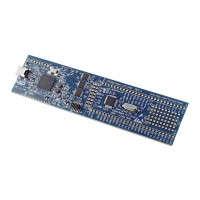
Details jumper settings for various Tower System MCU modules.
Instructions for assembling the Tower System hardware.
Details jumper settings for various Freedom development boards.
Instructions for assembling the Freedom development platform.
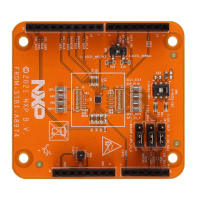
Components needed for the High-Voltage Platform.
Configuration files for IAR Embedded Workbench IDE.
Details device-specific files, initialization routines, and motor definitions.
Description of middleware folders like mc_algorithms and mc_drivers.
Maps development boards to control buttons and LED states for application control.
Steps to establish communication and control the BLDC motor using FreeMASTER.
Adding custom variables and using TSA for FreeMASTER monitoring.
Details the FreeMASTER control page for adjusting speed, current, and state.
Steps to assemble hardware, download project, and start the motor.
Procedures for stopping the motor and handling emergencies.
Procedure to clear faults using the control page button.
How to enable or disable the demonstration mode via FreeMASTER or board buttons.
This document describes the BLDC Control Demo User's Guide, which provides instructions for running and controlling a Brushless DC (BLDC) sensorless application using NXP's Freedom and Tower System development boards. The guide details the necessary software, hardware setup, jumper settings, project arrangement, and user interface for this application.
The BLDC Control Demo is designed to demonstrate the rotation of a motor using a BLDC sensorless application. It leverages Kinetis KV series motor-control MCUs for motor-control applications, supporting both low-voltage/low-power applications (with BLDC control) and high-voltage applications (up to 1 kW of power) depending on the platform used. The core functionality involves controlling a BLDC motor without the need for Hall sensors, relying instead on sensorless algorithms.
The application utilizes SDK peripheral drivers for general peripheral configuration (clocks, SPI, SIM, ports) but employs specialized motor-control drivers for critical timing-sensitive features like PWM signal generation, analog signal sampling, and synchronization between PWM and ADC units. This optimization is crucial for the control algorithms, which typically run in a 50-µs loop. The motor-control drivers are specifically designed to configure critical MC peripherals such as eFlexPWM, FTM, ADC, and PDB, which are not fully supported by standard SDK peripheral drivers for the required timing and features.
The project file structure includes several key components:
The motor-control projects are built upon the Real-Time Control Embedded Software Library (RTCESL), which provides mathematical functions and is fully compatible with the official RTCESL release 4.5.
The BLDC Control Demo offers both direct control via a user button on the development board and remote control through the FreeMASTER software.
FreeMASTER 3.0 is required for optimal remote operation via the USB interface.
bldc.pmp project file located in the <sdk_package_folder>\middleware\motor_control\freemaster directory.The user guide emphasizes the importance of proper hardware setup and jumper configurations for each supported development board (Tower System and Freedom platforms). It provides detailed tables for jumper settings for various MCU modules (TWR-KV46F150M, TWR-KV58F220M, TWR-KE18F, FRDM-KV11Z, FRDM-KE15Z, FRDM-KE16Z) and the TWR-MC-LV3PH module.
mcdrv_<board&MCU>.c file contains these critical configuration functions.BOARD_FMSTR_USE_TSA macro, stores variable addresses and sizes in MCU flash memory for FreeMASTER visibility.| Communication Interfaces | UART, SPI, I2C |
|---|---|
| PWM Channels | Up to 6 |
| Architecture | ARM Cortex-M0 |
| Operating Voltage | 3.3V, 5V |
| Output Current | Up to 1A |
| Control Interface | sensorless |
| Package Type | LQFP |
| Protection Features | OVP, UVP, OCP, OTP |