REGULATORS
DELTA 4 SECOND STAGE
© 2002 Design, 2005
PG-8
OCEANIC® Product Service Guide
Doc. 12-2803-r02 (10/3/10)
press the EXHAUST COVER in toward the HOUSING ASSEMBLY
until it snaps into place (Fig. 12).
3. Replace the VENTURI SWITCH ASSEMBLY if removed by closely
adhering to the following steps:
A. Lightly lubricate and install the VENTURI SWITCH O-RING
(36) onto the VENTURI SWITCH (35), ensuring the O-RING is
properly seated in the Groove.
B. Holding the ASSEMBLY by the Adjustment Tab, lower the
VENTURI SWITCH (35) into the HOUSING ASSEMBLY (5),
ensuring that the Adjustment Stop Post is seated in the Adjust-
ment Groove located on the HOUSING ASSEMBLY. Ensure the
Retaining Ring Groove on the VENTURI SWITCH is visible when
looking into the HOUSING ASSEMBLY through the Mouthpiece
opening.
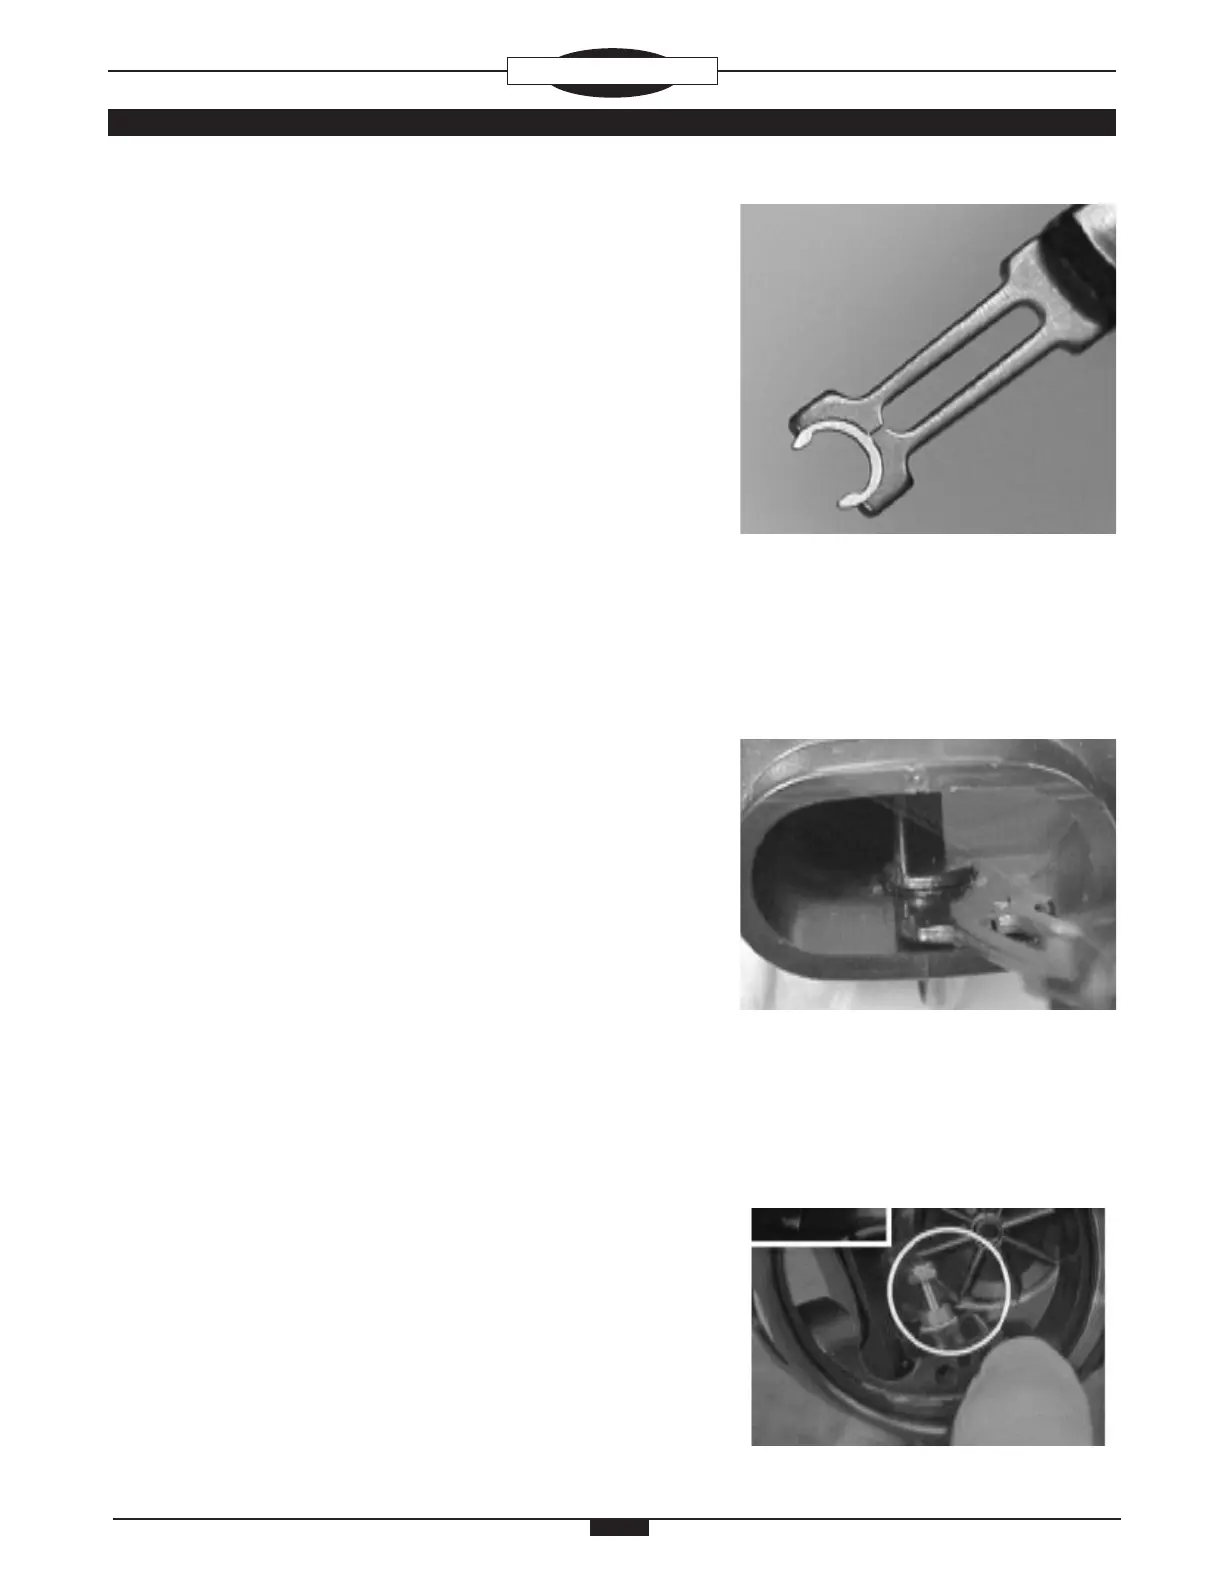
C. Place the SWITCH RETAINING RING (37) into the Retaining
Ring Tool so that the Rounded Side of the SWITCH RETAINING
RING is against the Cradle of the Tool, and the Flat Side is facing
up and out (Fig. 13).
D. Insert the Retaining Ring Tool with the SWITCH RETAIN-
ING RING (37) into the HOUSING ASSEMBLY (5) through the
Mouthpiece opening. Press the SWITCH RETAINING RING into
the VENTURI SWITCH (35) Groove until it is completely seated,
ensuring that the Flat Side of the SWITCH RETAINING RING is
against the HOUSING ASSEMBLY (5). Remove the Tool (Fig.
14).
E. Turn the VENTURI SWITCH (35) back and forth through its
complete range of motion ensuring smooth movement without
any restriction. Verify that the SWITCH RETAINING RING (37)
is completely seated into the Groove on the VENTURI SWITCH,
and does not rotate.
4. Replace the POPPET SEAT (14) into the POPPET (15), with
the side that is perfectly smooth facing out. Ensure that it is
completely seated, ush with the Rim of the POPPET. DO NOT
use adhesive.
5. Apply a light lm of lubricant to each end of the POPPET SPRING
(16) and place it onto the POPPET (15). Fit the POPPET into the
Pronged End of the Poppet Tool and insert the POPPET Shaft
completely through the Inlet Tube of the HOUSING ASSEMBLY (5)
compressing the POPPET SPRING until the Threaded portion of
the Shaft is completely visible inside the HOUSING ASSEMBLY.
Hold in position by grasping the Tool with your ngers and the
Outer Rim of the HOUSING ASSEMBLY with your thumb.
6. Place the WASHER (18) over the Threads of the POPPET (15)
and onto the Shaft. Place the SPACER (19) onto the POPPET
Shaft. Turn the LOCK NUT (20) clockwise onto the POPPET
Threads with your nger tips until threading is started (Fig. 15).
Fig. 15
Fig. 13
Fig. 14