14
Installation
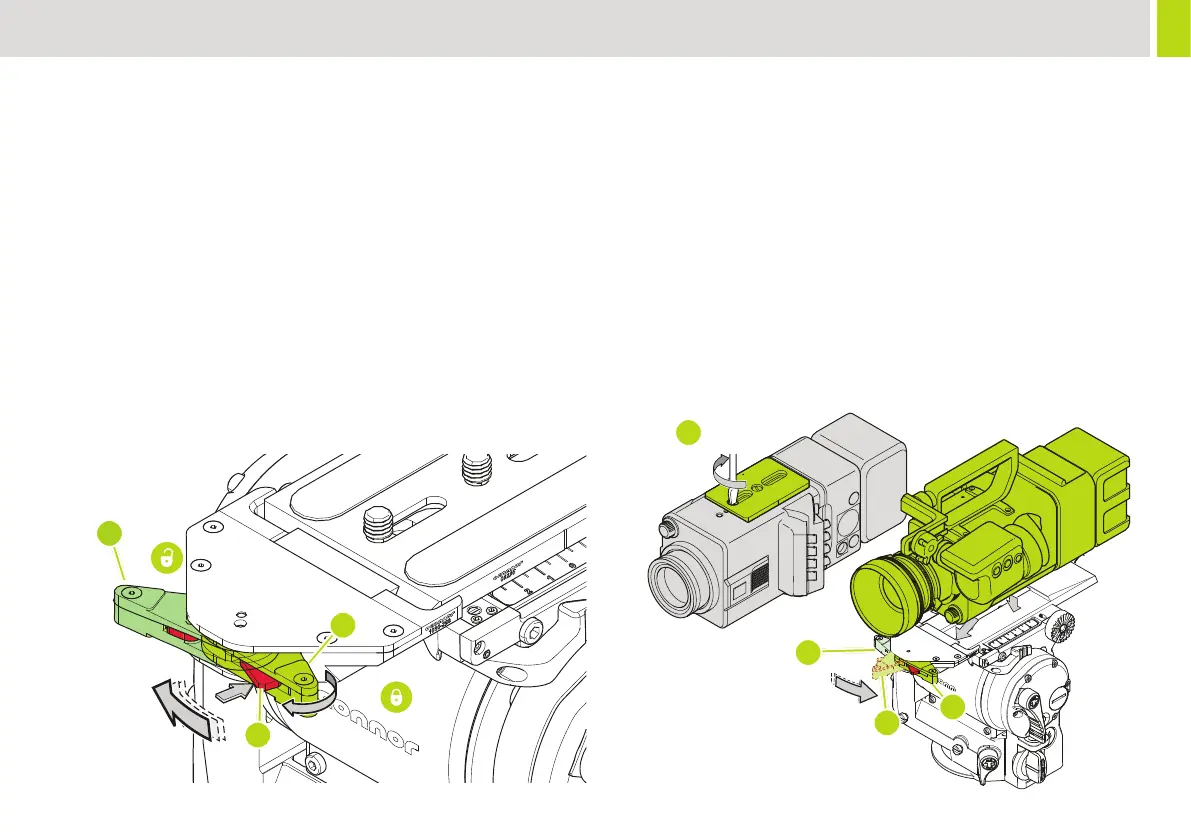
3. Securely attach the camera plate to the bottom of the camera (D).
4. Insert the camera plate into the platform. Push it into the dovetail
at the rear of the platform, with the clamp in position (E), then
push the front down until the platform hook engages with an
audible ‘click’ (F). Note that the camera is now captive, but not
locked.
5. To lock the camera mounting plate, turn the clamp lever on the
platform fully counter-clockwise (G). The clamping mechanism will
engage with the camera plate securing the camera in position.
movement of the camera relative to the head platform. If there
is movement see “Adjust Camera Plate” page 21” for plate
6. Install the remainder of the payload (lens, zoom and focus
C
B
A
D
E
F
G
If you are installing the head on a crane, pedestal, or dolly, you must
lock them before installing the camera.
To Mount the Camera:
1. Level the head and engage the tilt lock.
2. Remove the camera mounting plate from the platform. Push the
release (A) button at the front of the platform towards the front of
the head, rotate the lock lever (B) clockwise 180° (C) and lift out
the camera plate.