IPX7A-ION Motherboard Reference Guide 11
TIP: Support the SO-DIMM lightly with your ngers when pressing the re-
taining clips. The SO-DIMM might get damaged when it ips out with extra
force.
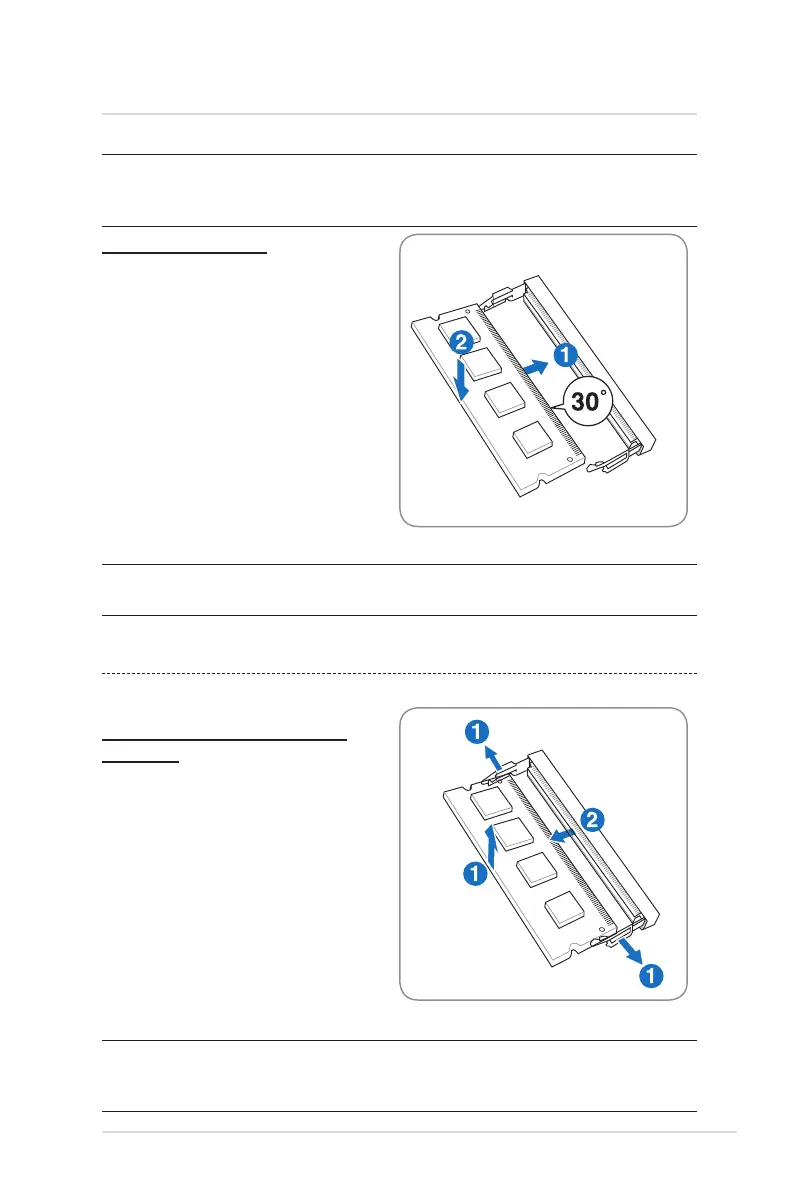
Installing a SO-DIMM
WARNING: Unplug the power supply before adding or removing SO-DIMMs
or other system components. Failure to do so can cause severe damage to
both the motherboard and the components.
To install a SO-DIMM:
1. Firmly insert a SO-DIMM into the
socket at a 30˚ angle with the notch
on the SO-DIMM matching the
break on the socket.
2. Push down on the SO-DIMM until
the retaining clips click into place.
1. Simultaneously press the retaining
clips outward to unlock the SO-
DIMM. The SO-DIMM will automati-
cally pop up.
2. Remove the SO-DIMM from the
socket.
NOTE: A SO-DIMM is keyed with a notch so that it ts in only one direction.
Do not force a SO-DIMM into a socket to avoid damaging the SO-DIMM.
4 System memory
Removing a SO-DIMM
Follow these steps to remove a
SO-DIMM:
(This is only an example.)
(This is only an example.)