Centers – Installing and Removing
Headstock
1. T
o install a spur center in the headstock t
he
c
enter should first be mounted to your
workpiece and both should be inserted into
the headstock at the same time. Make sur
e
both the spur center shaft and the headstock
spindle mating surfaces are clean and free of
debris.
W
arning: Do not drive the workpiece into the
spur center while it is in the headstock or
bearing failure will occur.
2. T
o remove the spur center, first remove the
workpiece from the lathe, insert the knockout
rod through the hole in the outboard spindle
then firmly tap the end of the spur center
shaft. See Figure 18a.
N
ote: Make sure to hold onto the spur center
while knocking it out so as to prevent it from
falling on the floor and damaging it.
F
igure 18a
Tailstock
T
o remove the live center from the tailstock
simply turn the handwheel in order to retract the
tailstock spindle into the body as shown by the
arrow in Figure 18b.
F
igure 18b
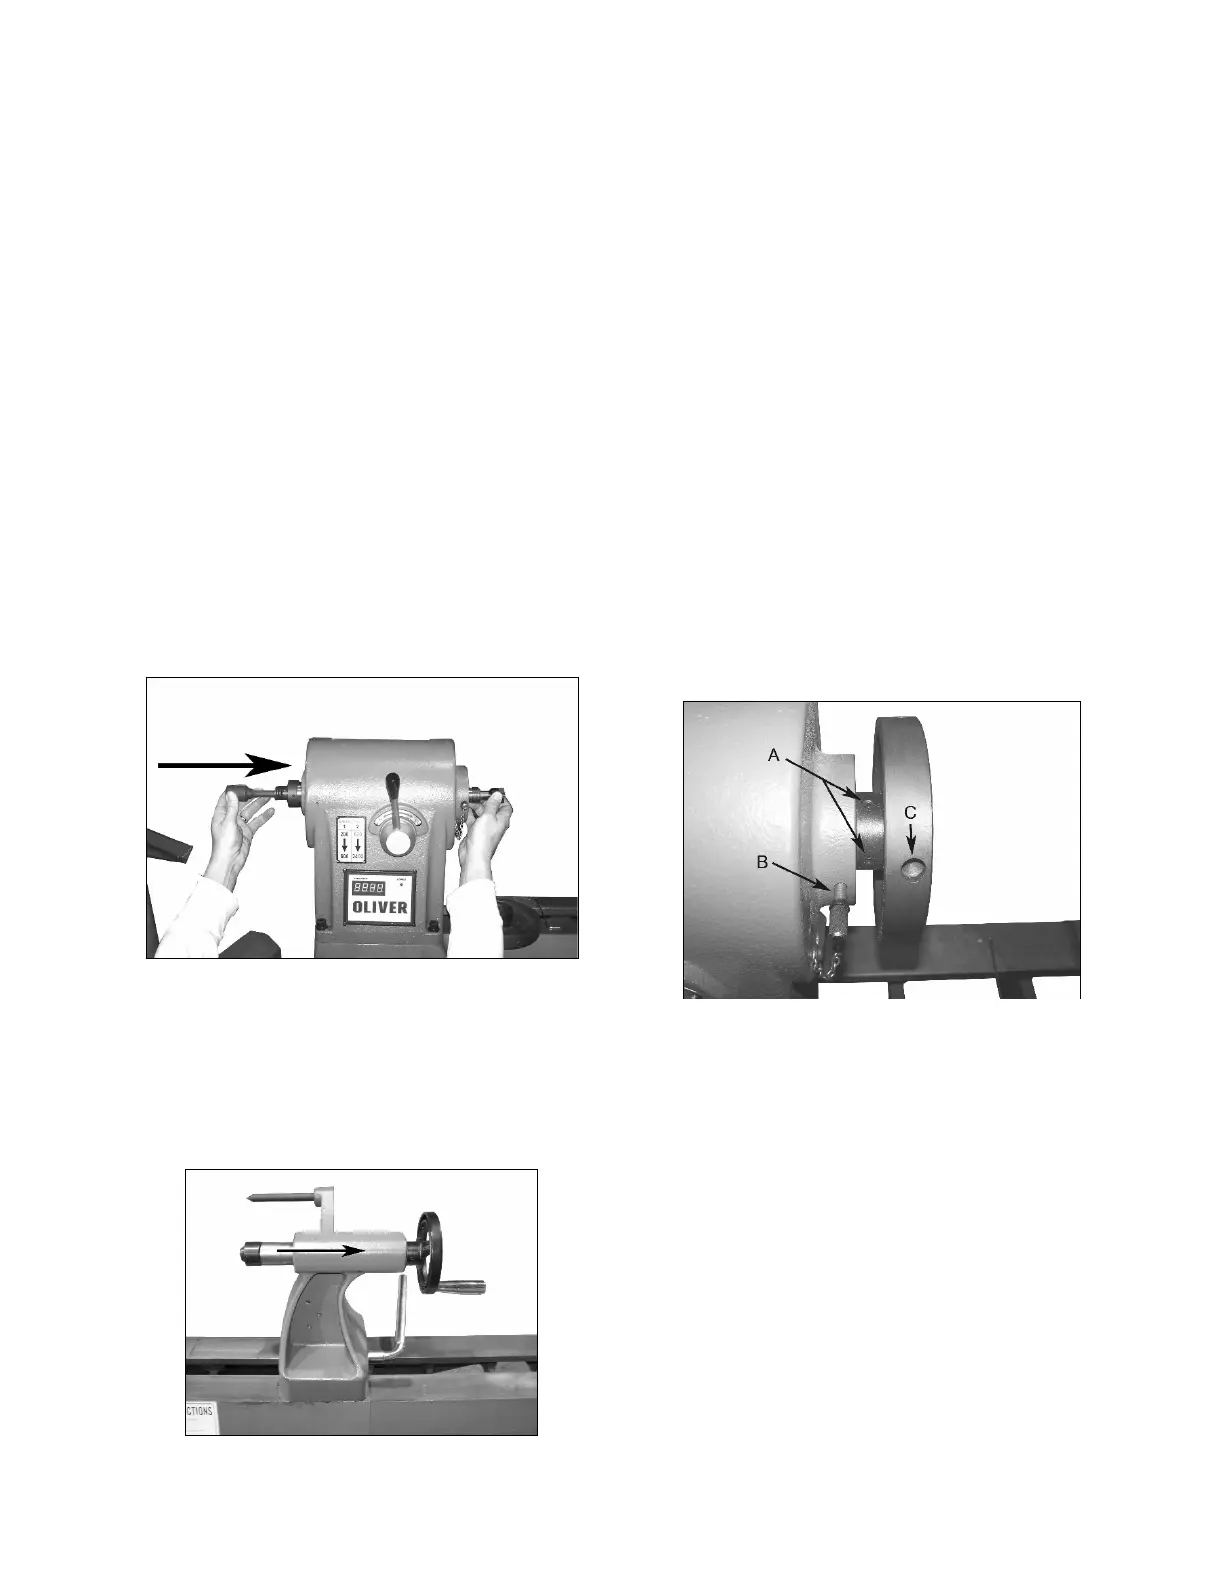
Face Plates – Removal and Installation
Inboard
1. T
o remove the face plate first loosen the
two set screws ‘A’ of Figure 19. Insert the
indexing pin ‘B’ into one of the three
holes and screw it in until it fully engages
one of the indexing holes in the spindle.
You may have to turn the face plate by
hand until you can feel the pin engage
the hole. The spindle should now be
locked. The face plate can now be
unscrewed counterclockwise off the
spindle. If more leverage is needed
insert the knock out rod into hole ‘C’.
2. Use the reverse procedure to install the
face plate back onto the spindle.
N
ote: Do not use the knock out rod to
tighten the face plate or thread damage
can occur. Hand tighten only.
F
igure 19