EasyManua.ls Logo

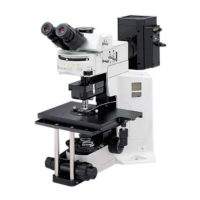
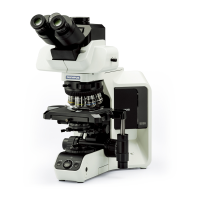
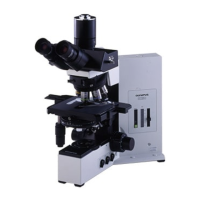
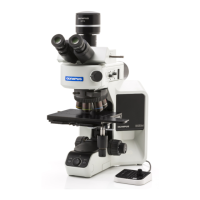
Olympus BX51M - User Manual

Olympus BX51M
36 pages
Print Icon
To Next Page IconTo Next Page
Loading...
INSTRUCTIONS
BX51M
SYSTEM METALLURGICAL
A X 7 6 0 9
This instruction manual is for the Olympus System Metallurgical Microscope Model BX51M. To
ensure the safety, obtain optimum performance and to familiarize yourself fully with the use of this
microscope, we recommend that you study this manual thoroughly before operating the micro-
scope. Retain this instruction manual in an easily accessible place near the work desk for future
reference.
This publication is printed on 100% recycled paper
MICROSCOPE

Questions and Answers

  • L
    leslie74Sep 8, 2025
    Why can't I vary the brightness on my Olympus BX51M?
    • L
      Lisa GutierrezSep 8, 2025
      If the brightness cannot be varied with the brightness control on your Olympus Microscope, the light preset switch may be set to ON. Set it to OFF.
  • T
    Tony VelazquezSep 10, 2025
    What to do if my Olympus BX51M coarse movement cannot reach the upper limit?
    • B
      Barbara PerezSep 10, 2025
      If the coarse movement on your Olympus Microscope cannot reach the upper limit, it may be because the pre-focusing lever is locked at the low position. Release the pre-focusing lever.
  • A
    Andrea PorterSep 12, 2025
    What causes dirt or dust in the Olympus BX51M field of view?
    • I
      iandersonSep 12, 2025
      If you see dirt or dust in the field of view of your Olympus Microscope, it could be due to dirt/dust on the specimen. Clean the specimen thoroughly.
  • M
    Matthew WarrenSep 15, 2025
    Why won't the voltage indication vary on my Olympus BX51M?
    • J
      Jessica VaughnSep 15, 2025
      If all voltage indicator LEDs light and the voltage indication cannot be varied with the brightness control on your Olympus Microscope, it could be due to these reasons: * The lamp bulb is not installed. Attach the lamp bulb. * The lamp bulb is burnt out. Replace the lamp bulb. * The lamp housing output connector is unplugged. Plug in the lamp housing output connector.
  • E
    Erin RosarioSep 18, 2025
    Why can't I increase the lamp intensity voltage on my Olympus Microscope?
    • B
      brayjuanSep 18, 2025
      If the lamp intensity voltage cannot be increased with the brightness control on your Olympus Microscope, the lamp bulb may be burned out. Replace the lamp bulb.

Summary

Microscope Safety and Handling

Important Usage Guidelines

Crucial information for the safe and effective use of the microscope.

Safety Precautions and Symbols

Explains safety symbols, warnings, and general cautions for handling.

Microscope Nomenclature

Component Identification

Identifies and labels the various parts of the BX51M microscope.

Reflected Light Observation Procedure

Brightfield;Darkfield Setup

Step-by-step guide for setting up brightfield or darkfield observation.

Using the Microscope Controls

Base and Light Controls

Instructions for using the voltage indicator and light intensity preset switch.

Focusing Block Operations

Guides on adjusting focus, replacing knobs, and managing tension.

Illuminator and Diaphragm Adjustments

Procedures for selecting light paths and centering diaphragms.

Stage Controls and Adjustments

Procedures for placing specimens, adjusting stage movement, and rotation.

Observation Tube Adjustments

Steps for adjusting interpupillary distance, diopter, and using special tubes.

Observation Methods

Brightfield;Darkfield Observation

Reference to the procedure for basic reflected light observation.

Nomarski DIC Observation

Setup and method for Nomarski Differential Interference Contrast.

Simplified Polarized Light Observation

Procedure for simplified polarized light observation.

Troubleshooting Guide

Optical System Troubleshooting

Common problems and solutions related to the microscope's optical components.

Electrical and Adjustment Troubleshooting

Troubleshooting for electrical issues and adjustment knob problems.

Specifications

System Specifications

Technical data on electrical systems, stage, and operating environment.

Optical Characteristics

Detailed optical characteristics of UIS2 series objectives and combinations.

Assembly Procedures

Assembly Diagram

Visual guide showing the sequence of assembling microscope modules.

Attaching Components

Step-by-step instructions for installing the halogen bulb, eyepieces, and power cord.

Power Supply Cord Selection

Certified Cord Information

Guidelines for selecting approved power supply cords based on agency certifications.

Olympus BX51M Specifications

General IconGeneral
Optical SystemInfinity-corrected optical system
Objective LensesPlan Apo
MagnificationDepends on objective and eyepiece combination
Eyepieces10x, 15x
Eyepiece TubeBinocular/Trinocular
StageMechanical stage
IlluminationHalogen lamp, LED
Observation MethodBrightfield, Darkfield, Phase Contrast, Fluorescence
FocusingCoarse and fine focusing
NosepieceRevolving nosepiece
CondenserAbbe condenser
Power SupplyAC power supply
Camera CompatibilityCompatible with various digital cameras

Related product manuals