136
Chapter 6 Care, Storage and Disposal
VIDEO SYSTEM OTV-SI
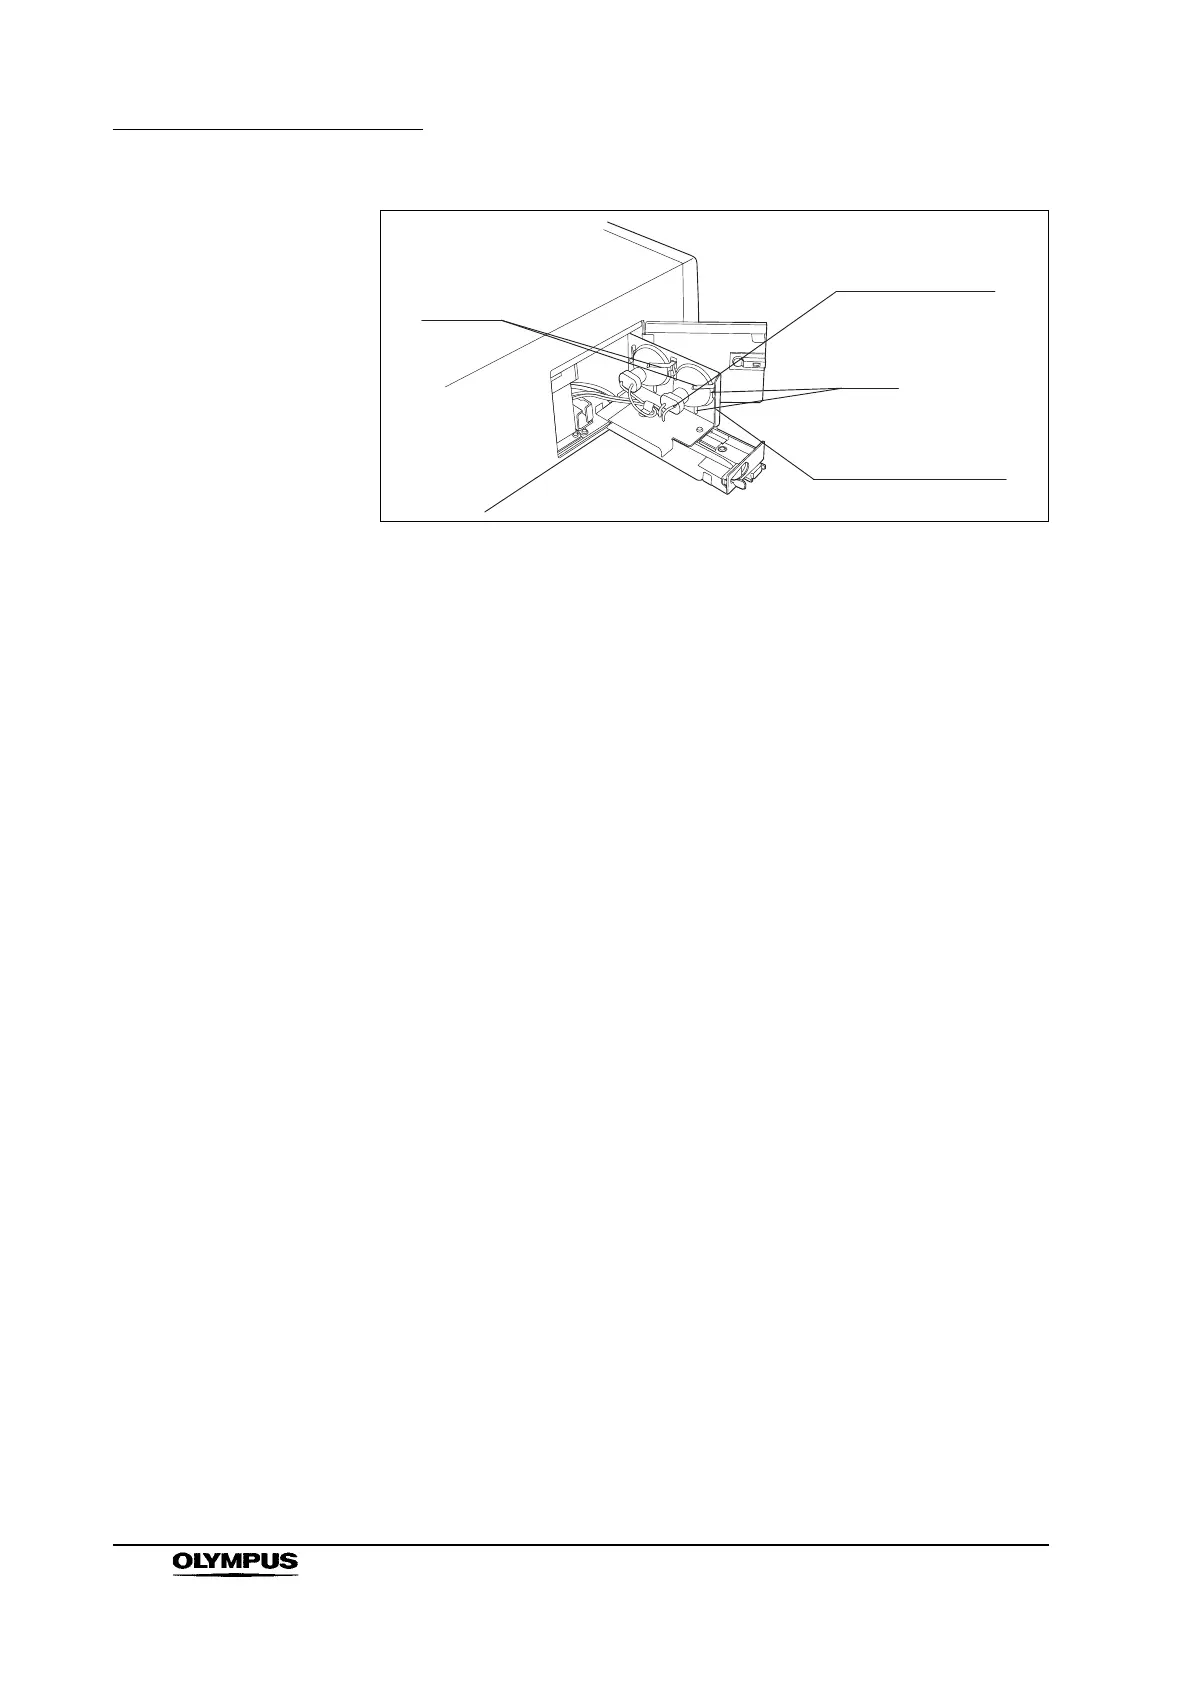
Figure 6.3
4. Remove the connector from the lamp that is to be replaced (see Figure 6.3).
5. Lift the lamp out of the lamp mounting plate.
Lamp installation
1. Hold the new lamp so that it faces the inside of the lamp mounting plate with
its projection (see Figure 6.4) at the bottom.
2. Slide the lamp down into the lamp mounting plate, confirming that it is
touching both clamps and all three tabs on the lamp mounting plate (see
Figure 6.3).
3. Confirm that the lamp’s projection fits securely in the lowest tab on the lamp
mounting plate. Then, attach the lamp connector securely.
4. Push in the lamp mounting plate until it stops, and lock its latch. Confirm that
the lamp mounting plate fits securely.
5. Close the lamp access cover and lock the latch.
Clamps
Lamp connector
Tabs
Lamp mounting plate