7
SUMMARY OF REFLECTED FLUORESCENCE OBSER-
VAT ION PROC E D URE
}If you view excitation light during observation, the light may be slightly glaring except when it is seen
through the excitation light protective shield. However, as the lamp housing incorporates a UV cut filter,
the excitation light is not hazardous even if it enters your eye. However, it is still recommended to view
the excitation light through the excitation light protective shield whenever possible.
When U-excitation is used, always be sure to view it through the excitation light protective shield.
}When it is required to interrupt observation for a short period, use the shutter (in 4 Filter slider).
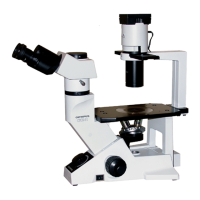
}When searching for the observation target position on the specimen, it is recommended to set the
CKX41 for transmitted brightfield observation (possible by stopping down the aperture iris diaphragm) or
transmitted phase contrast observation to facilitate it. After locating the observation target position, turn
off the transmitted light illumination.
(Controls Used) (Page)
Preparation
· Mount the objective suitable for the microscopy to be used.
· Centering the mercury burner.
(P. 11,12)
(P. 14,15)
Set the main switch to “ ” (ON) and wait until
the arc stabilizes (5 to 10 min.).
1 Main switch (P. 13)
Place the specimen on the stage.
Engage the fluorescent mirror matching the
specimen in the light path.
2 Fluorescent mirror switching lever (P. 5,10)
Engage the objective in the light path, open the
shutter and bring the specimen into focus.
3 Revolving nosepiece
4 Filter slider (Shutter)
5 Coarse/fine adjustment knobs
(P. 17)
Engage the ND filter in
light path as required.
4 Filter slider (ND filter) (P. 17)
Adjust the brightness so that the entire field of
view is uniformly bright.
6 Collector focusing knob (P. 15)
Adjust the aperture
stop.
7 Field iris diaphragm lever (P. 16)
Start observation.