EasyManua.ls Logo

Olympus U-RFLT50 - User Manual

Olympus U-RFLT50
36 pages
Print Icon
To Next Page IconTo Next Page
Loading...
INSTRUCTIONS
REFLECTED
FLUORESCENCE
SYSTEM
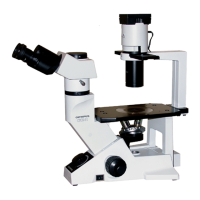
FOR CKX41
A X 7 3 8 9
This instruction manual is for the Olympus Reflected Fluorescence System for
use with the CKX41 culture microscope. To ensure the safety, obtain optimum
performance and to familiarize yourself fully with the use of this system, we
recommend that you study this manual thoroughly before operating the system.
Retain this instruction manual in an easily accessible place near the work desk
for future reference.
Modules described in this manual
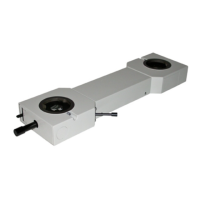
CKX-RFA
U-LH50HG
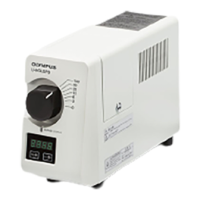
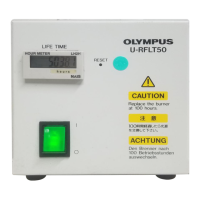
U-RFLT50
CKX-NU
This publication is printed on 100% recycled paper

Questions and Answers

  • M
    macdonaldpaulaAug 17, 2025
    Why is the burner flickering or dark on my Olympus U-RFLT50?
    • H
      Hunter DavisAug 17, 2025
      If the burner flickers or appears dark on your Olympus Laboratory Equipment, several factors could be the cause. First, the auto ignition interlock mechanism might be activated; in this case, press the switch inside the starter reset hole on the right side of the power supply unit, and then press the main switch to “ I ” (ON) again. If insufficient time has elapsed since turning on the burner, wait at least 10 minutes. Also, check that the voltage selector switch and/or frequency selector switch are correctly set to match your local AC mains. If the burner life has expired (typically after 100 hours), replace the mercury burner. Finally, ensure the input voltage selector switch is correctly set to match your local AC mains.
  • R
    robertharrisonAug 20, 2025
    How to fix the main switch indicator not lighting up on Olympus U-RFLT50?
    • J
      Justin DavisAug 20, 2025
      If the main switch indicator on your Olympus Laboratory Equipment does not light up, it could be due to a couple of reasons. First, check the power cord to ensure it is correctly connected. If the connection is proper, the fuses might be blown, in which case you should replace them.
  • J
    Jeffrey TuckerAug 22, 2025
    What to do if the main switch indicator lights, but the mercury burner does not ignite on Olympus U-RFLT50?
    • C
      Casey MillerAug 22, 2025
      If the main switch indicator lights up but the mercury burner fails to ignite on your Olympus Laboratory Equipment, consider these possible causes: Begin by checking all connectors to ensure they are properly connected. Confirm that the burner is correctly installed. Inspect the lamp housing interlock mechanism and tighten the burner socket clamping screw if it's activated. If these steps don't resolve the issue, the auto ignition may be malfunctioning; try turning the main switch on the power supply unit OFF and then ON again, repeating as necessary.
  • J
    John HayesAug 26, 2025
    Why is the burner life so short on my Olympus U-RFLT50 Laboratory Equipment?
    • L
      Lucas KellerAug 26, 2025
      If the burner life is exceptionally short on your Olympus Laboratory Equipment, the input voltage selector switch might be set incorrectly. Ensure it conforms to your local AC mains.
  • J
    Johnny SpenceAug 28, 2025
    What to do if the main switch is on but the burner doesn't ignite on my Olympus Laboratory Equipment?
    • M
      Melissa PowellAug 28, 2025
      If the main switch of your Olympus Laboratory Equipment can be set to ON, but the burner does not ignite, there are several possible reasons. First, ensure the lamp housing connecting cord is properly connected. Second, check if the mercury burner is mounted. If not, attach one. Third, the safety mechanism in the lamp housing might be activated; tighten the lamp burner socket clamping screw firmly. Lastly, the auto ignition system could be malfunctioning. Try setting the main switch of the power supply unit to OFF and then ON again.
  • A
    Anthony OsbornAug 31, 2025
    Why does the mercury burner flicker or have low brightness on my Olympus Laboratory Equipment?
    • K
      Kyle Montoya MDAug 31, 2025
      If you're experiencing a flickering mercury burner or low brightness with your Olympus Laboratory Equipment, it could be due to several reasons. One possibility is that the auto ignition safety mechanism is activated. To resolve this, press the switch inside the starter reset hole on the right panel of the power supply unit, and then set the main switch to ON again. Another reason might be that you are observing this phenomenon shortly after ignition, in this case wait for 10 minutes or more after ignition. Ensure that the power supply voltage and frequency switches are set correctly. Finally, the burner life might have expired, requiring you to replace the mercury burner.
  • T
    Tiffany WeeksSep 2, 2025
    Why is the edge of the field of view obscured on my Olympus Laboratory Equipment?
    • D
      Deborah JohnsonSep 2, 2025
      If the edge of the field of view is obscured or unevenly illuminated on your Olympus Laboratory Equipment, consider the following: * Ensure the objective is properly engaged in the light path by making sure the revolving nosepiece clicks into place. * Verify the fluorescent mirror is correctly engaged in the light path. * Check that the filter slider is fully in the open position and not stopped halfway. * Confirm the ND filter is also fully engaged and not stopped halfway. * Adjust the centering of the mercury burner. * Adjust the collector focus position to an optimum setting.
  • H
    Holly ChapmanSep 5, 2025
    What to do if the main switch cannot supply power to my Olympus Laboratory Equipment?
    • M
      mark81Sep 5, 2025
      If the main switch of your Olympus Laboratory Equipment cannot supply power to the system, it could be due to a couple of reasons. First, ensure that the power cord is properly connected. Second, check if a fuse is blown and replace it if necessary.
  • B
    Brenda DavisSep 8, 2025
    Why is the visibility poor and the image not sharp on my Olympus Laboratory Equipment?
    • B
      Brenda MontesSep 8, 2025
      If you are experiencing poor visibility, a non-sharp image, or poor contrast with your Olympus Laboratory Equipment, there are a few potential causes. First, if you're using a 40X objective, it may be inaccurate, or the correction collar may not be properly adjusted; use the objective with correction collar and adjust it to find the best position. Second, the objective or filter might be dirty, so clean them thoroughly. Third, the field iris diaphragm may be adjusted improperly; adjust it so that it circumscribes the field of view.
  • P
    Pamela RodriguezSep 12, 2025
    Why are the service lives of mercury burners very short in my Olympus Laboratory Equipment?
    • I
      ian71Sep 12, 2025
      If the service lives of mercury burners are very short in your Olympus Laboratory Equipment, it might be because the power supply voltage is set improperly. Ensure that the power supply voltage is set correctly.

Summary

Safety and Precautions for Reflected Fluorescence System

Essential Safety Guidelines

Essential safety guidelines for operating the fluorescence system and handling its components.

Initial System Setup and Safety

Understanding Safety Symbols and Warnings

Explanation of system symbols and warning indicators for safe operation.

Getting Ready for Operation

Initial steps and precautions before using the system.

System Maintenance and Cautions

Maintenance and Storage Procedures

Procedures for cleaning, maintenance, and proper storage of the system components.

General Usage Cautions and Hazards

Important warnings regarding system usage and potential hazards.

System Component Identification

Nomenclature: System Component Labels

Identification and labeling of major components of the reflected fluorescence system.

Controls of Each Module

Fluorescence Illuminator and Lamp Housing Controls

Detailed description of controls for the fluorescence illuminator and lamp housing.

Power Supply Unit Specifications

U-RFLT50 Power Supply Unit Overview

Overview of the power supply unit features and controls.

Reflected Fluorescence Observation Procedure

Observation Procedure Summary

Step-by-step guide for performing reflected fluorescence observation.

Using System Controls and Precautions

General Precautions for Observation

Key precautions to ensure proper observation and system longevity.

Reflected Light Fluorescent Mirror Selection

Selecting Fluorescent Mirrors for Excitation

Guidance on choosing and using fluorescent mirrors for different excitations.

Applicable Fluorescence Objectives

Fluorescence Objectives List

List of compatible objectives for fluorescence and phase contrast microscopy.

Mercury Burner Ignition and Startup

Turning On the Mercury Burner

Procedure for igniting the mercury burner and initial stabilization.

Mercury Burner Centering

Centering the Mercury Burner Arc

Step-by-step guide to correctly center the mercury burner arc.

Field Iris Diaphragm Adjustment

Centering the Field Iris Diaphragm

Procedure for centering and adjusting the field iris diaphragm for optimal contrast.

Filter Slider Operations

Switching the Filter Slider

Instructions on how to use the filter slider for ND filters and shutter.

Troubleshooting Guide

Optical System Troubleshooting

Common problems and solutions related to the optical path of the system.

System Specifications

Specifications and Operating Environment

Technical details and specifications for system modules and operating environment.

System Assembly Procedures

Assembly Diagram

Visual guide illustrating the step-by-step assembly of the system components.

Detailed Assembly Procedures

Removing Dummy and Dust Covers

Steps to remove dummy cover, dust covers, and fluorescent mirror slider.

Removing Fluorescent Mirror Slider

Procedure to detach the fluorescent mirror slider from the illuminator.

Attaching System Components

Attaching Fluorescence Illuminator

Step 3: Attaching the CKX-RFA reflected fluorescence illuminator.

Attaching Fluorescent Mirror Slider

Step 4: Attaching the fluorescent mirror slider.

Attaching Dust Covers

Step 5: Attaching the dust covers to the system.

Final Assembly Steps

Attaching Light Shield and Lamp Housing

Steps 6 & 7: Attaching the excitation light shield and U-LH50HG lamp housing.

High-Pressure Mercury Burner Installation

Attaching the Mercury Burner

Procedure for securely installing the mercury burner into the lamp housing.

Optional U-Excitation Filter Set

CKX-NU Filter Set Components

Information about the optional U-excitation filter set and its components.

Power Supply Cord Connection

Proper Selection of Power Supply Cord

Guidelines for selecting and using the correct power supply cord.

Fuse Replacement

Fuse Replacement Procedure

Steps for safely replacing fuses in the power supply unit.

Certified Power Cord Agencies

Table 1: Certified Cord Agencies

List of agencies and their certification marks for power supply cords.

HAR Flexible Cord Marking Standards

Table 2: HAR Flexible Cord Marking

Details on HAR flexible cord harmonization marking methods.

Olympus U-RFLT50 Specifications

General IconGeneral
ModelU-RFLT50
CompatibilityOlympus BX series microscopes
ApplicationFluorescence microscopy
Wattage50 W
Voltage100-240 V

Related product manuals