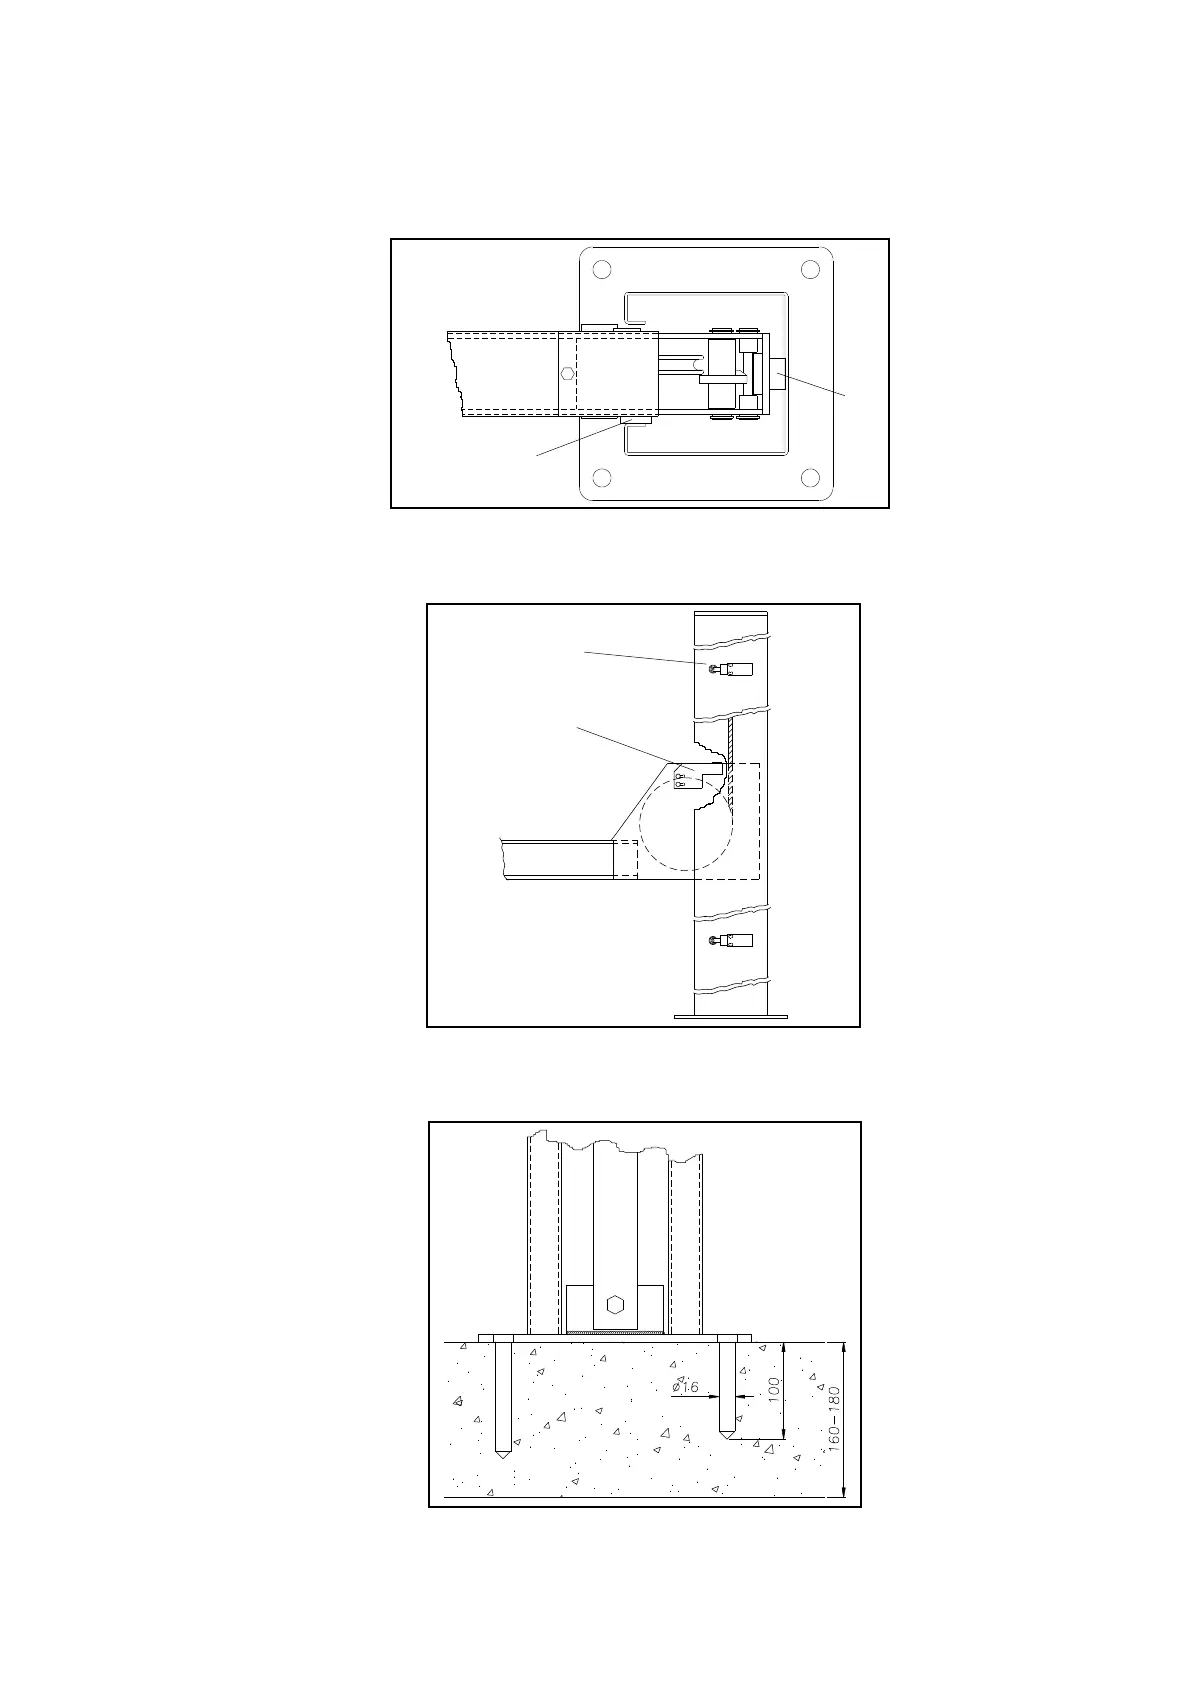
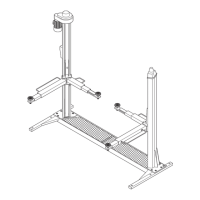
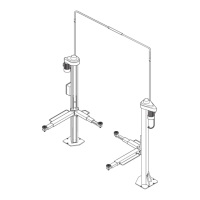
FISSAGGIOALSUOLODELLECOLONNE
Farscenderelapiattaforma(vedereistruzionid’uso)finoacirca30
cm.daterra.
Posizionarelecolonneinmodotalecheipattiniinnylon(posterio-
re37elaterale38)sianoacontattoconlecolonne(Fig.53).
Effettuarelamessaapiombodellecolonnespessorandodovene
-
cessariolepiastredibase.
L’operazionedispessoramentodeveesserelapiùampiapos
-
sibileesempreinprossimitàdeiforidifissaggio.
Premereilpulsantedisalita(SB1
inFig.50)edeffettuareunacorsa
completa;durantetalecorsaé
benecontrollare(senecessario
fermandosiogni20-30cm.)chelo
scorrimentodelletraverseavven
-
garegolarmentesenzaanomali
sfregamenti.
Sedurantequestaoperazionesi
verificanomalfunzionamentiéne
-
cessariorivederelamessaa
piombodellecolonne.
Fig.53 Regolazione pattini
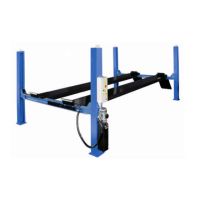
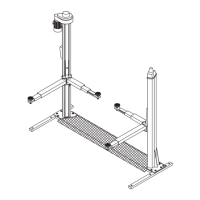
Alterminedellasalitacontrollareilcor
-
rettofunzionamentodelfinecorsasalita
(pos.39,Fig.54)esenecessarioeffet
-
tuarelaregistrazionetramitelacamma
(40)postasullatraversa.
Fig.54
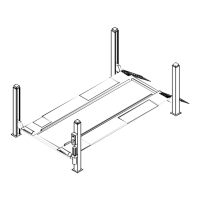
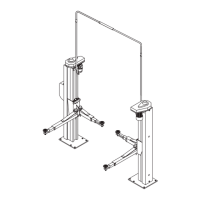
Farescenderelapiattaformaarrestan
-
dosiacirca30cm.dalsuolo,procedere
quindiallaforaturadelpavimentoattra
-
versoiforidellepiastredibasedelle
colonne.
PerilfissaggiousaretasselliØ16mm.,
M10,lunghi65mm.,tipoFISCHER
SLM10oHILTIHBM10.
Serrareleviticonchiavedinamometri
-
catarataa35Nm.
Fig.55 Fissaggio delle colonne
SECURINGTHEPOSTSTOTHEGROUND
Lowertheplatform(seeoperatinginstructions)untilitisabout30
cmfromtheground.
Positionthepostssothatthenylonshoes(rear37andside38)
areincontactwiththeposts(fig.53.
Plumbthepoststoensurethattheyareperfectlyperpendicularto
thefloor,insertingshimswherenecessaryunderthebaseplates.
Useshimsthatareaslargeaspossibleandalwaysinstall
themclosetotheanchorholes.
PressLIFTbutton(SB1infig.50)
andcompletetheliftcycle;during
thecyclecheckthatthecross-pie
-
cesslidefreelyandwithoutundue
rubbingfriction(youmaywantto
stoptheliftmotionevery20or30
cmtomakethisinspectionea
-
sier).
Ifyounoticeanymalfunctionsdu
-
ringthisoperation,checkthatthe
postsareperfectlyperpendicular.
Fig.53Shoeadjustment
Whentheliftcycleiscompleted,make
surethattheliftinglimitswitch(pos.39,
fig.54)isworkingproperlyandifne
-
cessary,adjustusingthecam(40)on
thecross-piece.
Fig.54
Lowertheplatformuntilitisabout30
cmfromthegroundandthendrillinto
thefloorthroughthefixingholesinthe
baseplates.
UsescrewanchorssizeØ16mm,M
10,length65mm,typeFISCHER
SLM10orHILTIHBM10.
Tightenthescrewswithatorque
wrenchsetto35Nm.
Fig.55Postanchoring
31
36
37
39
40