EasyManuals Logo

Omron 3G3MX2 Series Connection Guide

Omron 3G3MX2 Series
34 pages
To Next Page IconTo Next Page
To Previous Page IconTo Previous Page
Page #18 background imageLoading...
Page #18 background image
7. Connection Procedure
7.3. Setting Up the Controller
Set up the Controller.
7.3.1. Starting the Sysmac Studio and Setting the EtherCAT Network
Configuration
Start the Automation Software Sysmac Studio and set the EtherCAT network configuration.
Install the software and USB driver beforehand.
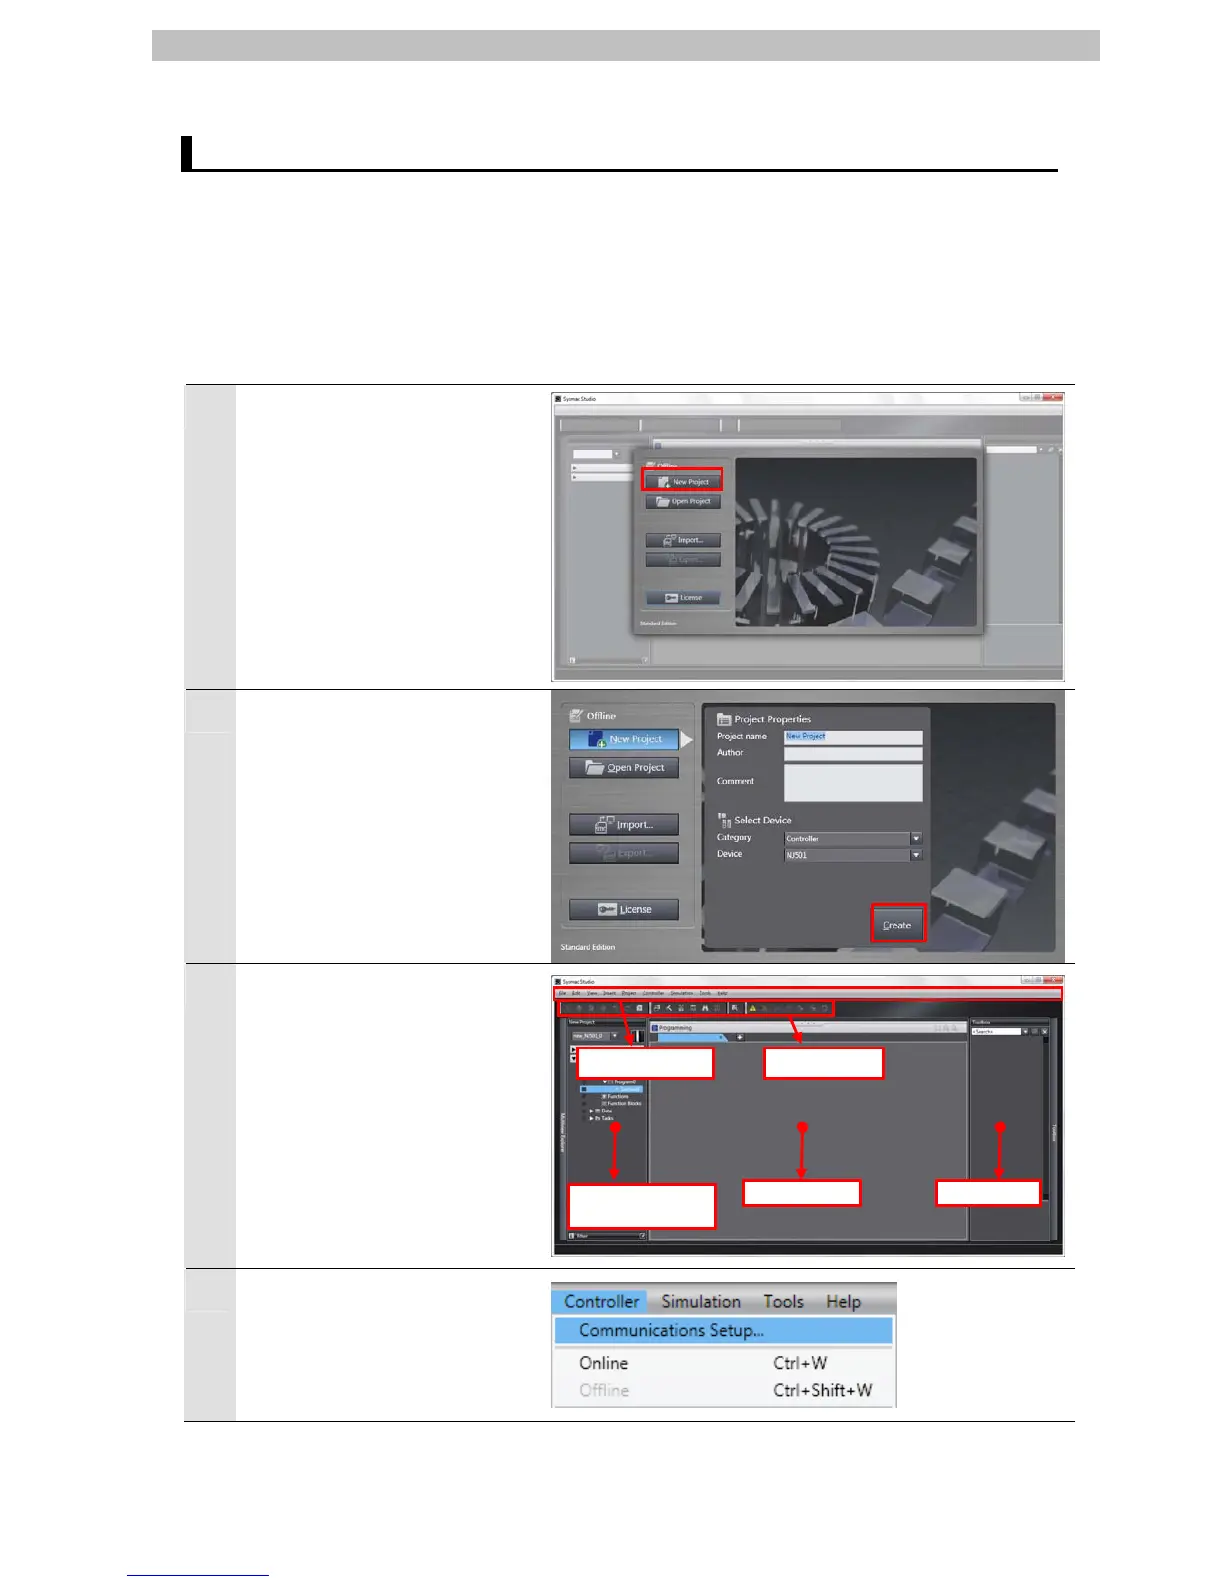
1
Start the Sysmac Studio.
Click the New Project Button.
16
2
The Project Properties Dialog
Box is displayed. Click the
Create Button.
*In this document, New Project
is set as the project name.
3
The New Project Pane is
displayed.
There are Menu Bar and Toolbar
in the upper part of the pane.
The left pane is called Multiview
Explorer, the right pane is called
Toolbox and the middle pane is
called Edit Pane.
Menu Bar Toolbar
Multiview
Explorer
Edit Pane Toolbox
4
Select Communications Setup
from the Controller Menu.

Other manuals for Omron 3G3MX2 Series

Questions and Answers:

Question and Answer IconNeed help?

Do you have a question about the Omron 3G3MX2 Series and is the answer not in the manual?

Omron 3G3MX2 Series Specifications

General IconGeneral
Frequency Range0.1 to 400 Hz
Control MethodV/f Control, Sensorless Vector Control
Overload Capacity150% for 60 seconds
Safety StandardCE, UL, cUL
IP RatingIP20
Output Voltage3-phase 200-240V AC
Output Frequency0.1 to 400 Hz
Protection FunctionsOvercurrent, Overvoltage, Undervoltage, Overheat, Ground fault, Short circuit
Ambient Temperature-10 to 50°C
Operating Temperature-10 to 50°C
Storage Temperature-20 to 65°C
Humidity5% to 95% RH (non-condensing)
AltitudeUp to 1000 m
Braking UnitBuilt-in
CommunicationModbus RTU
Communication InterfaceRS-485
Cooling MethodForced air cooling
Enclosure RatingIP20
Protection FeaturesOvercurrent, Overvoltage, Undervoltage, Overload

Related product manuals