13
SETTING THE DATE AND TIME
Set the monitor to the current date and time before taking a measurement for the
first time or after replacing the batteries.
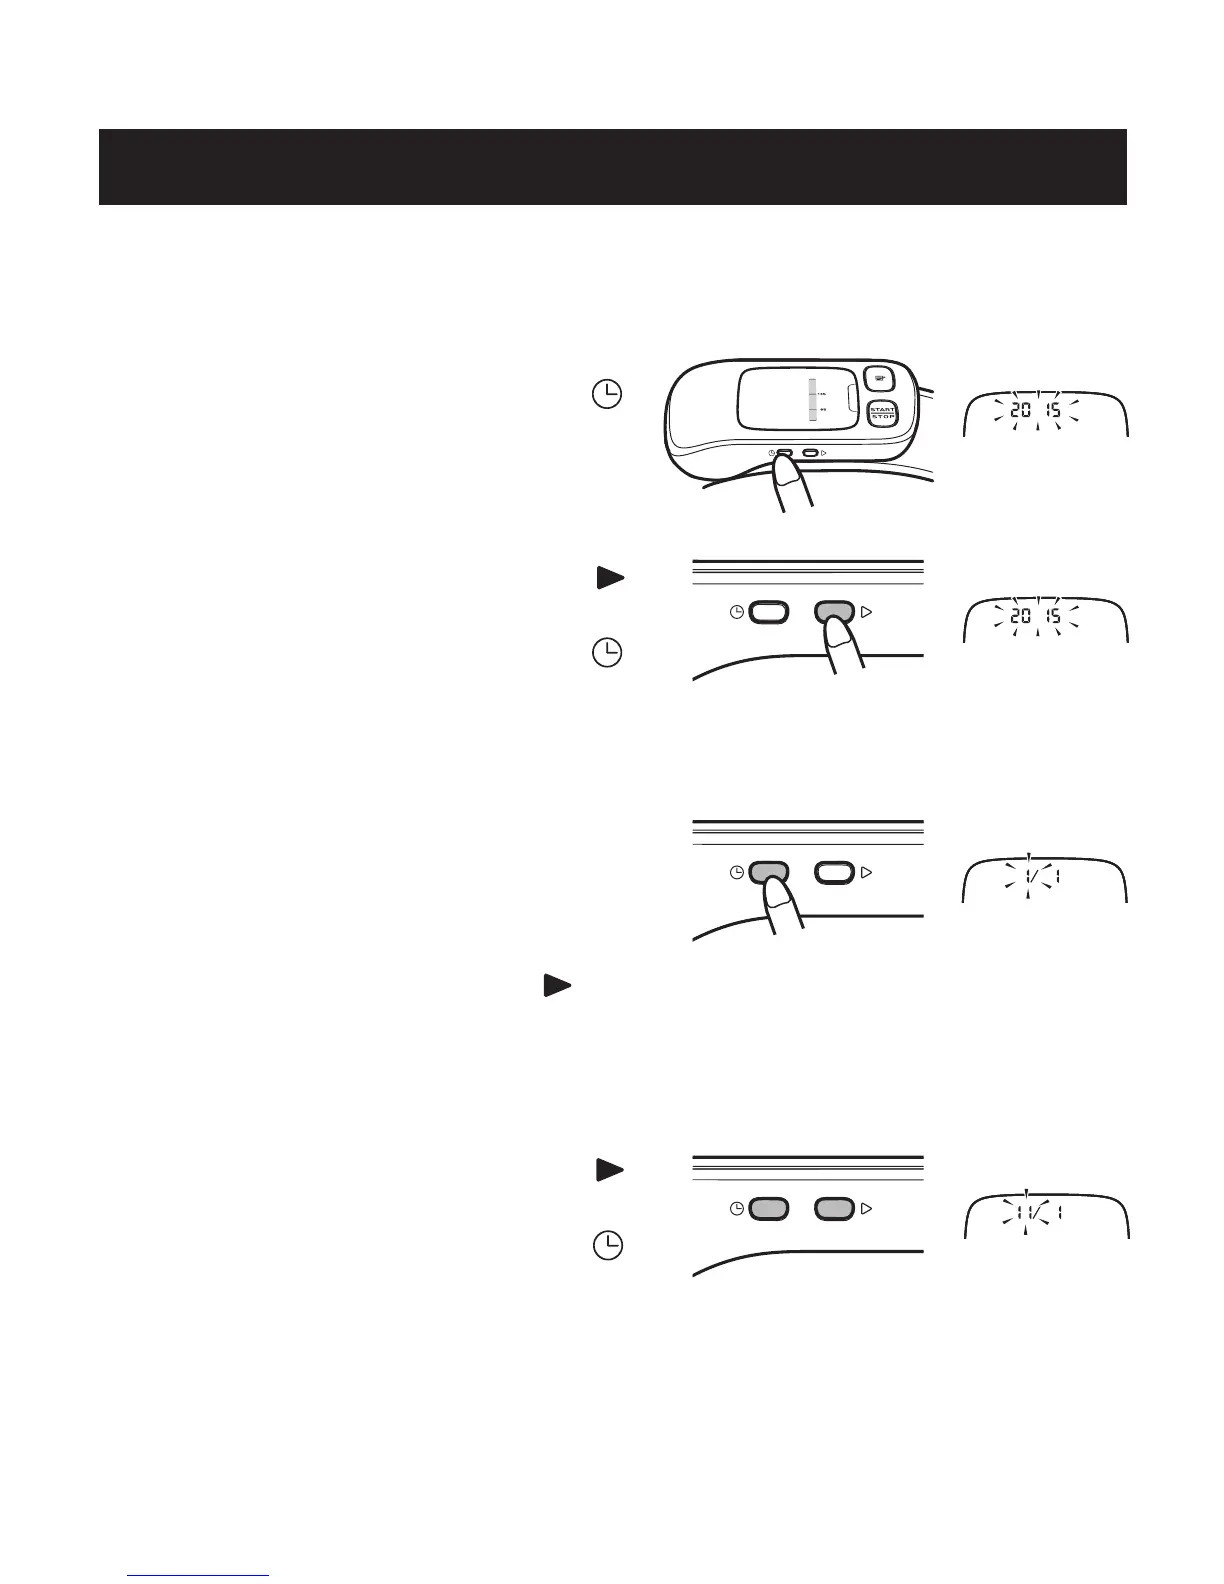
1. TO START THE SETTING
Press the Date/Time Setting button ( )
to adjust the date and time.
The year flashes on the display.
2. SETTING THE YEAR
Press the Date/Time Setting button ( )
to advance by one year.
Press the Date/Time Setting button ( )
to set the current year.
The month flashes on the display.
NOTES: • The year can be set between
2015 and 2040. When the
display reaches 2040, it will
return to 2015.
• Press and hold the ( )
button to increase the date
and time values faster.
3. SETTING THE MONTH
Press the Date/Time Setting button ( )
to advance by one month.
Press the Date/Time Setting button ( )
to set the current month.
The day flashes on the display.
4. SETTING THE DAY
Press the Date/Time Setting button ( )
to advance by one day.
Press the Date/Time Setting button ( )
to set the current day.
The hour flashes on the display.
5. SETTING THE HOUR
The time is set using AM or PM.
Press the Date/Time Setting button ( )
to advance by one hour.
Press the Date/Time Setting button ( )
to set the current hour.
The minute flashes on the display.
6. SETTING THE MINUTE
Press the Date/Time Setting button ( )
to advance by one minute.
Press the Date/Time Setting button ( )
to set the minute setting.
7. TO TURN THE MONITOR OFF
Press the START/STOP button.