E5jK-T
E5jK-T
17
E5CK
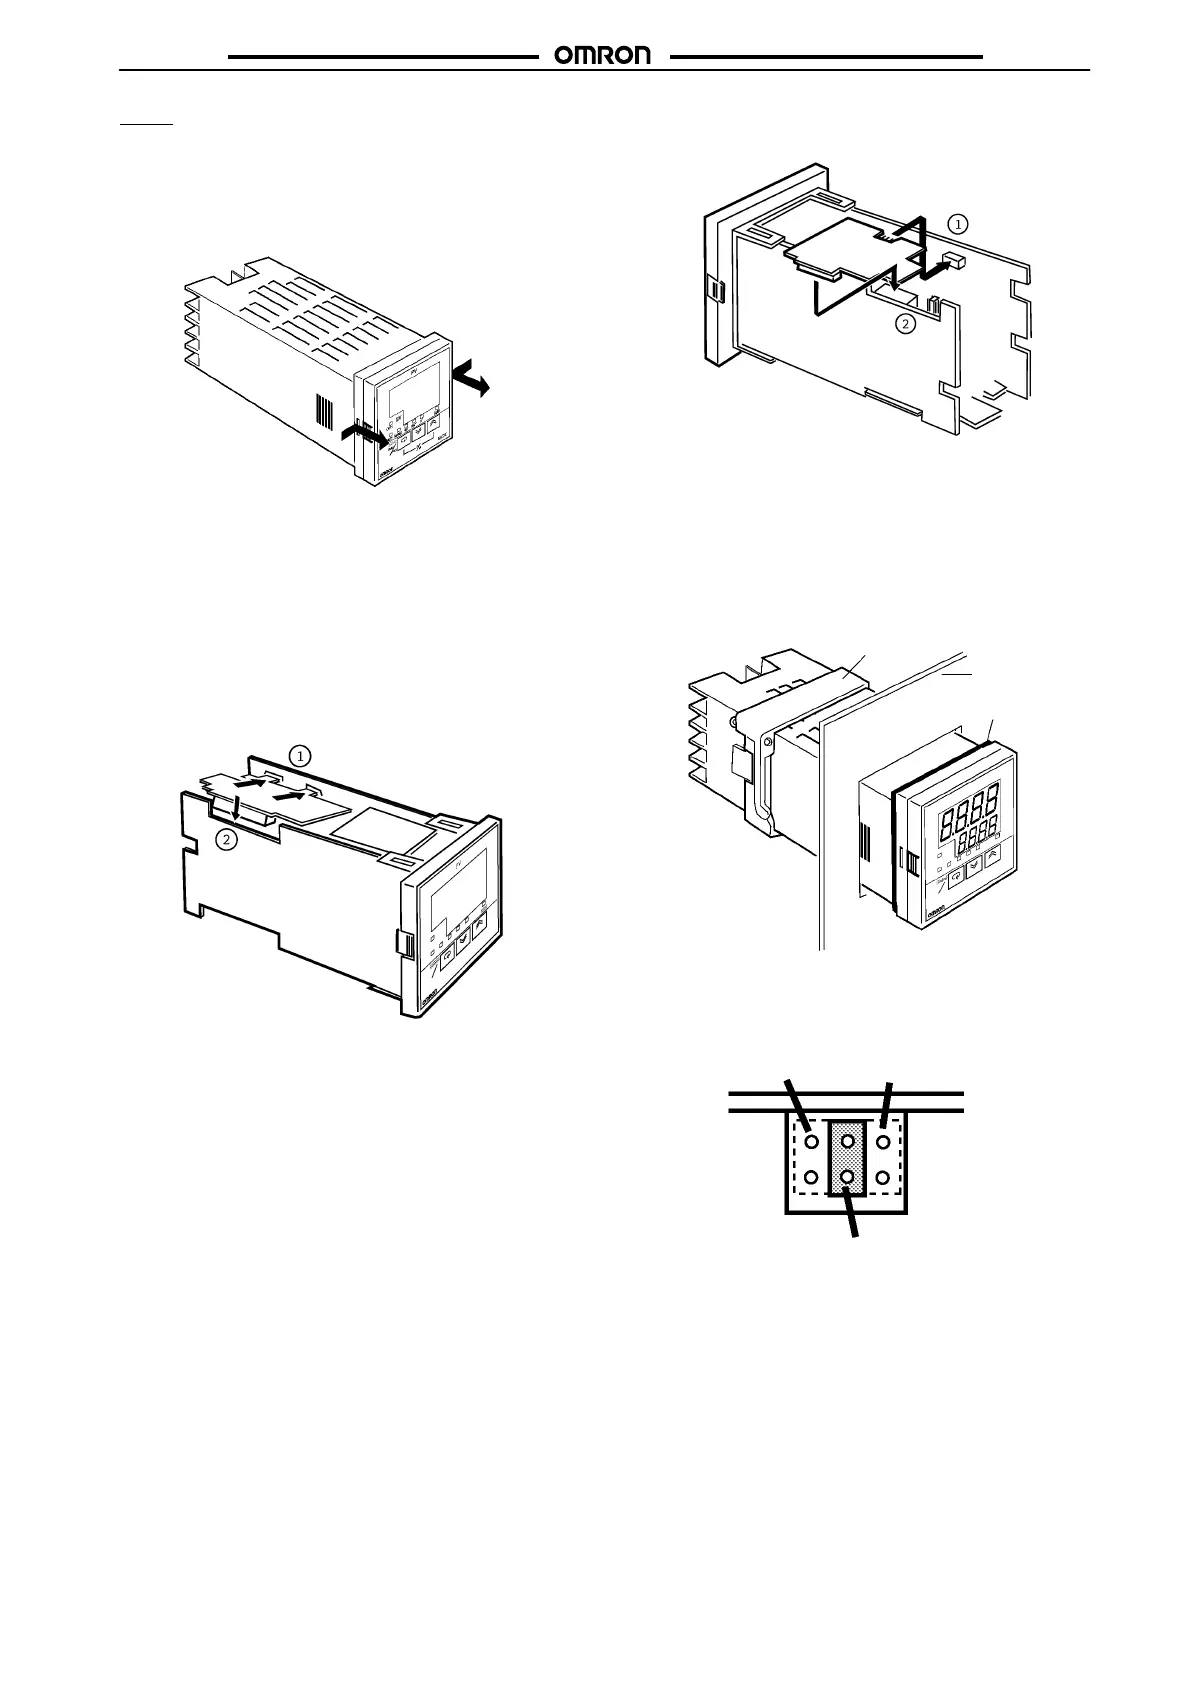
Draw-out
Draw out the internal mechanism from the housing.
1. Press in both of the hooks on the left and right sides of the
front panel to unlock the internal mechanism from the
housing.
2. Draw out the internal mechanism towards you holding both
sides
of the front panel.
Setting Up the Output Unit
• Procedure
1. Two
rectangular holes for slotting are provided
on the power
board
(on right side of Controller). Fit the
two protrusions on
the
Output Unit into these two holes.
2. With
the Output Unit fitted
into the power board, fit the Output
Unit into the connector on the control board (on left side of
Controller).
Setting Up the Option Unit
• Procedure
1. Place
the Controller with its bottom facing up, and fit the
board
horizontally into the connector on the power board (on right
side
of Controller).
2.
With the power board connected, fit the board vertically into
the
connector on the control board (on left side of Controller).
Mounting
1. Insert the E5EK-T Controller into the mounting hole in the
panel.
2. Push
the adapter along the Controller body
from the terminals
up
to the panel, and fasten temporarily
.
3. Tighten
the two fixing screws on the adapter
. When tightening
screws,
tighten the two screws alternately keeping the torque
to
approximately 0.29 to 0.39 N
S
m, or 3 to 4 kgf
S cm.
Adapter
Panel
Waterproof packing
Setting
the Input T
ype Jumper
Set
the jumper to one of temperature input, voltage input or current
input
matched to the type of sensor connected to the input terminal.
I
: Current input
V : V
oltage input
TC/PT : T
emperature input
The
input type jumper is factory-set to “TC/PT (temperature input).”
When
you disconnect or insert the input type
jumper
, do not hold it
directly
by its pins.
When you have finished setting the input type jumper, insert the
internal
mechanism back into the housing.
To
do
this, push in the internal mechanism until you hear the hooks
on
the front panel snap into place.