7. Connection Procedure
7
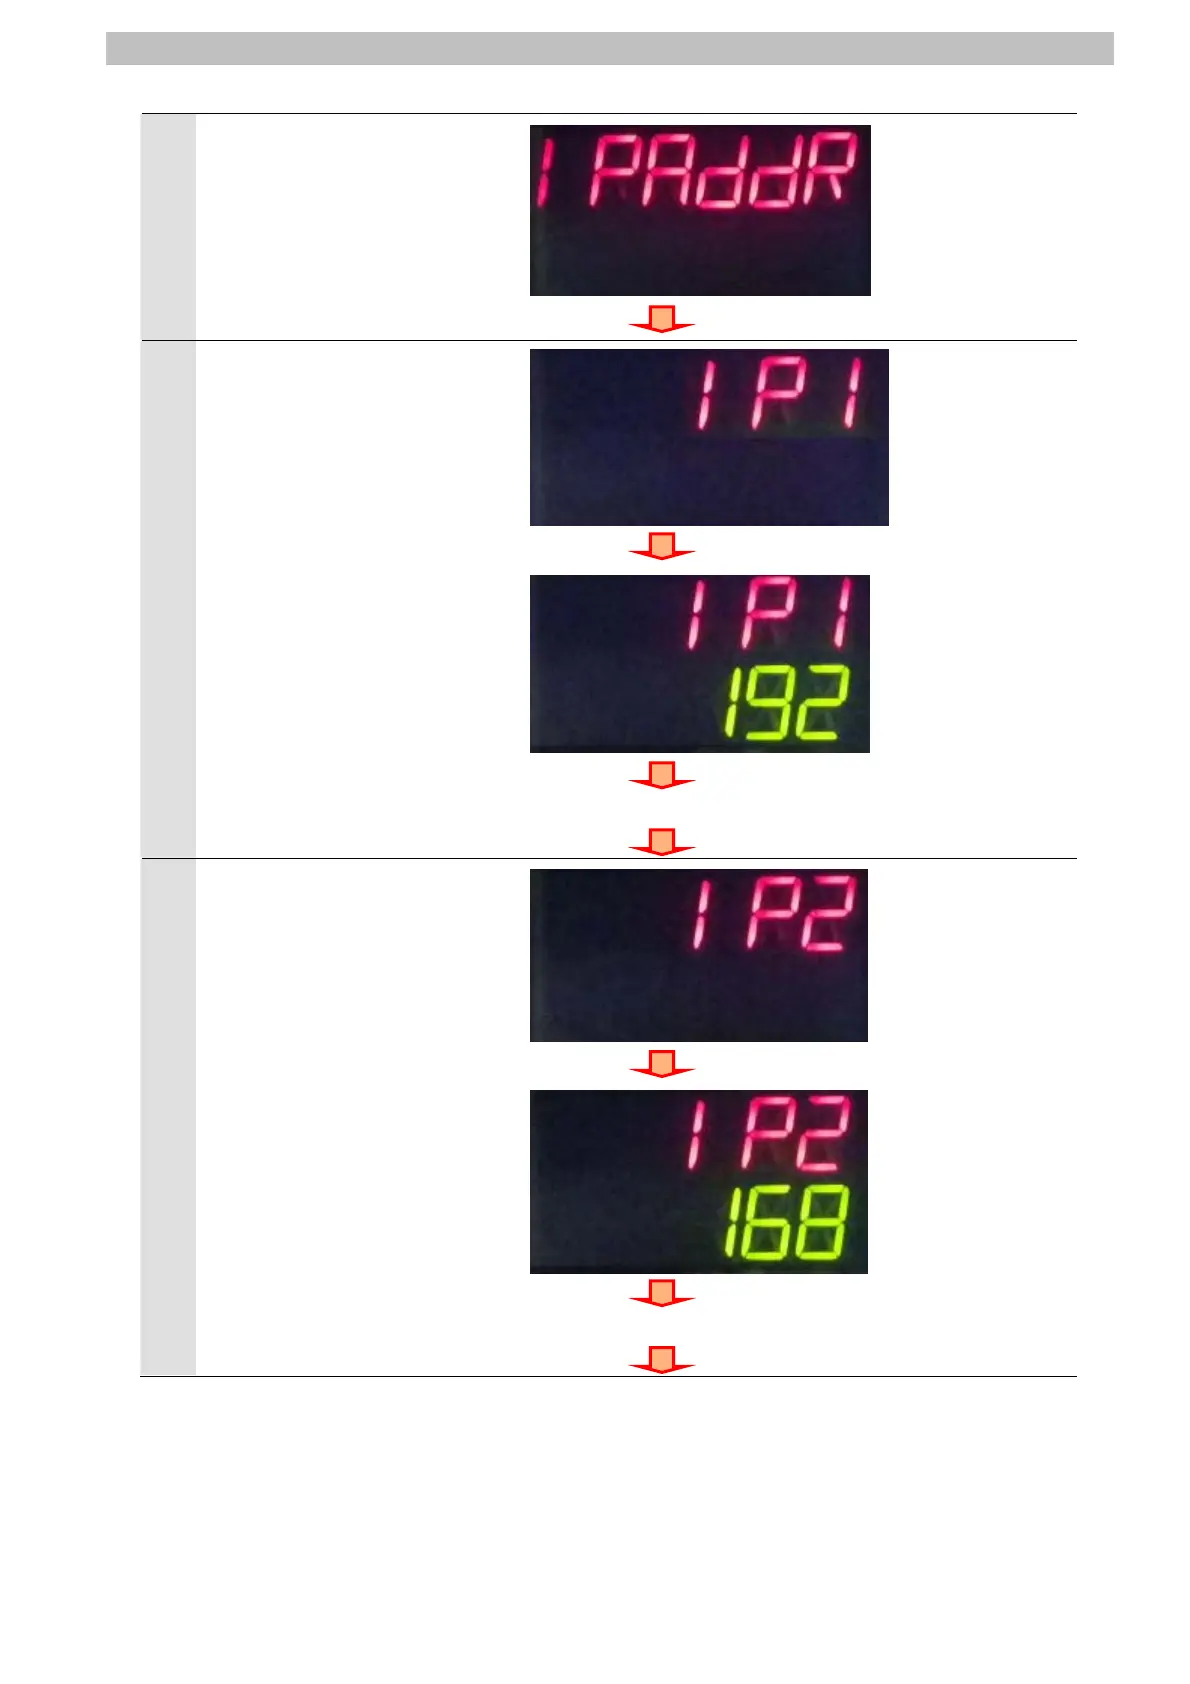
IPADDR is displayed on the
main display.
Press the ZERO/SET Key.
Press the ZERO/SET Key once.
8
IP1 is displayed on the main
display.
Press the ZERO/SET Key.
Confirm that 192 is displayed on
the sub-display.
*If the setting value is different,
change the value by referring to
step 11 and step 12.
*In this step, you set 192 that is
the first octet of IP address
192.168.250.2.
Press the ZERORST/ESC Key
once. The first screen in this
step is displayed again.
Press the → (RIGHT) Key once.
Press the ZERO/SET Key.
Press the ZERORST/ESC Key.
IP1 is displayed.
Press the → (RIGHT) Key once.
9
IP2 is displayed on the main
display.
Press the ZERO/SET Key.
Confirm that 168 is displayed on
the sub-display.
*If the setting value is different,
change the value by referring to
step 11 and step 12.
*In this step, you set 168 that is
the second octet of IP address
192.168.250.2.
Press the ZERORST/ESC Key
once. The first screen in this
step is displayed again.
Press the → (RIGHT) Key once.
Press the ZERO/SET Key once.
Press the ZERORST/ESC Key once.
IP2 is displayed.
Press the → (RIGHT) Key once.
21
 Loading...