13
3.3 Unpacking Your Engraver
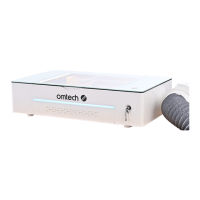
Your new Polar 350 arrives in a wooden crate with its accessories (including this manual) packaged inside the
main bay. You should have placed the crate in a spacious flat area for unpacking, ideally near where you plan
to operate the machine permanently. Use at least two people to move and adjust the engraver’s position to
help keep it level and avoid any sharp or sudden movement.
Step 1 Open the top of the crate. Remove the honeycomb workbed and surrounding foam insulation.
Step 2 Carefully remove the other packaging and foam insulation from the sides and set them aside. With
at least one other person, use the two straps around the engraver to lift it out of the crate and move
it to a sturdy table or countertop.
Step 3 Carefully remove the straps and plastic packaging from around the engraver.
Step 4 Open the cover and confirm that you have received all of the following accessories: Two 4-wheel
rotary axes with an aviator connection cord and backup aviator plug; a duct fan, its wired and remote
controls, an adapter ring, 2 exhaust pipes, and 3 hose clamps; five 3 mm basswood, cardboard, and
acrylic blanks; a main power cord; an Ethernet cable; two USB cords; a USB flash drive with engraving
software; a storage box with cotton swabs, tape, 2 rulers, 2 laser keys, interlock connection, and
sets of hex wrenches, target discs, and O-rings; and this manual.
Step 5 Carefully remove any remaining interior packaging and stays—including the strap around the laser
head—and set them aside. The laser tube is a highly fragile object and should be handled delicately
and as little as possible.
Step 6 Pull out the debris tray. The honeycomb bed has inch and metric rulers on opposite sides. Place the
one you prefer to use facing up and slide it into place. Slide the tray back in underneath it.
Never attempt to place or remove the honeycomb bed through the main cover. Always
remove it along with the debris tray instead.
Step 7 You may keep the packaging in case of future return but, if you dispose of it or any accessories, be
sure to do so in compliance with applicable waste disposal regulations.
3.4 Exhaust System Installation
The provided duct pipes extend to a total length of 16′4″ (5 m). Plan out the route that they will take from your
engraver’s fan to a dedicated purifier or—if your engraving fumes and debris will not hazardous and meet
local and national air safety standards—to any window or exterior vent. Generally speaking, the straighter
you can keep the pipes between your engraver and their outlet, the better your system’s ventilation will be
and the less dust and debris will build up within the pipes over time.
Slide the two small hose clamps onto the smaller exhaust pipe. Attach one end directly onto the rim
surrounding the exhaust fan behind the laser. Use a screwdriver to tighten one of the clamps around this
connection. Attach the other end of the pipe to the inlet side of the 60W duct fan using the provided
adapter ring. Tighten the second clamp around this connection.
Slide the large hose clamp onto the larger exhaust pipe. Attach one end of the pipe to the outlet side of the
duct fan and tighten the clamp around this connection. Attach the other end of the pipe to a fume extractor
or vent it into the open air outside your work area.
Connect the duct fan to power, ideally on a separate circuit from the one that will be used to power the laser
itself. Turn it on and confirm that it operates at both speeds.
NEVER operate the laser if the exhaust system is not removing the fumes and dust produced by
your materials out of your work area. Always research materials before use and never operate
the laser on any that can produce corrosive, hazardous, or even deadly fumes.

 Loading...