Valve
Spring:
Check valve springs for cracks, worn
ends, distortion, and tension. If spring ends are worn,
check valvespring retainer forwear. Check
for
spring
distortion by placing spring on aflat surface next to a
square. Measure height of spring and rotate
it
against
square edge to measure distortion. If distortion
exceeds
0.06
inch
(1.5
mm) replace spring. Check
spring tension at the installed height for both the
valve open and closed position using an accurate
valve spring tester. Replace any valve spring that is
weak, cracked, worn, or distorted.
Valve
Rofafors:
Positive type valve rotators prolong
valve life and decrease valve repairs. When func-
tioning properly, the valve is rotated
a
fraction of a
turn each time it opens. While at open position, the
valve must rotate freely. There
is
no easy way to
determine if a valve rotator is good or bad. Onan
recommends that valve rotators be replaced at each
major overhaul or if a build-up of carbon is noted
on
valve face and valve seat.
Valve Seafs:
Inspect valve seat inserts. If seats are
loose, cracked or severely pitted, new ones must be
installed. Removevalve seat inserts using avalve seat
removal tool. If valve seat insert bores in cylinder
block are damaged or worn
so
that a press fit cannot
be obtained when installing new standard size valve
seat inserts, the bores must be machined for an
oversize seat.
USE
NEW
VALVE
SEAT
TO
ADJUST
PULLER
DEPTH
PULLER
JAWS
C-1104
FIGURE
56.
VALVE
SEAT
REMOVAL
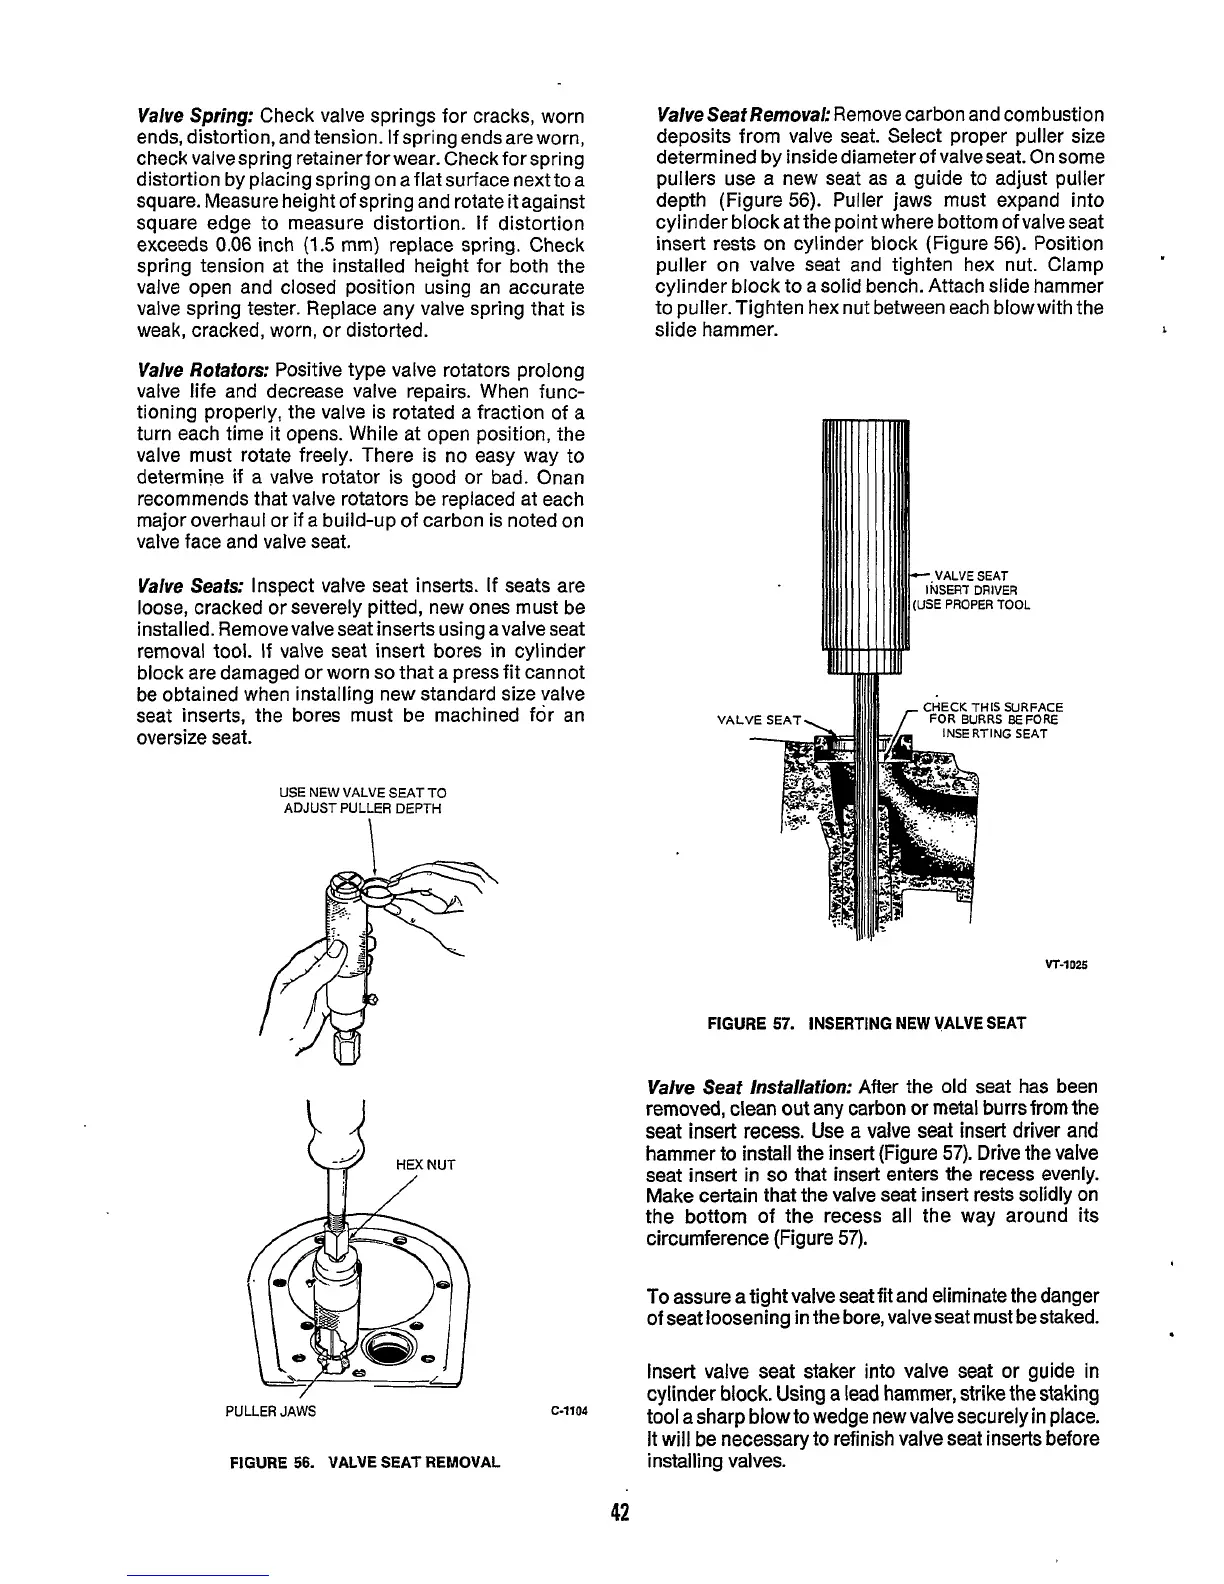
Valve Seaf Removal:
Remove carbon and combustion
deposits from valve seat. Select proper puller size
determined by inside diameter of valve seat. On some
pullers use a new seat as a guide to adjust puller
depth (Figure
56).
Puller jaws must expand into
cylinder block at the point where bottom of valve seat
insert rests
on
cylinder block (Figure
56).
Position
puller on valve seat and tighten hex nut. Clamp
cylinder block to a solid bench. Attach slide hammer
to puller.Tighten hex nut between each blowwith the
slide hammer
A
USE
PROPER
TOOL
CHECK
THIS
SURFACE
FOR BURRS BEFORE
SERTING
SEAT
FIGURE
57.
INSERTING
NEW
VALVE
SEAT
Valve Seaf lnsfallafion:
After the old seat has been
removed, clean out any carbon or metal burrs from the
seat
insert
recess.
Use
a
valve
seat
insert driver and
hammer to install the insert (Figure
57).
Drive the valve
seat insert in
so
that insert enters the recess evenly.
Make certain that the valve seat insert rests solidly on
the bottom of the recess all the way around its
circumference (Figure
57).
t
To
assure a tight valve seat fit and eliminate the danger
of seat loosening in the bore, valveseat must be staked.
insert valve seat staker into valve seat or guide in
cylinder
block.
Using
a
lead hammer,
strike
the
staking
tool a sharp
blow
to wedge new valve securely in place.
It
will
be
necessary to refinish valve seat inserts before
installing valves.
42
 Loading...

