18 Oneida Air Systems
Maintenance
UNPLUG YOUR UNIT BEFORE SERVICING OR CLEANING. KEEP THE TOP VENTS IN THE
COWLING CLEAN. THESE ARE FOR BOTH EXHAUST AND INCOMING COOLING AIR FOR THE
MOTOR.
Cleaning the lter
Proper lter cleaning should not be neglected as a
dirty lter can signicantly aect your dust collector’s
performance and the overall lifespan of your lter.
1. Wear a dust mask and eye protection.
2. Turn o and unplug the dust collector and wait for the
fan blower to come to a complete stop and for the dust
to settle.
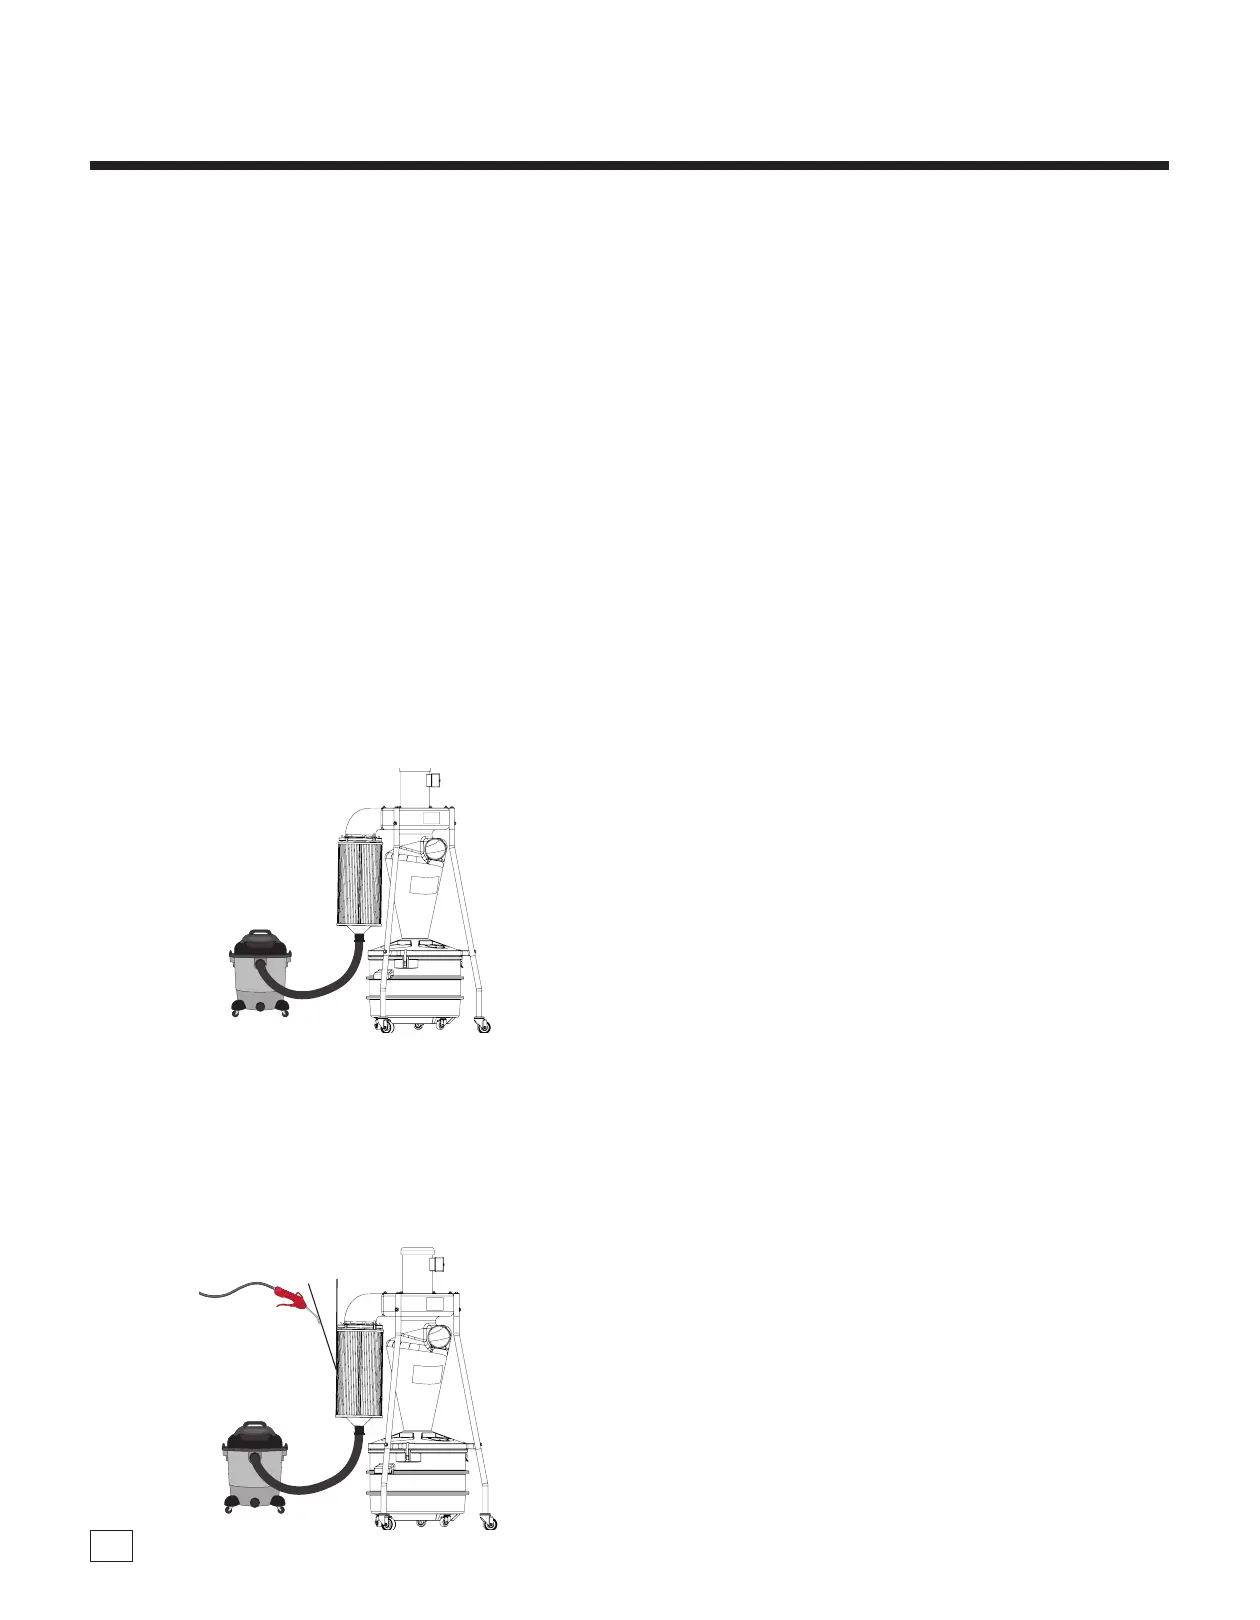
3. Remove the Filter Cap (C9V) from the bottom of the
lter. Attach your wet/dry vacuum’s hose to the outlet.
Turn on your wet/dry vacuum.
Note: e lter’s outlet measures 1.9" ID and 2.1" OD; You
may need an adapter depending on your hose. If you don’t
have a shop vacuum available you can clamp a bag over
the outlet to collect excess dust.
4. While the wet/dry vacuum is running. Use a hand-held,
compressed air nozzle with a pressure between 30 to
60 PSI to blast air along the lter’s exterior pleating.
Hold the air nozzle at a 20 degree angle and at least
6” away from the lter; closer blasts may damage the
lter material. Direct air out and away from anyone in
the area. Do not use this method when any hazardous
material has been vacuumed up.
5. Check to make sure lter is in good condition with
no torn media or cracks or tears in the seal. A broken
lter can leak material into the motor and cause severe
damage! You cannot operate the system without a proper
lter in place. (See Accessories page for the replacement
lter part.) Operating without a sucient lter will cause
severe damage to the motor and will void the warranty!
Note: To help see damage from the outside, a ashlight can
be used.
Emptying the Drum
When rst using the dust collector, check the drum
window regularly to get an idea of how oen it needs
to be emptied. If the drum becomes overlled, the
dust will be sucked into the collector and into the
lter. To clean the view window ONLY use a clean,
so cloth. NEVER use solvents. Using a ashlight
will make viewing the dust levels easier.
1. Wear a dust mask and eye protection.
2. Turn o the dust collector and wait for the fan blower to
come to a complete stop and for the dust to settle before
unlatching the drum from the cyclone body.
3. Dispose of waste safely and properly.
4. Replacement bags should be 36" x 36" and at least 1.5
mils thick. See Accessories page for replacement bags
needed for your system. When you are not using a bag in
your drum then you must use the Cap (C9F).
20º
 Loading...