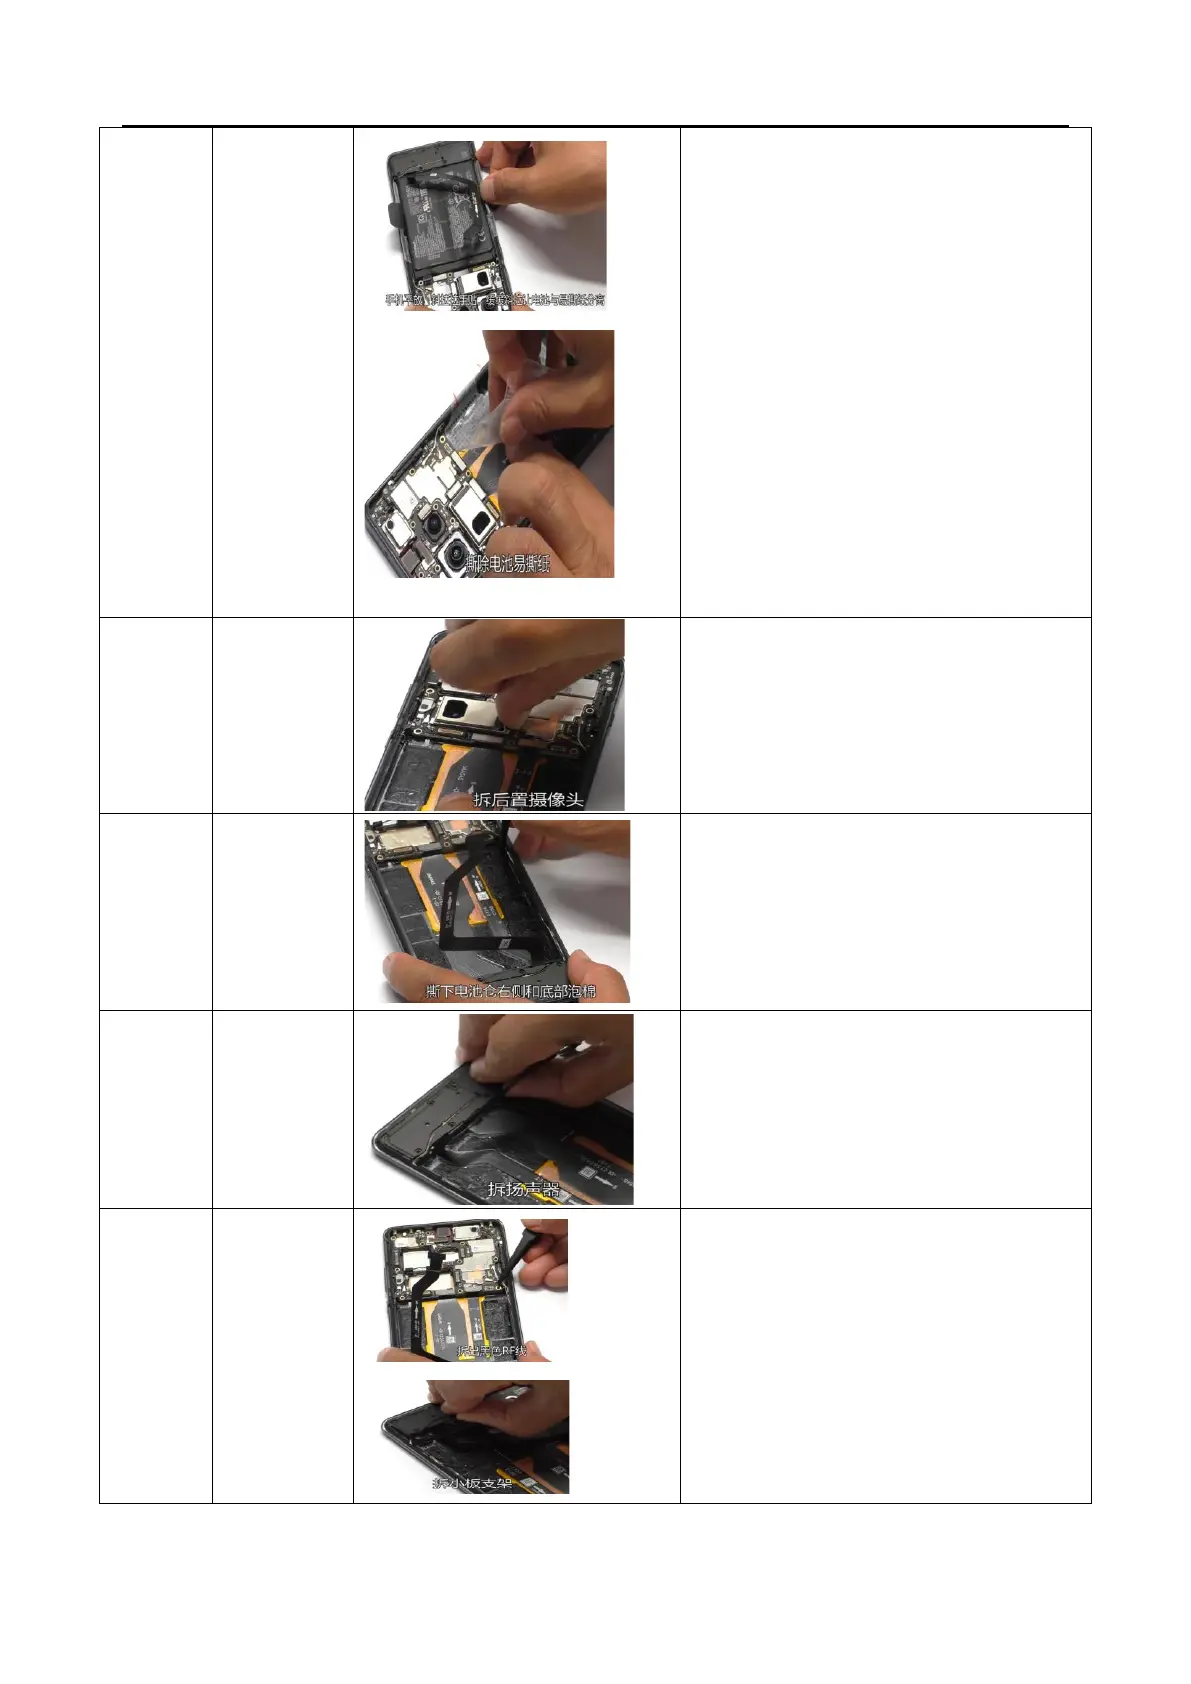
straight to avoid vertical pulling, which may
cause deformation of the battery). When
pulling to the rear, remove the battery along
with the easy to tear paper from the phone.
Slowly remove the battery tear off paper and
mark the repair label at the corresponding
position of the battery.
3. After removing the battery, it is necessary to
check whether the double-sided adhesive is
damaged, dirty or defective. For defective
products, a special note should be made
stating "double-sided adhesive is damaged".
The repair team should replace the back
adhesive. If it is OK, immediately attach the
battery double-sided adhesive release paper.
Disassemble the three camera BTBs of the rear
telephoto, wide-angle, and main camera, and
remove the rear camera module. The bottom of the
main camera has a weak adhesive backing, which
can be slightly raised from the side before removing
the camera (do not pull the camera FPC).
Disassemble the
battery
compartment
foam
Use tweezers to peel off the foam on the right and
bottom of the battery compartment
Disassemble the
C board and
small board
bracket
1. Disassemble the black RF cable (note: 1. Lift the RF
cable in the upper right corner of the battery
compartment, 2. Then lift the cable clamp, 3. Then
lift the RF socket), the small board bracket, and
the BTB of the C board on the motherboard, and
then remove the C board
2. Disassemble the U-board on the
motherboard/small board BTB and remove the U-
board