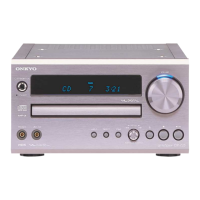
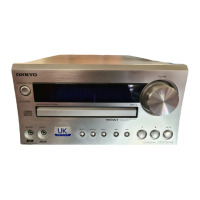
22
Basic CD Dubbing
• The MD will be recorded in digital.
• If the MD is prerecorded, the new recording will
be made on the blank portion. The track numbers
will be added to the existing track numbers
sequentially.
Display
1 Insert the CD and MD.
See step 1 in “Playing a CD” on page 16 and “Playing an
MD” on page 18.
The MD must be recordable.
2 Check the remaining recordable time.
1 Press CD/MD repeatedly until “CD” is
displayed.
2 Check the total playing time.
Press DISPLAY repeatedly until the desired information
appears.
3 Press CD/MD repeatedly until “MD” is
displayed.
4 Check the remaining recordable time.
Press DISPLAY repeatedly until the desired information
appears.
3 Press CD DUBBING to start dubbing.
The DUB indicator lights in the display (see the
illustrations on the next page).
4 Press MD after completing recording.
The TOC indicator flashes while the data is being
recorded onto the MD, and then the MD is ejected.
When dubbing does not start
• If “Cannot Rec” appears,
The MD is a playback-only disc. Change to a recordable MD.
• If “Protected” appears,
The record-protect window is open. Close the window by
sliding the record-protect tab. (See page 55.)
• If “Disc Full” appears,
There is no space for recording. Replace with a new MD.
The TOC indicator flashes.
See next page.
Tips
• Record level adjustment is not
required.
• All the track numbers on the
CD will be copied to the MD
regardless of the LevelSync
function setting (see page 25).
To stop recording
Press MD or CD .
Dubbing automatically stops
when the last CD track has
been played or the end of the
MD has been reached.
To check the CD/MD
information while
recording
See next page.
Notes
• You cannot change the source
while recording.
•
(Play/Pause button) and
(Eject button) do not
operate during CD dubbing.
If CD dubbing has been
incomplete
The incompletely recorded
track will be erased
automatically.
Checking the recordings
After completing recording, or
stopped recording by pressing
, press MD on the unit or
MD
on the remote controller.
Only the newly recorded portion
will be played back from the
beginning.
MD
SLEEP SOURCE C D TIMER M D M D
CH
C D
C D
ONCE
W.DAY
W.END
REC
L
R
S.BASS
-
40
-
20
-
10 0 OVER
-
6
-
2
MUTING DIGITAL CHAIN
REPEAT
DISC TRACK ELAPSED REMAIN TITLE
RDS MONO AUTO STEREO TUNED
1 TR MEMORY
RANDOM
LEVEL - SYNC
-
M D
DUB TOC
SLEEP SOURCE C D TIMER M D M D
CH
C D
C D
ONCE
W.DAY
W.END
REC
L
R
S.BASS
-
40
-
20
-
10 0 OVER
-
6
-
2
MUTING DIGITAL CHAIN
REPEAT
DISC TRACK ELAPSED REMAIN TITLE
RDS MONO AUTO STEREO TUNED
1 TR MEMORY
RANDOM
LEVEL - SYNC
-
M D
DUB TOC
Total playing time
Total remaining
recordable time
(“DISC REMAIN”
appears.)
SLEEP SOURCE C D TIMER M D M D
CH
C D
C D
ONCE
W.DAY
W.END
REC
L
R
S.BASS
-
40
-
20
-
10 0 OVER
-
6
-
2
MUTING DIGITAL CHAIN
REPEAT
DISC TRACK ELAPSED REMAIN TITLE
RDS MONO AUTO STEREO TUNED
1 TR MEMORY
RANDOM
LEVEL - SYNC
-
M D
DUB TOC
2-
13
4
1
2-
24
3
CD/MD
CD/MD
DISPLAY
DISPLAY
R
CD DUBBING
M D
Das private Onkyo Archiv © von Dirk Gardi
Der Online-Treff zum Thema Onkyo!
www.gardi.de
Das private Onkyo Archiv © von Dirk Gardi
Der Online-Treff zum Thema Onkyo!
www.gardi.de
Das private Onkyo Archiv © von Dirk Gardi
Der Online-Treff zum Thema Onkyo!
www.gardi.de
 Loading...