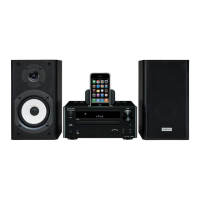
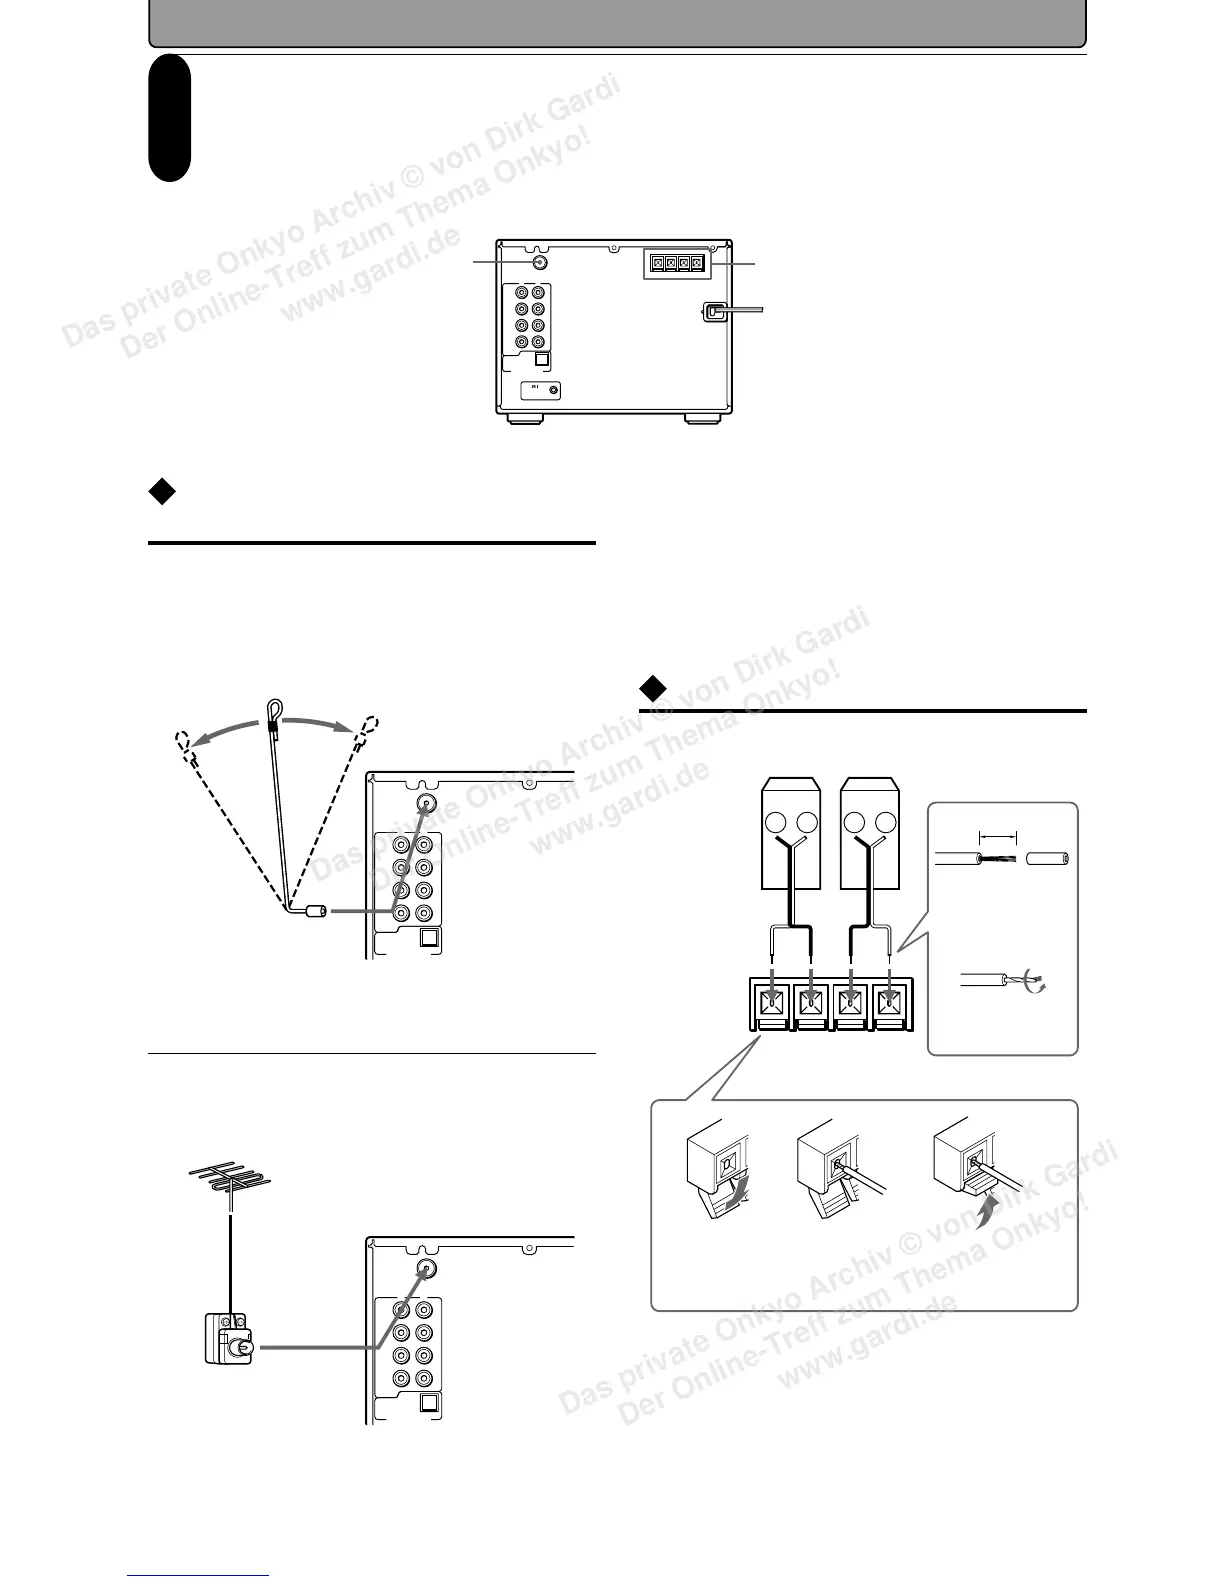
Connecting the speakers
Connecting
Antenna (aerial) and speakers
Antenna (aerial) connection is a must for auto clock setting. Do not connect the AC
power cord (mains lead) at this time. The AC power cord will be connected on page
11.
Speaker connectors
Antenna (aerial) connector
Connecting the supplied indoor
antenna (aerial)
While listening to the radio on page 20, move the
antenna (aerial) in various directions until the clearest
signal is received. Then secure the antenna (aerial)
with push pins in the position with the least distortion.
To connect the outdoor antenna (aerial)
If signals received via the indoor antenna (aerial) are
not clear enough, connect an outdoor FM antenna
(aerial).
Right speaker Left speaker
Twist the stripped
end of the cord.
1
Press down
the lever.
2
Insert the
stripped end of
the cord.
3
Push the lever up.
The wire of the stripped
end of the cord should
appear slightly.
15mm
(Not supplied)
1
Strip 15 mm from
the end of each
cord.
2
(Speakers from behind)
WARNING
Do not install the antenna (aerial) near power lines because
this could result in electrical shock.
Note
Keep the antenna (aerial) away from noise sources, such
as neon signs and busy roads.
LINE
IN-1
LINE
IN-2
OUTPUT
(REC)
INPUT
(PLAY)
TAPE
OPTICAL
SPEAKERS
CAUTION: SPEAKER IMPEDANCE
4 OHMS MIN. / SPEAKER
+ R – – L +
FM
75Ω
REMOTE
CONTROL
DIGITAL INPUT
R
ANTENNA
L
LINE
IN-1
LINE
IN-2
OUTPUT
(REC)
INPUT
(PLAY)
TAPE
R
ANTENNA
L
FM
75Ω
OPTICAL
DIGITAL INPUT
LINE
IN-1
LINE
IN-2
OUTPUT
(REC)
INPUT
(PLAY)
TAPE
R
ANTENNA
L
FM
75Ω
OPTICAL
DIGITAL INPUT
Das private Onkyo Archiv © von Dirk Gardi
Der Online-Treff zum Thema Onkyo!
www.gardi.de
Das private Onkyo Archiv © von Dirk Gardi
Der Online-Treff zum Thema Onkyo!
www.gardi.de
Das private Onkyo Archiv © von Dirk Gardi
Der Online-Treff zum Thema Onkyo!
www.gardi.de
 Loading...