EasyManua.ls Logo

Onkyo FR-V3 - User Manual

Onkyo FR-V3
60 pages
Print Icon
To Next Page IconTo Next Page
Loading...
CD/MD Receiver
FR-V3
Instruction Manual
Thank you for purchasing the ONKYO CD/MD
Receiver.
Please read this manual thoroughly before making
connections and turning on the power.
Following the instructions in this manual will enable
you to obtain optimum performance and listening
enjoyment from your new CD/MD Receiver.
Please retain this manual for future reference.
Contents
6
10
16
26
45
52
Connecting
Preparations
Basic Operation
Advanced Operation
Additional Operation
Others
Before Using
2
DISCRETE OUTPUT STAGECD / MD RECEIVER

Questions and Answers

  • E
    Edward ColemanJul 31, 2025
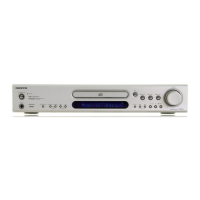
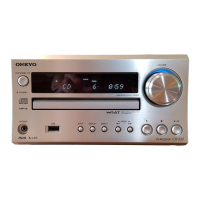
    What to do if my Onkyo FR-V3 remote control does not operate?
    • N
      Nicole PalmerJul 31, 2025
      The remote control may not be working because: * The batteries are dead. * You are too far from the unit or outside the sensor's detection angle. * There is an obstruction between the remote control and the unit. Try these solutions: * Replace the batteries with new ones. * Ensure you are within the remote control's effective range and angle. * Remove any obstructions.
  • C
    christophercopelandAug 4, 2025
    Why is there no sound from my Onkyo FR-V3 Car Receiver speakers?
    • P
      pughashleyAug 4, 2025
      Several factors could cause this issue: * A speaker wire might be touching other jacks, connectors, or metal parts. * The volume level might be set too low. * The sound could be muted. * Headphones might be connected. * Audio cables might not be firmly inserted. To resolve this: * Check the speaker connections. * Adjust the volume level. * Press the MUTING button on the remote control. * Disconnect the headphones after turning down the volume. * Check and firmly insert the audio connection cable plugs.
  • V
    Victor ShieldsAug 8, 2025
    Why does my Onkyo FR-V3 disc skip sounds?
    • B
      belindabrownAug 8, 2025
      Skipping sounds can occur due to: * Vibrations affecting the unit. * A severely scratched disc. * An extremely dirty disc. To fix this: * Place the unit in a location free from vibrations. * Replace the disc with a new one. * Clean the disc.
  • S
    Steve ToddAug 13, 2025
    What to do if my Onkyo Car Receiver disc cannot be loaded?
    • D
      David MccallAug 13, 2025
      If a disc cannot be loaded, make sure that the correct side of the disc is facing the unit. Ensure that you insert the disc in the direction of the arrow printed on the disc.
  • D
    Dana RyanAug 17, 2025
    What to do if my Onkyo FR-V3 disc is loaded but playback won't start?
    • R
      Riley BrownAug 17, 2025
      If the disc is loaded but playback doesn't start, it could be due to: * The disc being inserted with the wrong side facing upward. * The disc being extremely dirty. * The disc being dirty or damaged (with “Disc Error” appearing on the display). * The disc not being recorded. * Moisture inside the unit. Try these solutions: * Insert the disc with the label side facing upward. * Clean the disc. * Replace the disc with a new one or a disc that has been reused after erasing all data. * Replace the disc with a recorded one. * Remove the disc and let the unit sit for several hours to allow moisture to evaporate.
  • R
    Ronald HolmesAug 21, 2025
    Why can't track numbers be stored when setting MEMORY playback on my Onkyo Car Receiver?
    • J
      Jennifer KellerAug 21, 2025
      This issue can occur if: * There is no disc inserted in the unit. * A track number not on the disc is being input. To resolve this: * Insert a disc into the unit. * Input only the track numbers that are actually on the disc.
  • J
    joanne93Aug 26, 2025
    Why is the search time so long on my Onkyo Car Receiver?
    • H
      hadamsAug 26, 2025
      A long search time can be caused by: * A dirty disc. * A scratched disc. Try these solutions: * Clean the disc. * Replace the disc with a new one.

Summary

Important Safeguards

Precautions

Power

Critical warning about checking voltage and power supply compatibility.

Connecting

Connecting the supplied indoor antenna (aerial)

Instructions for connecting the indoor FM antenna for optimal radio reception.

Connecting the outdoor antenna (aerial)

Instructions for connecting an outdoor FM antenna if indoor signal is weak.

Connecting the speakers

Step-by-step guide for connecting speakers to the unit.

Preparing the remote controller

Setting the clock

Setting the clock automatically by initiating ACCUCLOCK manually

When setting the RDS broadcasting station automatically

Steps to scan for and select an RDS station for automatic clock setting.

When setting a RDS broadcasting station manually

Steps to manually select an RDS station for clock setting.

Disabling;enabling ACCUCLOCK function

Setting the clock manually

Understanding preparatory;common operation

Choosing the required source

How to select audio sources like CD, MD, tuner, or external inputs.

Presetting radio stations automatically

Playing a CD

Operating with the remote controller

Playing an MD

Selecting the track to play

How to select specific tracks for playback on an MD.

Listening to the radio

Tuning in the radio station manually

Steps for manually tuning into radio stations.

Basic CD Dubbing

Marking track numbers - LevelSync

To change the LevelSync setting

How to enable or disable the LevelSync function.

Adjusting the recording level in analog recording

Various ways of playing CDs and MDs

MEMORY playback

How to create and play custom track sequences from CDs/MDs.

1 TR (one track) playback

RANDOM playback

While the source is CD or MD, and in stop mode

How to enable random playback of tracks from a stopped state.

REPEAT;CHAIN repeat playback

Canceling the playback mode

Adjusting the tone

Naming a CD, MD and its tracks, and preset channels

Naming a CD

How to name a CD disc for easier identification.

Naming an MD disc or track

How to name an MD disc and its individual tracks.

Naming a preset channel

How to assign names to preset radio channels.

Advanced CD Dubbing

Dubbing a track from the beginning listening

How to dub a CD track to an MD starting from the beginning.

Dubbing a playing track into various playback mode onto the MD

How to dub a playing CD track to an MD using different playback modes.

CD to MD Synchro Recording

CD to MD synchro recording

How to synchronize CD dubbing directly to an MD.

Moving, dividing, combining, and erasing MD tracks

All Erase

How to erase all tracks and initialize the MD.

Erase

How to erase a selected track from an MD.

Move

How to move a selected track to a different position on the MD.

Divide

How to split a selected track into two on the MD.

Combine

How to merge two adjacent tracks on the MD.

Erasing all the tracks of the MD - All Erase

How to erase all tracks and names to initialize the MD.

Erasing a selected track - Erase

Moving the selected track - Move

Dividing a selected track - Divide

Combining selected tracks - Combine

Recording from a connected source to an MD

Signal Synchro Recording

Synchro Recording operation with an ONKYO stereo cassette tape deck

How to perform synchro recording with an ONKYO cassette deck.

Using the timers

Once, Weekday, and Weekend timer

How to set timers for specific days or recurring schedules.

Rec timer

How to set a timer to record programs automatically.

Operating with the unit

Setting Once, Weekday, Weekend, and Rec timer

Setting your own weekdays and weekends

Setting the date and selecting the recorder for Rec timer

Switching the set timer On;Off

Customizing the source names

Presetting radio stations manually - Preset Write

Erasing a preset channel - Preset Erase

Copying a preset channel - Preset Copy

Using the optional remote controller

Inserting the batteries

Guide for inserting batteries into the optional remote controller.

Using the remote controller

How to operate the unit with the optional remote controller.

Entering a name

Rules for digital recording

Rule 2

Rule 3

Troubleshooting

The unit does not turn on.

Troubleshooting steps if the unit fails to power on.

No sound is reproduced from neither the left or right speaker.

Steps to resolve issues with no audio output from speakers.

Timer

Remote control

The remote control does not operate.

Steps to take if the remote control is unresponsive.

Remote Controller Buttons

Onkyo FR-V3 Specifications

Power IconPower
power supplyAC 230 V, 50 Hz AC 120 V, 60 Hz
power consumption66 W
Amplifier Specifications IconAmplifier Specifications
power output at 4 Ω 1kHz DIN2 × 20 W
power output at 6 Ω 1kHz DIN2 × 17 W
power output at 8 Ω 1kHz DIN2 × 15 W
dynamic power at 4 Ω2 × 24 W
dynamic power at 8 Ω2 × 18 W
Tuner Specifications IconTuner Specifications
tuning range87.50 to 108.00 MHz (50 kHz steps)
usable sensitivity mono12.8 dBf, 1.2 µV (75 Ω IHF) 1.0 µV (75 Ω DIN)
usable sensitivity stereo18.0 dBf, 2.2 µV (75 Ω IHF) 25.0 µV (75 Ω DIN)
Weight and Dimensions IconWeight and Dimensions
dimensions205 × 154 × 356 mm
weight5.5 kg

Related product manuals