NOTATION ABOUT ENTERING TEST MODE BY PRESSING BUTTON
In this procedure, the following notations are used to simplify explanation of how to press button.
e.g.-1 [TV/CD] + [ON/STANDBY] → [BD/DVD]
This means "While holding down TV/CD button, press ON/STANDBY button then release both buttons and then press
BD/DVD button".
e.g.-2 [DISPLAY] + [ON/STANDBY] *2 → [DIMMER]
This means "While holding down DISPLAY button, press ON/STANDBY button twice then release both buttons and then press
DIMMER button".
INITIAL SETTING FOR SHIPPING
Initialization of memories.
Do the following operation.
Unplug the power cord from AVR after the FL tube displays "Clear" and AVR goes standby.
[CBL/SAT] + [ON/STANDBY]
CONFIRMATION OF F/W VERSION
to display MMPU version.
to display another F/W version.
<NOTE>
It cannot enter a test mode immediately after power supply ON, please press the Setup key.
1. [DISPLAY] + [ON/STANDBY]
Do the following operation.
2. [TONE+] or [TONE-]
M1.01/14716ALN
M1.01/14716ALN
N1.07/14620ALA
O1.00/14324AL
Main
DSP
OSD
1. set the volume level to 25.
3. Press the following button, while "TEST - " is displayed, then each test mode is set.
TEST MODE FOR OPERATION
Do the following operation.
2. [TV/CD] + [ON/STANDBY]
TEST-_
e.g.
1-00
2-00
3-00
4-00
5-00
6-00
[BD/DVD]
[CBL/SAT]
[STB/DVR]
[GAME]
[PC]
[AUX]
KEY TEST
[MEMORY]
IDLING TIMER / Wi-Fi check
[TUNING MODE]
FL TEST
[DIMMER]
(RT/PTY/TP)
Button ButtonTest Mode Test Mode
In the test mode, (TONE)+ button is TEST MODE UP and (TONE)- button is TEST MODE DOWN.
TEST 1-00 → TEST 1-01 → TEST 1-02 - - - - TEST 2-00
e.g.
CONFIRMATION OF MAIN CHECKSUM
MAIN Checksum can be confirmed the following
operation.
[DISPLAY] + [ON/STANDBY] * 2 → [MEMORY]
Temperature and output voltege can be confirmed the following
operation.
CONFIRMATION OF OUTPUT VOLTAGE AND THERMAL SENSOR
[DISPLAY] + [ON/STANDBY] * 2 → [TONE]
Model name and destination can be confirmed the following
operation.
[TV/CD] + [ON/STANDBY] → [DIMMER](RT/PTY/TP) → [TONE] *4
CONFIRMATION OF MODEL NAME AND DESTINATION
e.g.
001 042 F:x S:H
Amplifier power
supply voltage condition
H : High-B
L : Low-B
Temparature
of thermal sensor
Voltage
of VOLH port
FAN speed
x: Stop
L: Low speed
H: High speed
e.g.
S R 3 3 3 D x 2 2 0 0
FL DIS Name Destination A B C D
A:Value of AD port of BAND
B:Value of AD port of INIT1
C:Value of AD port of INIT2
D:Value of AD port of INIT3
e.g.
CONFIRMATION OF VOLTAGE-DETECTION PROTECTORS.
to the following test mode.
2. AVR automatically tests in the following test sequence. And if it is all OK, Wi-Fi test will begin.
3. If FL tube displays Wi-Fi check mode then voltage-detection protectors test will be completed.
TEST 1-01
Test sequence
(FL+)
→
(FR-)
→
(C+)
→
(SL-)
→
(SR+)→
(SW+)
<NOTE>
Don't connect load nor short speaker terminals.
1-2. [TV/CD] + [ON/STANDBY] → [BD/DVD]
1-1. set the volume level to 25.
1. Do the following operation.
1-3. [TONE +]
CONFIRMATION OF UPDATE ROUTE.
2.Once the above mentioned test mode is entered, voltage-detection protectors function is checked automatically first, then update
route check will begin.
If the result of update route check is no problem then Wi-Fi check will begin. If the result is NG then NG message will be shown on
the FL tube.
3. If FL tube displays Wi-Fi check mode then voltage-detection protectors test and update route check are passed.
to the following test mode.
TEST 1-01
1-2. [TV/CD] + [ON/STANDBY] → [BD/DVD]
1-1. set the volume level to 25.
1. Do the following operation.
1-3. [TONE +]
CONFIRMATION OF Wi-Fi CONNECTION
1. Setting Wi-Fi routers.
3. Once the above mentioned test mode is entered, voltage-detection protectors function is checked automatically first, then update
route check will begin and then Wi-Fi check will begin.
In Wi-Fi check mode, it connects an access point automatically. Wi-Fi LED flashes during connection.
4. If connection is completed and IP address is successfully acquired, Wi-Fi LED turning lights off and the value of RSSI to an access
point is displayed in dBm.
If the connection is failed, NG is displayed.
If the connection is failed, exit the idling timer mode by pressing the TV/CD button and please try again from step 1.
In case value of RSSI level isn't showed on the FL tube at all past 4 minutes in this timer mode, judge as NG.
02 -55d 01’ 14’’
RSSI(dbm)SSID No Time Counter
e.g.
COMFIRMATION OF USB
1. Connect USB memory or USB storage to AVR front USB port.
2. Change selector to USB. After FL tube showed USB device name, press Enter key twice, then confirm signals form front
L/R or Headphone.
Change volume as necessary.
CONFIRMATION OF CURRENT DETECTION PROTECTORS
2. Confirm that relay is not cut off even if you connect the following load A to the following channels one by one.
3. Confirm that relay is cut if you connect the following load B to the following channels one by one.
Channel FL, FR, C, SL and SRch (and SW only HT-R393)
Load A 3 ohm
Load B 1 ohm
to the following test mode.
TEST 1-09
1-2. [TV/CD] + [ON/STANDBY] → [CBL/SAT]
1-1. set the volume level to 25.
1. Do the following operation.
1-3. [TONE - ]
CONFIRMATION OF OUTPUT SENSOR
After lighting "FM STEREO" on the FL tube, the following relays break their connections and "FM STEREO" lamp goes off .
Relays
RL643 and RL644
to the following test mode.
TEST 1-07 and TEST 1-08
1-2. [TV/CD] + [ON/STANDBY] → [CBL/SAT]
1-1. set the volume level to 25.
1. Do the following operation.
1-3. [TONE - ] *2(TEST 1-07), *3(TEST 1-08)
CONFIRMATION OF KEY OPERATION
2. Confirm each key and master volume operation.
3. If "ON/STANDBY" button is pressed, AVR escapes from this KEY test mode.
Therefor, press the "ON/STANDBY" button, after checking other buttons finished.
to the following test mode.
TEST 1-06
1-2. [TV/CD] + [ON/STANDBY] → [CBL/SAT]
1-1. set the volume level to 25.
1. Do the following operation.
1-3. [TONE - ] *4
IDLING TIMER (TEST 1-01)
This mode is used for aging for idling.
Once the following test mode is set, idling timer mode works.
Idling timer mode includes the following functions.
Test mode TEST 1-01
Function Timer
Voltage-detection protector check
F/W update route test
Wi-Fi connection check
Once the above test mode is set, AVR's status changes to idling timer mode and voltage-detection protector check automatically begins.
If voltage-detection protector check is all OK, Wi-Fi connection check automatically begins.
Even if one channel of voltage-detection protector check is NG, Wi-Fi connection check doesn't begin.
Refer to CONFIRMATION OF VOLTAGE-DETECTION PROTECTORS (next page).
Refer to CONFIRMATION OF UPDATE ROUTE (next page).
Refer to CONFIRMATION OF Wi-Fi CONNECTION (next page).
[TONE+] [TONE-]
Model Name Distination Number Writing Data
TX-SR333 Dx 2200 2200 TX-SR333 Dx S R 3 3 3 D x 2 2 0 0
TX-SR333 xx 8200 8200 TX-SR333 xx S R 3 3 3 x x 8 2 0 0
HT-RC630 Dx 2202 2202 HT-RC630 Dx R C 6 3 0 D x 2 2 0 2
HT-RC630 xx 8202 8202 HT-RC630 xx R C 6 3 0 x x 8 2 0 2
HT-R393 Dx 2220 2220 HT-R393 Dx R 3 9 3 D x 2 2 2 0
HT-R393 xx 8220 8220 HT-R393 xx R 3 9 3 x x 8 2 2 0
Check USB flash device
SW+ : HT-R393 only
to the following test mode.
TEST 1-01
2-2. [TV/CD] + [ON/STANDBY] → [BD/DVD]
2-1. set the volume level to 25.
2. Do the following operation.
2-3. [TONE +]
Max value of RSSI is -45dB.(Display of FL is -45d.)
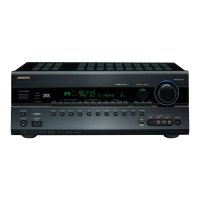
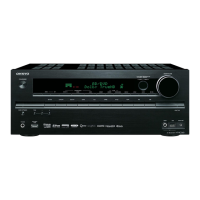
TX-SR333/ HT-R393/ HT-RC630 TX-SR333/ HT-R393/ HT-RC630
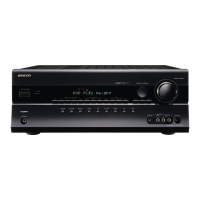
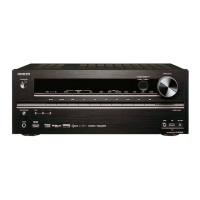
TX-SR333/ HT-R393/ HT-RC630 TX-SR333/ HT-R393/ HT-RC630
OPERATION CHECK-1 OPERATION CHECK-2
OPERATION CHECK-3
OPERATION CHECK-4
 Loading...