43
First Time Setup
—Continued
If you connect a video component to HDMI IN 1 or 2,
you must assign that input to an input selector. For exam-
ple, if you connect your DVD player to HDMI IN 1, you
must assign HDMI IN 1 to the DVD input selector.
Note:
When HDMI IN 1 or 2 is assigned to an input selector
here, the digital audio input for that selector is automat-
ically set to HDMI IN 1 or 2. See “Digital Audio Input
Setup” on page 45.
HDMI Video Setup
(TX-SR803/803E Only)
10
--/---
11 12
REMOTE MODE
HDD
RECEIVER
TAPE/AMP
DVD CD
ZONE2
SAT
TV
VCR
CABLE
MDCDR
STEREO
SURR
SUBTITLEAUDIO
PLAY MODE
REPEAT
RANDOMREC PLAYLIST
+
-
T
V CH
T
V VOL
ENTER
S
E
T
U
P
T
O
P
M
E
N
U
M
E
N
U
VOL
+
-
CH
DISPLAY
PREV
CH
DIMMER
SLEEP
MUTING
LISTENING MODE
INPUT SELECTOR
32
MACRO
1
+
10 0
CLEAR
12
3
456
789
INPUT
I
ON STANDBY
T
V
CD
V1 V2 V3
MULTI CH
DVD
TUNER
PHONO
DISC
ALBUM
V4
TAPE
R
E
T
U
R
N
2
2, 3
1, 4
1
1
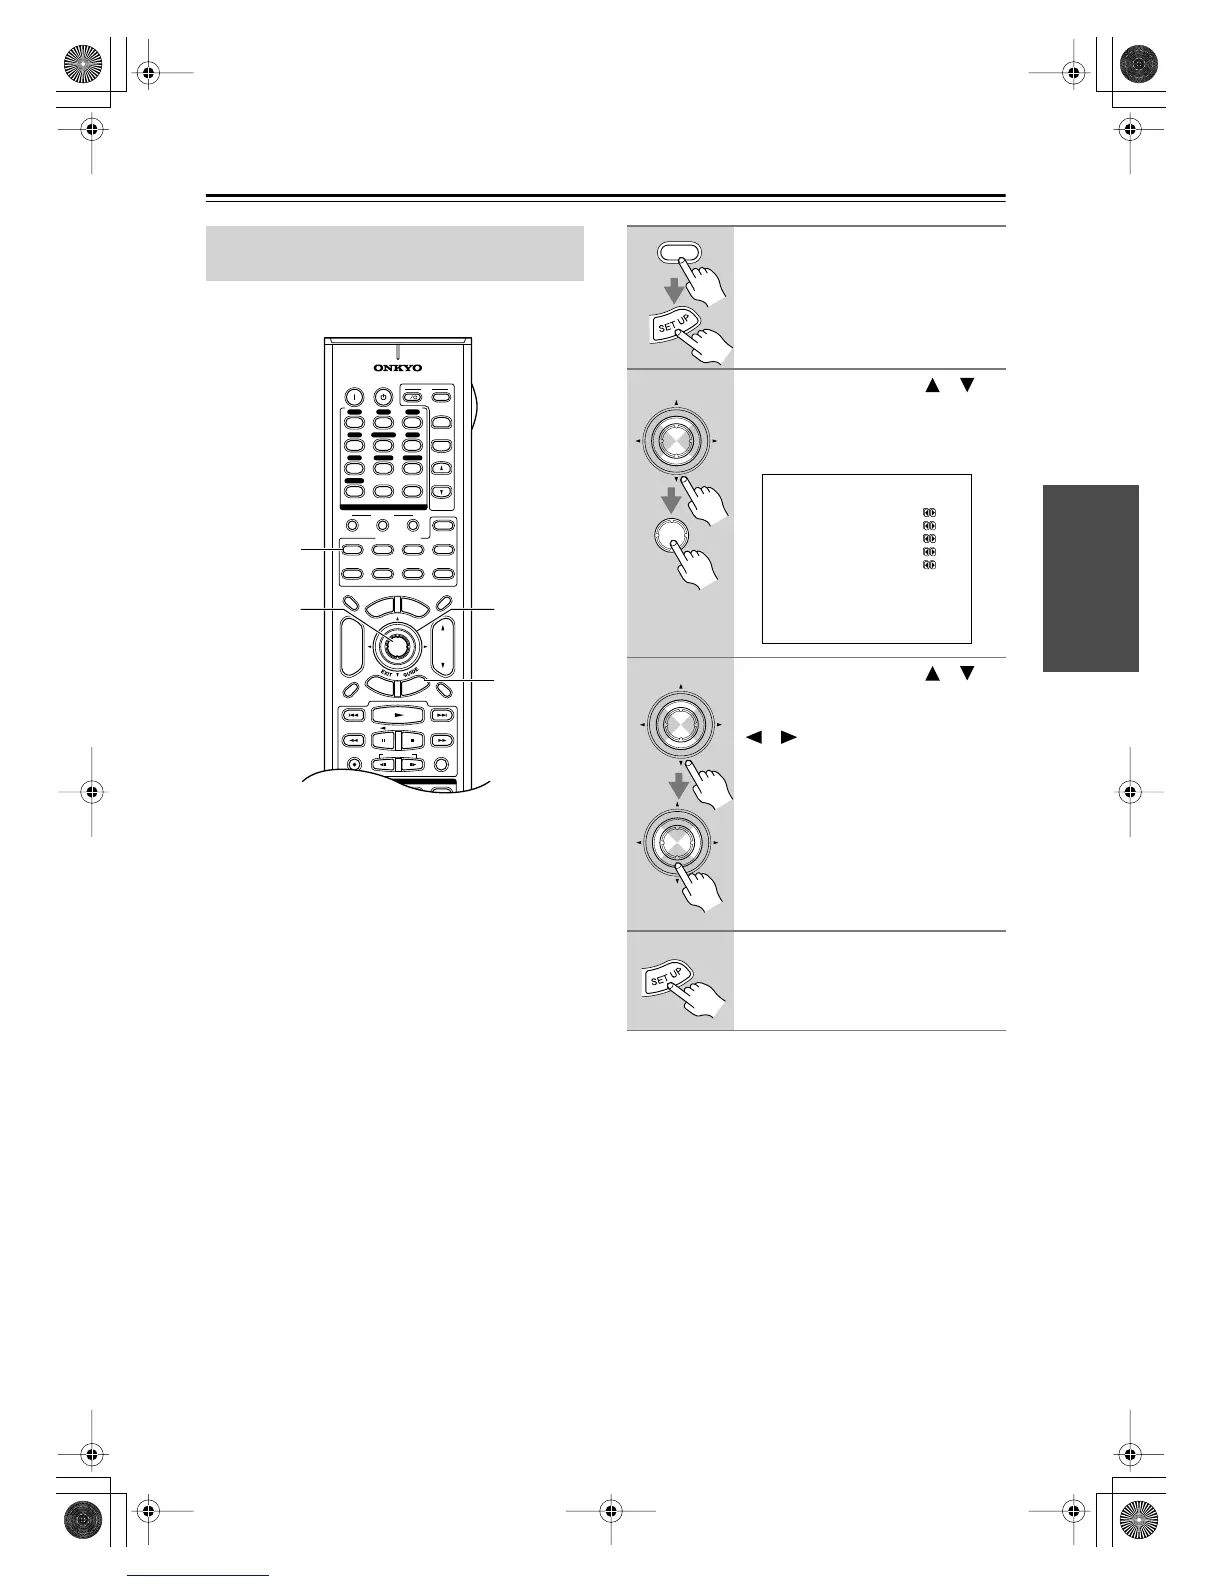
Press the [RECEIVER] button,
followed by the [SETUP] button.
The main menu appears onscreen.
2
Use the Up and Down [ ]/[ ]
buttons to select “0.HDMI Video,”
and then press [ENTER].
The HDMI Video menu appears.
3
Use the Up and Down [ ]/[ ]
buttons to select an input selec-
tor, and use the Left and Right
[ ]/[ ] buttons to select:
IN1:
Select if the video component
is connected to HDMI IN 1.
IN2:
Select if the video component
is connected to HDMI IN 2.
No:
Select if you’re not using a
HDMI connection.
4
Press the [SETUP] button.
Setup closes.
RECEIVER
ENTER
ENTER
0.HDMI Video
------------------------
a.DVD :No
b.VIDEO1 :No
c.VIDEO2 :No
d.VIDEO3 :No
e.VIDEO4 :No
ENTER
ENTER
TX-SR803En.book Page 43 Friday, August 26, 2005 9:26 AM