Do you have a question about the Onkyo TX-SR800 and is the answer not in the manual?
Adjusts the receiver's voltage to match local power supplies for safe operation.
Instructions for inserting batteries into the remote control for proper functionality.
Guidance on pointing the remote at the sensor and operational range for control.
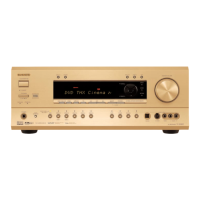
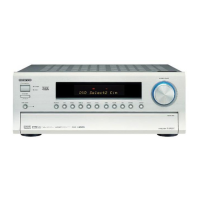
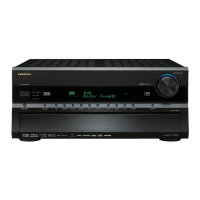
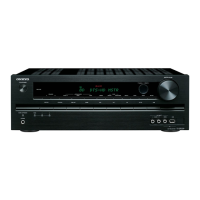
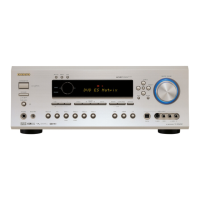
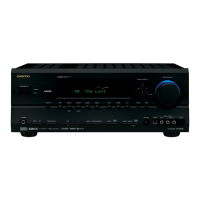
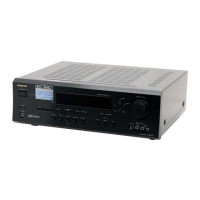
Identifies and describes the controls and indicators on the front panel of the unit.
Explains the various indicators and information displayed on the unit's front panel.
Details the layout and function of each button on the remote control for unit operation.
Identifies and describes the connection terminals and ports on the rear of the unit.
Guides on connecting various audio sources like CD players, turntables, and tape decks.
Instructions for connecting video sources like DVD players, VCRs, and monitors.
Explains how to connect and operate other Onkyo components using the RI system.
Describes using the unit's AC outlets to power and control other connected devices.
Step-by-step guide to selecting sources and playing media using the remote.
How to control the main volume using the dial or remote control buttons.
Customizing the input source name display from 'TAPE' to 'MD' for clarity.
Using the MUTING button to silence the audio output momentarily.
How to adjust bass and treble levels via the Setup Menu for sound customization.
Connecting headphones to the front panel jack for private listening.
Setting the timer for automatic unit shutdown after a specified period.
Selecting different sound modes like Stereo, Surround, THX, and DSP for optimal playback.
How to cycle through display information on the front panel or TV screen.
Using the DIMMER button to adjust front panel display brightness.
Adjusting individual speaker volumes for fine-tuning sound balance.
Selecting audio input modes like Auto, Multich, or Analog for playback.
Instructions for setting up and enjoying multi-channel audio playback.
How to enable tone controls and adjust bass/treble via the Setup Menu.
Guide to selecting FM/AM stations using the TUNER input and tuning controls.
Information on FM stereo reception and using the FM MODE button.
Steps to save frequently tuned radio stations for easy access.
How to recall saved radio stations using preset buttons.
Procedure for removing a stored radio station from memory.
Controls on the unit for operating the remote zone (Zone 2) audio output.
Instructions for controlling the remote zone using the main remote control.
How to set the volume level for speakers connected to the remote zone.
Steps to output the selected source signal to recording devices.
Procedure to record a source signal separate from the one being monitored.
Combining video from one source with audio from another for custom recordings.
Simplified menu for users unfamiliar with advanced settings or for basic adjustments.
Comprehensive menu offering detailed customization of receiver functions.
Initial settings related to speaker impedance and IR input configuration.
Configuration for speaker size, distance, and level calibration for optimal sound.
Settings for digital input formats, multichannel support, and video source matching.
Adjustments for tone controls, surround speaker settings, and sound effects.
Customization options for volume display, headphone levels, and OSD settings.
Explanation of how to use buttons on the unit and remote to navigate menus.
Main menu for initial hardware configuration settings.
Sets the speaker impedance level to match connected speakers for optimal performance.
Configures settings for surround back speakers or remote zone (Zone 2) connections.
Sets the IR input position for controlling the unit from a remote location.
Adjusts the AM tuner frequency step for specific regions.
Main menu for configuring speaker settings to optimize sound environment.
Defines connected speakers (size, presence of subwoofer) for correct audio processing.
Sets the distance from each speaker to the listening position for accurate sound staging.
Adjusts the volume level of each speaker using pink noise for balanced output.
Menu for configuring signal inputs and their associated settings for various sources.
Settings for digital input signals, including format and connection type.
Enables multichannel audio playback for sources connected via the MULTI CHANNEL INPUT.
Matches audio components with video sources and configures component video inputs.
Allows custom naming of preset stations and input sources for easier identification.
Adjusts volume levels between different input sources for consistent listening.
Assigns specific listening modes to different input signal types for automatic selection.
Main menu for adjusting various audio parameters and sound effects.
Adjusts bass and treble levels for overall sound shaping.
Configures surround back speaker output for 5.1 channel sources.
Controls various sound effects like Re-EQ, Upsampling, Subwoofer, and Late Night.
Adjusts audio timing and speaker relative delay for proper synchronization and soundfield.
Sets the Low Frequency Effect (LFE) level for Dolby Digital and DTS sources.
Adjustments for mono playback, including Academy Filter and input channel selection.
Customizes the Theater-Dimensional listening mode settings for immersive sound.
Modifies surround modes for Dolby Digital, DTS, and Pro Logic II for enhanced playback.
Settings specific to THX listening modes, including Re-EQ and decoder options.
Enables sound effect adjustments for specific listening modes like Mono Movie and Enhanced 7.
Main menu for customizing user preferences and operational settings.
Configures volume display, muting level, maximum volume, and power-on volume.
Adjusts the headphone volume level relative to speaker output.
Customizes the On-Screen Display (OSD) menu appearance, including background and mode.
Adjusts the position of the OSD menu on the screen for optimal viewing.
Introduction to the multi-functional remote controller and its basic operation.
Instructions for operating an Onkyo cassette tape deck using the remote.
Instructions for operating an Onkyo DVD player with the remote controller.
Instructions for operating an Onkyo CD player with the remote controller.
Instructions for operating an Onkyo MD recorder with the remote controller.
Guide to programming the remote to control other manufacturers' devices.
List of codes for programming the remote to operate various brands of equipment.
How to use the remote controller after programming it for specific modes like DVD, SAT, and CABLE.
Instructions for operating a VCR using the programmed remote controller mode.
Instructions for operating a TV using the programmed remote controller mode.
Step-by-step guide for teaching the remote controller to operate other devices.
Procedure to remove a single learned command from a specific button.
How to clear all learned commands associated with a particular MODE button.
Explanation of macros and how they allow single-button operation of multiple commands.
Step-by-step guide to creating a macro sequence on the remote controller.
How to run a programmed macro sequence using the remote controller.
Procedure to delete a specific macro sequence from a MACRO button.
Resets the remote controller to factory defaults, erasing all custom programming.
Solutions for power-related issues like no power or no sound after power on.
Troubleshooting steps for no sound or low volume from specific speakers.
Solutions for issues related to AM/FM reception, noise, and preset recall.
Troubleshooting for issues with picture display, OSD, and audio/video synchronization.
Solutions for problems where the remote controller does not operate the unit.
Addresses issues with specific functions like Late Night, Re-EQ, Multichannel, and remote zone operation.
| continuous average power output | 100 W per channel min. RMS at 8 Ω, 130 W min. RMS at 6 Ω |
|---|---|
| continuous power output (DIN) | 135 W at 6 Ω |
| maximum power output (EIAJ) | 160 W at 6 Ω |
| dynamic power output (stereo) | 2 × 250 W at 3 Ω, 2 × 210 W at 4 Ω, 2 × 130 W at 8 Ω |
| total harmonic distortion | 0.08% at rated power |
| IM distortion | 0.08% at rated power |
| damping factor | 60 at 8 Ω |
| phono input sensitivity and impedance | 2.5 mV, 50 kΩ |
|---|---|
| line input sensitivity and impedance | 200 mV, 50 kΩ |
| multichannel input sensitivity and impedance | 200 mV, 50 kΩ |
| subwoofer input sensitivity and impedance | 36 mV, 50 kΩ |
| coaxial input sensitivity and impedance | 0.5 Vp-p, 75 Ω |
| video input sensitivity and impedance | 1 Vp-p, 75 Ω |
| rec out level and impedance | 200 mV, 470 Ω |
|---|---|
| pre out level and impedance | 1 V, 470 Ω |
| video output level and impedance | 1 Vp-p, 75 Ω |
| component video output level and impedance | 1 Vp-p, 75 Ω (Y), 0.7 Vp-p, 75 Ω (PB, PR) |
| frequency response | 10 Hz to 100 kHz : +1/–3 dB |
|---|---|
| RIAA deviation | 20 Hz to 20 kHz : ±0.8 dB |
| bass tone control | ±10 dB at 50 Hz |
| treble tone control | ±10 dB at 20, 000 Hz |
| signal-to-noise ratio (direct) phono | 80 dB (IHF A, 5 mV input) |
| signal-to-noise ratio (direct) line | 110 dB (IHF A, 0.5 V input) |
| FM tuning range | 87.5–108.0 MHz (USA & Canadian models), 87.50–108.00 MHz (Other models) |
|---|---|
| usable sensitivity mono | 11.2 dBf, 1.0 µV (75 Ω IHF) |
| usable sensitivity stereo | 17.2 dBf, 2.0 µV (75 Ω IHF) |
| 50 dB quieting sensitivity mono | 17.2 dBf, 2.0 µV (75 Ω) |
| 50 dB quieting sensitivity stereo | 37.2 dBf, 20 µV (75 Ω) |
| capture ratio | 2.0 dB |
| image rejection ratio | 40 dB (USA & Canadian models), 85 dB (Other models) |
| IF rejection ratio | 90 dB |
| signal-to-noise ratio mono | 76 dB |
| signal-to-noise ratio stereo | 70 dB |
| alternate channel attenuation | 55 dB |
| selectivity | 50 dB (DIN) |
| AM suppression ratio | 50 dB |
| total harmonic distortion mono | 0.2% |
| total harmonic distortion stereo | 0.3% |
| frequency response | 30 Hz–15 kHz, ±1.0 dB |
| stereo separation | 45 dB at 1 kHz |
| AM tuning range | 530 to 1, 710 kHz (USA & Canadian models), 522 to 1, 611 kHz (Some Asian and Australian models), 522 to 1, 611 kHz (Worldwide models) |
|---|---|
| usable sensitivity | 30 µV |
| image rejection ratio | 40 dB |
| IF rejection ratio | 40 dB |
| signal-to-noise ratio | 40 dB |
| total harmonic distortion | 0.7% |
| power supply | AC 120 V, 60 Hz (USA & Canadian models), AC 230–240 V, 50 Hz (Australian models), AC 220–230 V, 50/60 Hz (Some Asian models), AC 220–230 and 120 V switchable, 50/60 Hz (Worldwide models) |
|---|---|
| power consumption | 8.1 A (USA & Canadian models), 655 W (Other models) |
| dimensions | 435 × 175 × 459 mm |
| weight | 35.9 lbs. (USA & Canadian models), 17.3 kg (Other models) |
| transmitter | Infrared |
|---|---|
| signal range | Approx. 16 ft., 5 meters |
| power supply | Two “AA” batteries (1.5 V × 2) |