Do you have a question about the Onkyo TX-SR805 and is the answer not in the manual?
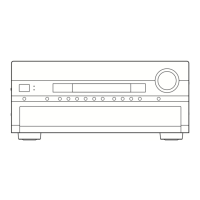
Overview of the AV receiver's front panel controls and indicators.
Explanation of the AV receiver's display indicators and messages.
Identification of the AV receiver's rear panel connection terminals.
Instructions for inserting batteries into the remote controller.
Explanation of different operating modes for controlling AV components.
Guidance on setting up speakers for surround sound experience.
Details on speaker channel connections and setup options.
Instructions for connecting the supplied indoor FM antenna.
Instructions for connecting the supplied AM loop antenna.
General guidelines for making audio and video connections.
Step-by-step guide for connecting TVs and projectors.
Instructions for connecting DVD players for audio and video.
Guide for connecting VCRs or DVRs for playback purposes.
Instructions for connecting VCRs or DVRs for recording purposes.
Steps for connecting satellite, cable, or terrestrial receivers.
Information about the HDMI interface and its capabilities.
Detailed steps for establishing HDMI connections.
Guide for connecting game consoles to the AV receiver.
Instructions for connecting camcorders and other AV components.
Guide for connecting CD players for audio playback.
Instructions for connecting various audio recorders.
Steps for connecting Onkyo RI Docks for iPod control.
Guidance on connecting Onkyo components via RI.
Procedure for powering the AV receiver on and placing it in standby.
Initial configuration of speaker impedance and type.
Configuring HDMI output for optimal video signal flow.
Assigning HDMI inputs to specific input selectors.
Assigning component video inputs to input selectors.
Customizing input selector names for RI-capable components.
Assigning digital audio inputs to input selectors.
Assigning analog inputs, including multichannel audio.
Automated speaker calibration using the setup microphone.
Standard procedures for selecting sources and adjusting volume.
Steps for tuning into AM and FM radio stations.
Directly tuning into radio stations using frequency input.
Utilizing Radio Data System features for FM stations.
Searching for radio stations based on program type.
Storing favorite radio stations as presets.
Adjusting the brightness of the AV receiver's front panel display.
Setting the AV receiver to turn off automatically.
Choosing between analog, digital, multichannel, and HDMI audio inputs.
How to choose different surround sound listening modes.
Table showing compatible listening modes for various source formats.
Detailed descriptions of various listening modes.
Procedure for recording audio and video from a selected source.
Overview of the AV receiver's setup menu structure and navigation.
Compensating for harsh high-frequency content in soundtracks.
Reducing dynamic range for late-night listening.
Adjusting bass, treble, and other audio parameters.
Setting default listening modes for different audio formats.
Manual configuration of speaker settings.
Specifying connected speakers and crossover frequencies.
Setting speaker distances from the listening position.
Adjusting individual speaker volume levels for balance.
Fine-tuning speaker tone with a 7-band equalizer.
Configuring THX-specific audio settings.
Customizing settings for individual input sources.
Assigning custom names to input selectors and radio presets.
Adjusting general settings like volume display and muting.
Configuring hardware settings like remote ID and tuner options.
Methods for connecting Zone 2 speakers directly or to an amp.
Instructions for connecting Zone 3 speakers to an amplifier.
Activating or deactivating the powered Zone 2 speaker output.
Configuring volume control for Zone 2 and Zone 3 outputs.
Choosing input sources for Zone 2 and Zone 3.
Controlling AV receiver and components in other zones with remote kits.
Programming remote control codes for other AV devices.
Specific remote codes for Onkyo components via RI connection.
Instructions for controlling a TV using the remote.
Copying commands from other remote controllers.
Programming macro buttons for sequences of actions.
Solutions for the AV receiver not powering on.
Troubleshooting steps for audible noise issues.
Steps to resolve issues with the remote controller not functioning.
Technical specifications for the AV receiver's amplifier.
Details on the AV receiver's various audio output terminals.
| Channels | 7.1 |
|---|---|
| HDMI Inputs | 3 |
| HDMI Outputs | 1 |
| Dolby Technologies | Dolby Digital, Dolby Digital EX, Dolby Pro Logic II, Dolby Pro Logic IIx, Dolby TrueHD |
| DTS Technologies | DTS, DTS-ES, DTS 96/24, DTS-HD Master Audio |
| THX Certification | THX Select2 |
| Component Video Inputs | 3 |
| Component Video Outputs | 1 |
| Composite Video Inputs | 5 |
| Composite Video Outputs | 2 |
| Digital Audio Inputs (Optical) | 3 |
| Digital Audio Inputs (Coaxial) | 3 |
| Digital Audio Outputs | 1 (Optical) |
| Analog Audio Inputs | 7 |
| Analog Audio Outputs | 2 |
| Phono Input | Yes |
| Multi-room Output | Yes |
| Zone 2 Output | Yes |
| Preamp Outputs | 7.1 |
| Subwoofer Outputs | 2 |
| Remote Control | Yes |
| Frequency Response | 5 Hz-100 kHz |
| Power Output per Channel | 130 W (8 Ohm, 20 Hz-20 kHz, 0.05% THD, 2 channels driven) |
| THD | 0.05% |
| Input Sensitivity | 200mV |
| Signal-to-Noise Ratio | 106 dB (Line), 80 dB (Phono) |
| Weight | 50.7 lbs |