2
0. What’s in the box
a. Ooni Connect™ Digital
Temperature Hub
b. Mounting bracket
c. Thumb nut (comes attached to Hub)
d. Ambient temperature cable
e. Food probe
f. AA Batteries
g. Mounting Bracket screws
1. Buttons and inputs:
a. Power button (long press)
°C / °F selector (short press)
b. Temperature cycle (short press)
Bluetooth activation (long press)
c. Back-light button
Eco-mode (long press)
Back-light (short press)
d. Food probe input 1
e. Food probe input 2 (optional)
f. Ambient temperature input A
g. Factory reset button
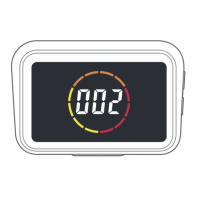
2. Screen
a. Main temperature display
b. Temperature ring
c. °C indicator
d. °F indicator
e. Ambient temperature Indicator
f. Food probe 1 Indicator
g. Food probe 1 display
h. Food probe 2 indicator (optional)
i. Food probe 2 display (optional)
j. Bluetooth status indicator
k. Low battery indicator
l. Eco mode indicator
3. Install batteries
Remove screws using a screwdriver and remove hatch. Insert 2x AA batteries.
Replace hatch and secure screws.
If you are storing the oven for more than a month, remove the batteries.
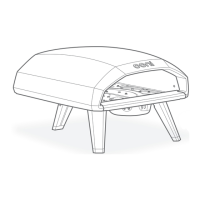
4. Set up and assembly
4.1
|
Attaching Ooni Connect™ Digital Temperature Hub
a. Using 2x bracket screws, attach the mounting bracket to the underside of
the oven.
b. Attach the Ooni Connect™ Digital Temperature Hub to the bracket using the
thumb nut (comes attached to the Hub).
4.2
|
Attaching the ambient temperature cable
a. Plug ambient temperature cable into the input on the underside of the oven.
b. Plug the opposite end into the corresponding input on the back of the Ooni
Connect™ Digital Temperature Hub.