no. 56 on one unit. Press → until you reach option 56. Press → to
switch from 0 to 1, to turn on the network display. Press → and →
simultaneously to save, then press and hold → for a few seconds
to return home. The unit will display each monitor connected
in order of their address. If the unit does not display the others
scrolling by, check the following;
• each unit must have a unique address, setting 39, with no
duplicates
• end-of-line jumpers are set on units at ends of cable only
• polarity of the communication cable and the 24 Vac is the
same on all units
• verify wire connections for shorts, and loose wires, etc.
8. To further test communication, press and hold the up button on
a monitor for 5 seconds to start manual mode (5 minutes). This
will close the relay 1 on that unit and all of the other units on the
network. See section 5 to set up a conguration for multiple
zones.
For assistance contact Opera Inc.
(see back cover for contact info)
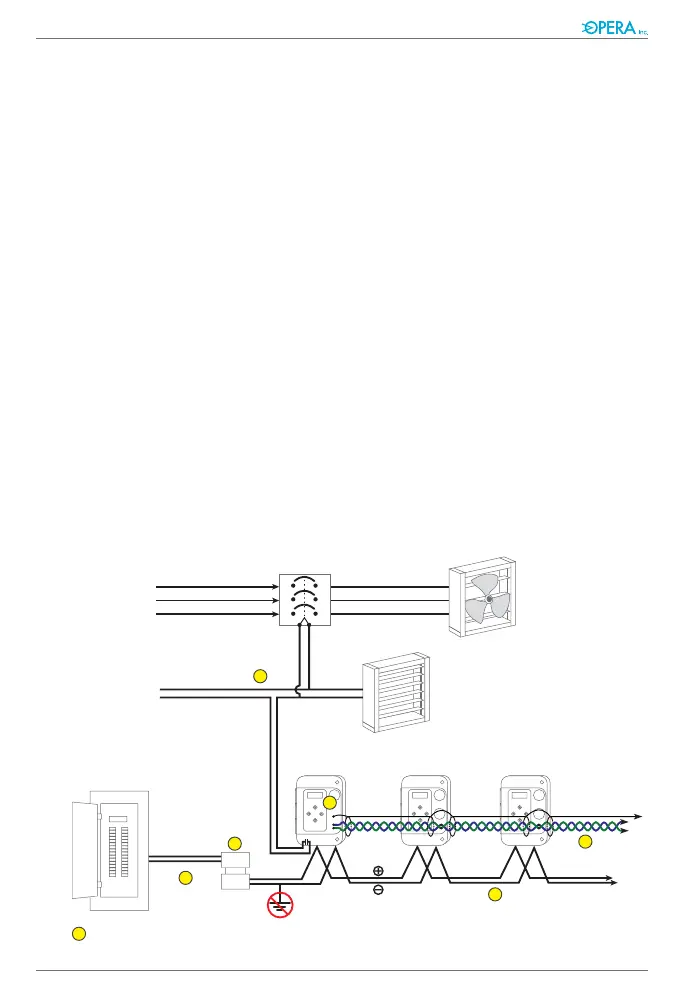
3.3 Installation
Electrical
Distribution
Panel
Magnetic
Starter
Exhaust Fan
Dampers
Fan Power
Source
Power source
for controls
to other
sensors
H
S
L
5
6
4
3
2
1
1
24 Vac
Transformer