Optelec ClearView C
English 23
4.3. The Advanced Control Pad
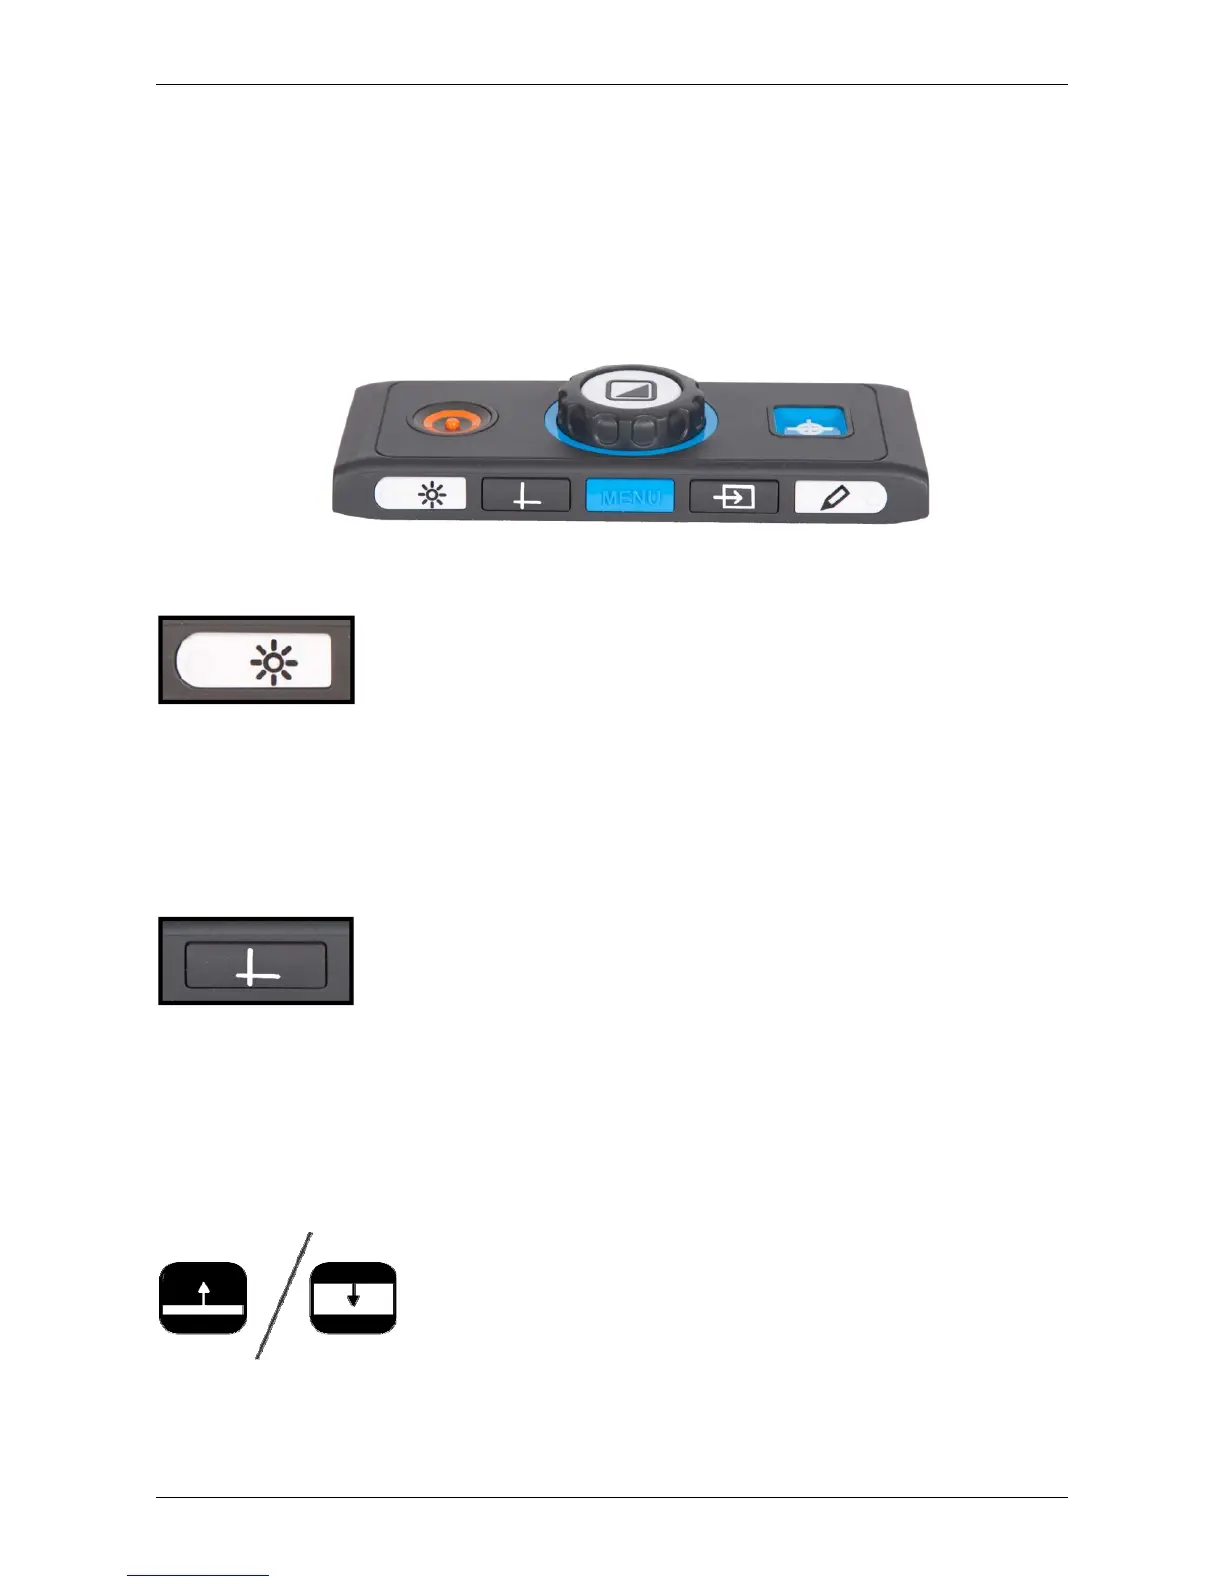
The Advanced Control Pad is correctly placed in the reading table when five
rectangular buttons are facing you and three larger buttons are on top of the
Control Pad.
The ClearView C One only allows you to access the menu.
4.3.1. Adjusting the image control
If characters or other on-screen elements are not clearly
visible, use the image control to enhance the image and
increase the sharpness. To adjust the image control, press
the white Image Control button marked with a dot and a “sun” icon once
(most left button). Now use the Zoom dial to adjust the image control. If no
button is pressed within three seconds, the Zoom dial will revert back to its
original zoom function.
This function is not available for the ClearView C One.
4.3.2. Activating line markers / window shades
Pressing the grey Lines / Windows button (second button
from the left) cycles you through the line markers, window
shades and full screen camera image modes. Line markers
are used as guides to make reading text easier or to help you write under the
ClearView C. The window shades function is used to block a part of an image
when screen brightness becomes inconvenient or when you need to
concentrate on only one or two lines of text.
This function is not available for the ClearView C One.
4.3.3. Positioning line markers / window shades
When line markers or window shades are activated,
press the grey Lines / Windows button for 3 seconds.
The top or left line or window shade blinks to indicate it
can be moved up, down, left and / or right. Use the
Zoom dial to move the line marker or window shade.
Press the Lines / Windows button to adjust the other line or window shade.
To move the other line marker or window shade use the Zoom dial. Press the
Lines / Windows button again to exit Lines / Windows modification mode.
This function is not available for the ClearView C One.





 To Next Page