Guide Bar
Mechanical Timber Harvesting Handbook
80
Sprocket Nose Replacement: HS
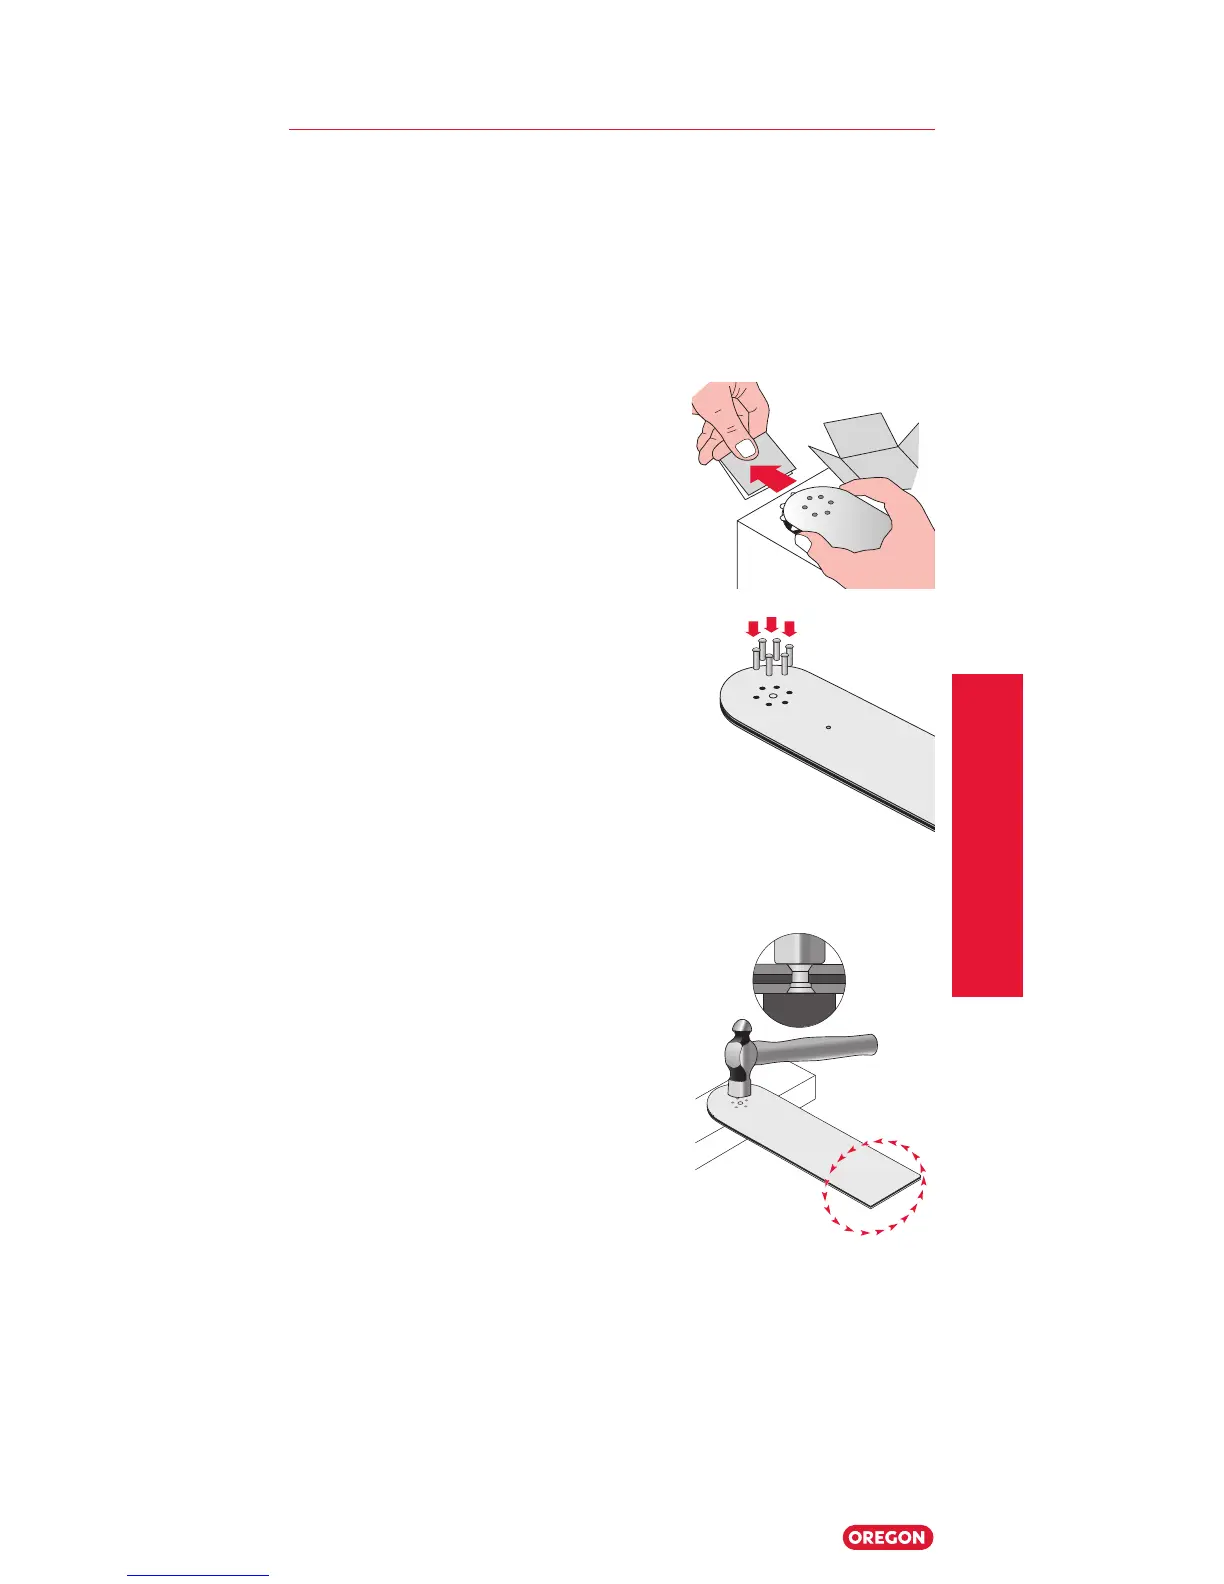
4. Inside the nose sprocket package, you’ll find the new sprocket
wrapped in a tissue. Be careful to keep the sprocket inside the
tissue as you remove it from the package — bearings are
easily lost. Slide the tissue and the new sprocket, together, into
the guide bar’s nose.
5. Once fully inside the nose, hold
the nose sprocket in place, then
remove the tissue.
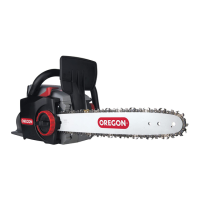
6. Align the sprocket’s inner race
holes with the holes in the guide
bar nose. Insert rivets into each
hole through the guide bar. On
used guide bars, the nose rails
could be spread apart. Use a
small clamp to hold the nose
rails together when inserting and
securing the rivets.
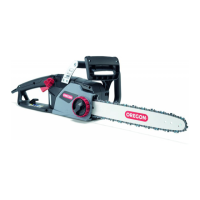
7. With the guide bar and rivets solidly
supported on a strong, flat metal
surface, carefully peen the rivet
heads down with the flat end of a
hammer. Be careful to hit only the
rivet head. Do not hit the guide bar
body — this will pinch the nose
sprocket. Rivet heads must be snug
and secure while still allowing the
drive sprocket to turn freely.
8. Clean out the bar groove to ensure it is free of possible
debris.