EasyManua.ls Logo

Orion COMBI 3601VT - Removal of Anode Cap; Installation

Orion COMBI 3601VT
69 pages
Print Icon
To Next Page IconTo Next Page
To Previous Page IconTo Previous Page
Loading...
DISASSEMBLY
INSTRUCTIONS
3.
REMOVAL
OF
ANODE
CAP
Read
the
following
NOTED
items
before
starting
work.
*
After
turning
the
power
off
there
might
still
be
a
potential
voltage
that
is
very
dangerous.
When
removing
the
Anode
Cap,
make
sure
to
discharge
the
Anode
Cap's
potential
voltage.
Do
not
use
pliers
to
loosen
or
tighten
the
Anode
Cap
terminal,
this
may
cause
the
spring
to
be
damaged.
REMOVAL
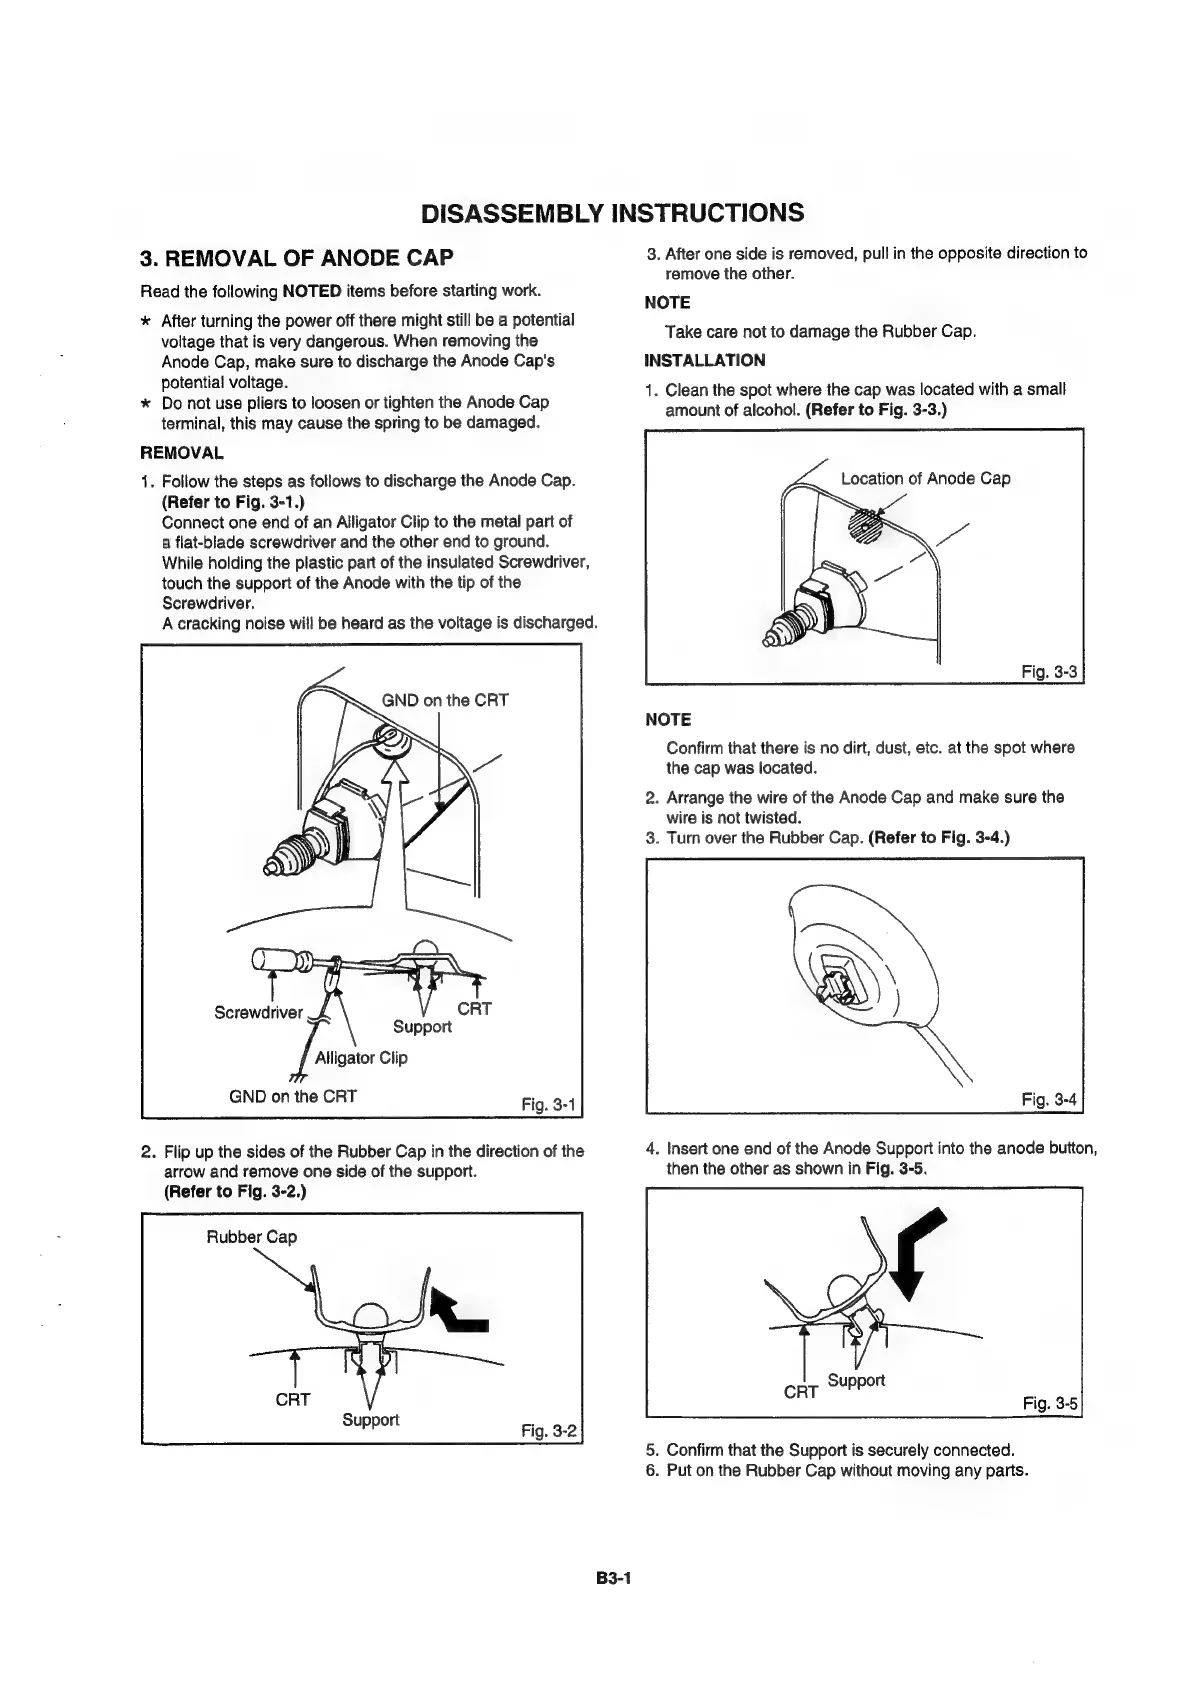
1.
Follow
the
steps
as
follows
to
discharge
the
Anode
Cap.
(Refer
to
Fig.
3-1.)
Connect
one
end
of
an
Alligator
Clip
to
the
metal
part
of
a
flat-blade
screwdriver
and
the
other
end
to
ground.
While
holding
the
plastic
part
of
the
insulated
Screwdriver,
touch
the
support
of
the
Anode
with
the
tip
of
the
Screwdriver.
A
cracking
noise
will
be
heard
as
the
voltage
is
discharged.
Screwdriver
Alligator
Clip
GND
on
the
CRT
2.
Flip
up
the
sides
of
the
Rubber
Cap
in
the
direction
of
the
arrow
and
remove
one
side
of
the
support.
(Refer
to
Fig.
3-2.)
Rubber
Cap
B3-1
3.
After
one
side
is
removed,
pull
in
the
opposite
direction
to
remove
the
other.
NOTE
Take
care
not
to
damage
the
Rubber
Cap.
INSTALLATION
1.
Clean
the
spot
where
the
cap
was
located
with
a
small
amount
of
alcohol.
(Refer
to
Fig.
3-3.)
Location
of
Anode
Cap
NOTE
Confirm
that
there
is
no
dirt,
dust,
etc.
at
the
spot
where
the
cap
was
located.
2.
Arrange
the
wire
of
the
Anode
Cap
and
make
sure
the
wire
is
not
twisted.
3.
Turn
over
the
Rubber
Cap.
(Refer
to
Fig.
3-4.)
4.
Insert
one
end
of
the
Anode
Support
into
the
anode
button,
then
the
other
as
shown
in
Fig.
3-5.
5.
Confirm
that
the
Support
is
securely
connected.
6.
Put
on
the
Rubber
Cap
without
moving
any
parts.