19
SUSPENSION
OSET bikes feature adjustable front and rear suspension. The available adjustability is a great
feature. Separate owner’s manuals are provided. Please read for further informaon on how
to best set up the suspension.
The front suspension is an ‘air’ fork. A specic air pump is required to add pressure which can
be purchased from your local OSET dealer. The fork is also adjustable for rebound & preload
via two simple dials located on the top of the fork.
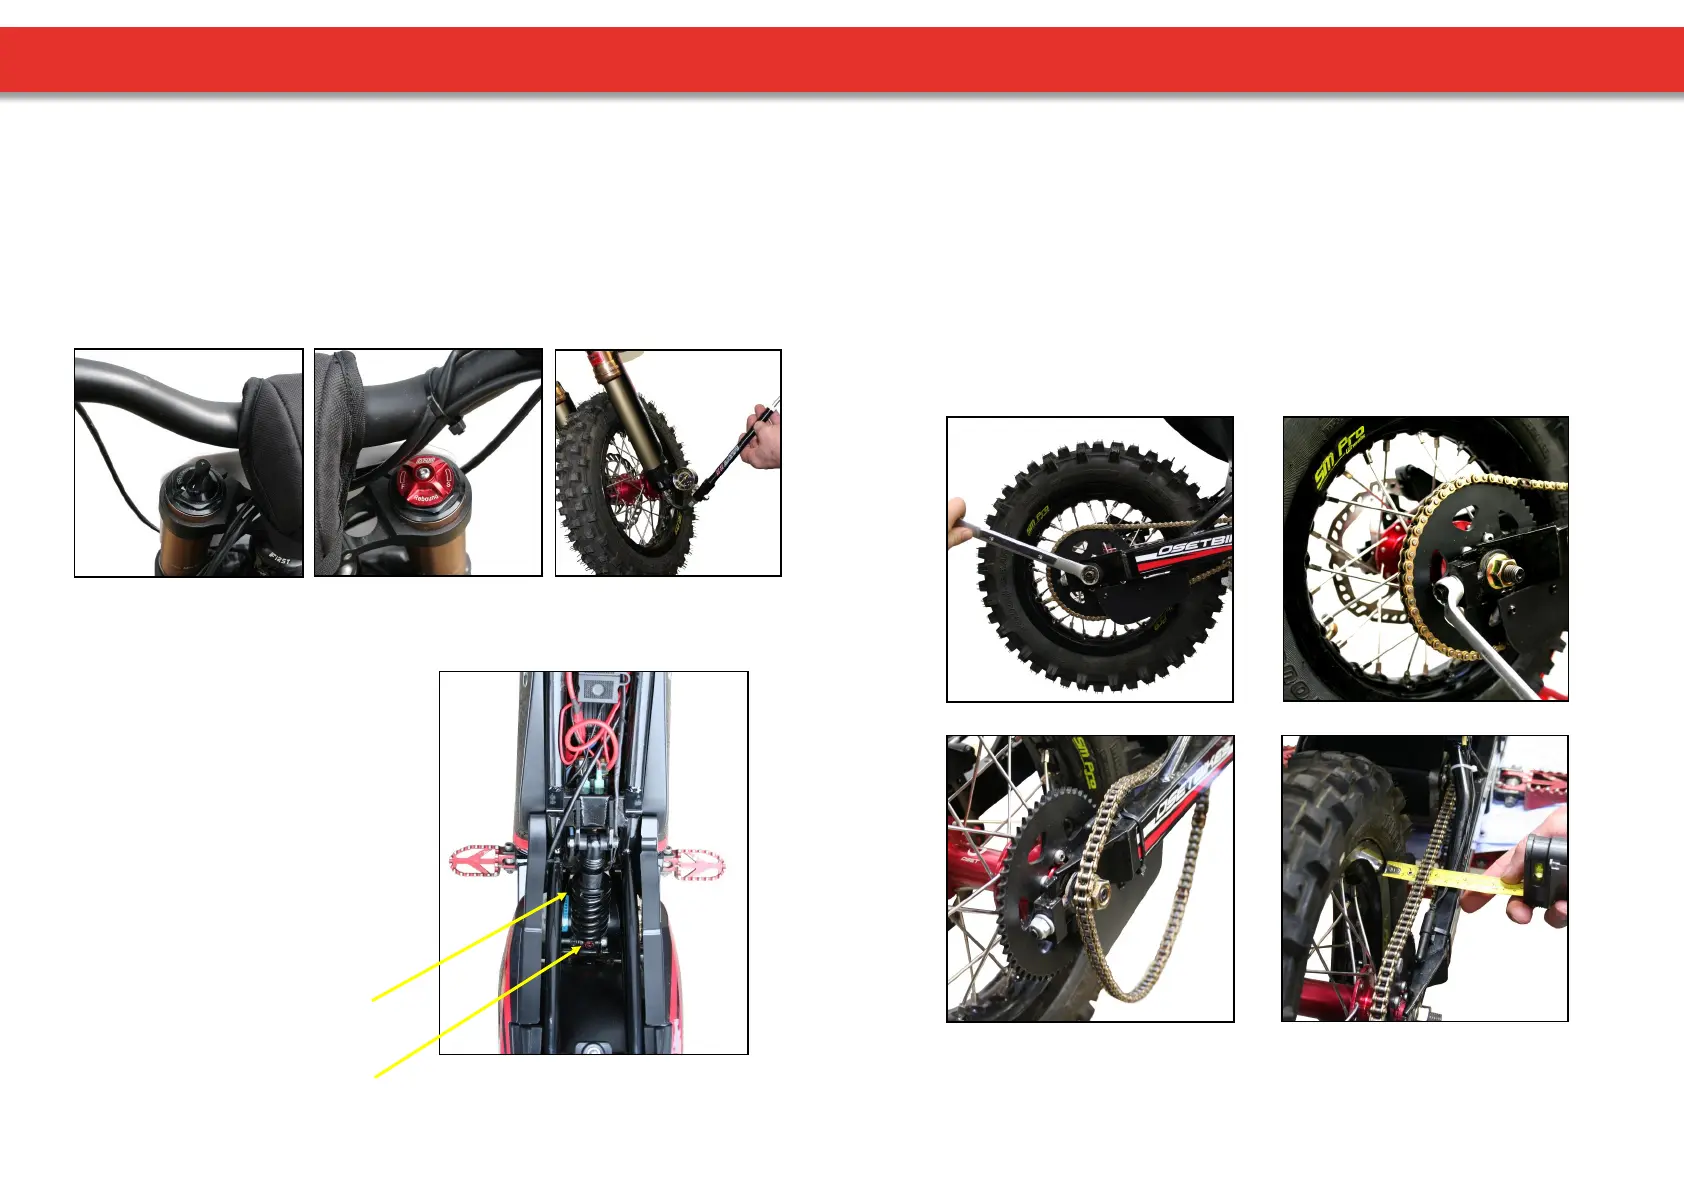
FRONT SUSPENSION FORKS
Preload Dial. Rebound Dial. Suspension Air Pump.
Your OSET bike is equipped with a single
coil spring type rear shock. For a harder/
ser ride at the rear ghten the
adjustment ring in a clockwise
direcon.
For a soer ride, loosen the adjuster by
turning an-clockwise. It also features a
very eecve rebound dial.
Oponal springs are available from your
OSET dealer to adjust the spring rate.
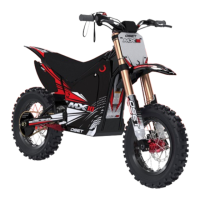
REAR SUSPENSION
Rebound Dial
Adjustment ring
20
WHEEL REMOVAL AND INSTALLATION
Please refer to the secon on assembling your OSET bike (page 12) for informaon on
installing the front wheel, and reverse the instrucons for removal.
FRONT WHEEL
1. Ensure power is switched o and the key removed.
2. Li the bike onto a block or stand so the wheels are o the ground.
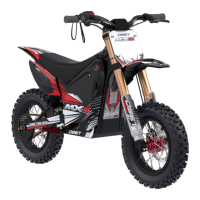
3. Loosen the axle bolts (see image 1.)
4. Loosen the chain adjustment nuts to the point where the wheel can be pushed
forward, and the chain slipped o to the right of the sprockets (image 2 & 3).
5. Pull back on the wheel to remove it.
REAR WHEEL
(1.) (2.)
(3.) (4.)
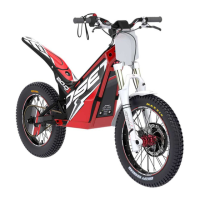
6. To re-install the wheel reverse the above procedures. Ensure the chain is correctly
adjusted and lubricated, the wheel is aligned, and all nuts and bolts are ght
(image 4).