31
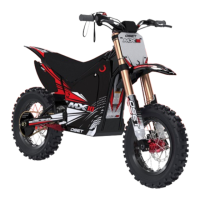
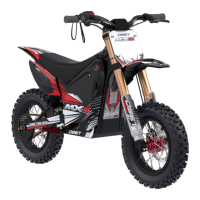
SETTING UP YOUR OSET FOR RIDING
1. Set the speed dial to the correct level for the rider.
Low for non-experts and all riders under 10 years old.
ALWAYS CHECK BEFORE RIDING.
2. Set the ‘response’ dial to the correct level for the rider.
Low for all non-experts and all riders under 10 years old.
ANTI-CLOCKWISE for low. CLOCKWISE for high.
3. Set the ‘power’ dial to the correct lever for the rider.
Low for non-experts and all riders under 10 years old.
ANTI-CLOCKWISE for low. CLOCKWISE for high.
A. Ensure everyone is clear of the bike.
B. Place the bike on a stand or block, so both wheels are above the ground.
C. Switch the bike on.
D. Turn speed dial to low. Set to high for experienced/advanced
riders over 10 years old ONLY.
Turn the power dial in very small increments to the desired seng. ALWAYS start the rider on
the slowest sengs!
4. Check the res are inated to between 20 & 40 psi. Light riders can run lower
pressures.
5. Check the chain for ghtness and lubricaon.
6. Set the controls correctly for the rider.
A. With the wheels on the ground, sit the rider on the bike.
B. Adjust the lever posions so they are easy to reach, and check that the
brakes are funconing correctly, and at the desired level. Adjust the ‘reach’
of the levers to suit the rider. For more informaon see page 19.
Improper set-up is dangerous! It is your responsibility to set the machine to the ability of
the rider. Failure to do so could result in serious injury or death, and damage to
the machine.
WARNING!
32
NOTE
As the responsible adult, you must ensure that the OSET and its rider are ready to ride, every
me. The bike must be set to the abilies of the rider, and you must ALWAYS supervise when,
where and how the bike is ridden. Children can lose concentraon quickly, and be distracted
easily. If the speed or throle response is set too high then loss of control could result.
STATIONARY LEARNING
RIDING INSTRUCTIONS & SAFETY TIPS
1. Ensure the key switch is in the o posion.
2. Li the machine on to a stand or block so the back wheel is an inch or two o the
ground. Ensure the bike is stable and cannot be rocked or fall o the stand.
3. Sit the rider on the machine.
4. Explain all the controls:
A. Throle
B. Front Brake (right hand side).
C. Rear Brake (le hand side).
Have the rider pracce each control, while the power is sll o.
5. Explain that it’s me to try some staonary pracce, with the power turned on. Place
the rider’s feet either on the pegs, or on the ground. Either way, make sure the rider is
wearing boots with no laces, and no loose clothing.
6. Start with both hands on the handlebars.
7. With the power on, and the riders hands on the bars, have the rider pracce opening
and closing the throle. The aim is to get some throle control, and not use it as an
‘on-o’ switch. This is very important.
DO NOT RIDE UNTIL THIS HAS BEEN LEARNED FULLY.
8. While sll praccing the throle, pracce using the rear brake to stop the back wheel.
Make sure that this is coordinated. The throle and brake should not be applied
simultaneously.
UNTIL THESE SKILLS ARE MASTERED, DO NOT LET THE CHILD RIDE THE BIKE!
BEGGINERS & LEARNERS
With the bike set up correctly, your OSET is ready to ride! For learning riders, please use these
ps and instrucons. The riders will get the most enjoyment if they feel safe and in control.
Do not be tempted to start the riders too quickly. Make sure the speed and response are set
to their slowest sengs to begin.
NOTE
If the rider does not fully understand the controls and demonstrate these skills, do not let
them ride. They can try again at a later date when they are ready. The riders must learn at
THEIR pace.