21
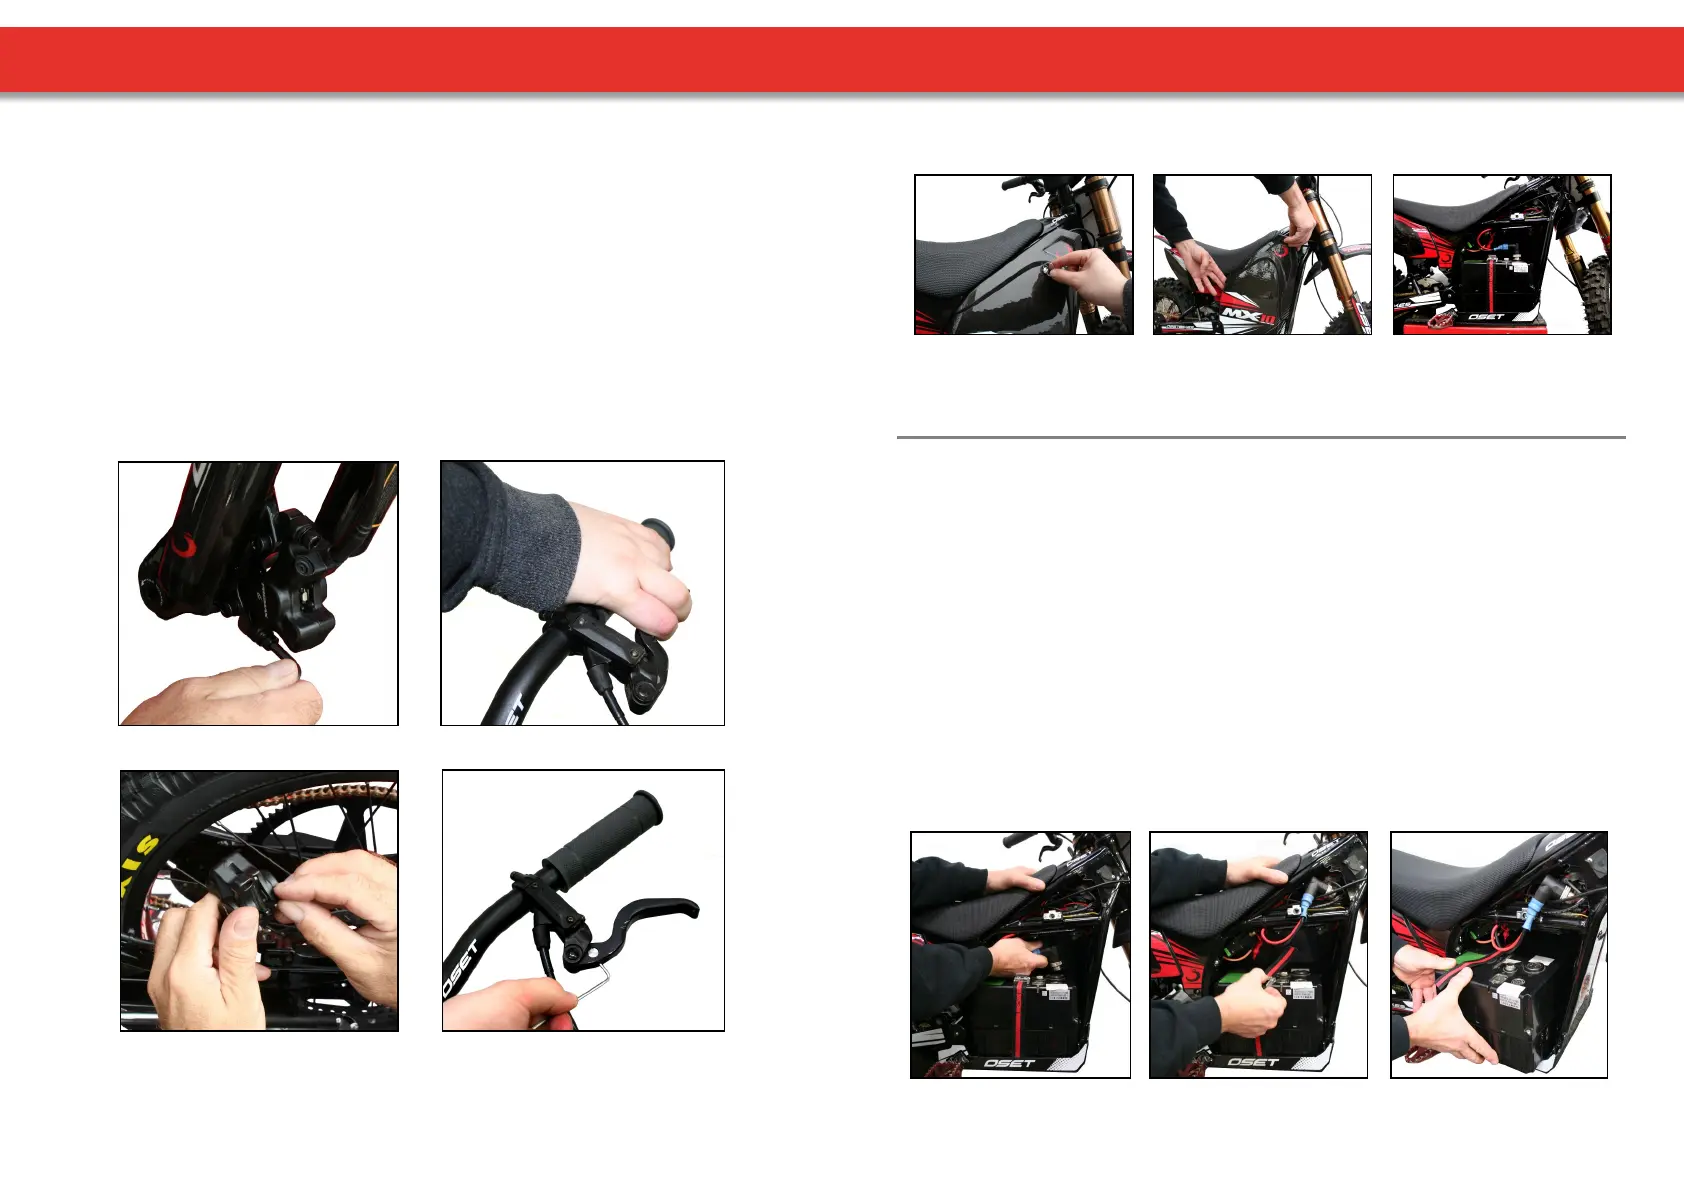
BRAKE ADJUSTMENT
The brakes are self adjusng to a point, but correct alignment is vital to get the maximum
performance. The pads must be equidistant from the disc for maximum eciency.
Visually inspect the pads as you spin the wheel. Check that alignment is good and pad to disc
distance is even. If adjustments are needed follow the instrucons below:
Using an Allen wrench, loosen the calliper mounng bolts, allowing the calliper to
move freely from le to right.
With the bike raised, spin the wheel before pulling the brake lever. This will allow the
calliper to ‘centre’ on the disc.
With the lever sll holding the pads ghtly on the disc, re-ghten the calliper bolts.
If the wheel does not spin freely with the brake released and further adjustment is
required beyond the limits of the built in adjustment, the calliper posion itself can be
adjusted further by the use of spacer washers. In this way, the calliper can be lined up
perfectly.
Loosen calliper. Squeeze lever.
Inspect pads. Adjust lever reach.
The brake levers can be adjusted for ‘reach’. Use a small 2mm Allen key.
Turn an-clockwise to bring the reach closer to the bar (for smaller hands).
22
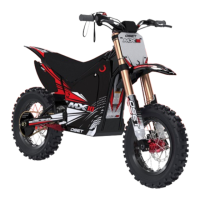
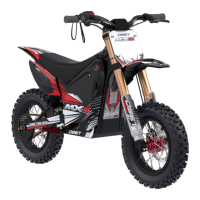
SIDE PANEL & BATTERY REMOVAL
• Ensure power is turned o, and remove the key.
• With the side panel already removed, unscrew & disconnect the power lead (image 4).
• Next, release the baery retaining strap (image 5).
• Finally, carefully li the baery box out of the bike (image 6).
To reinstall baery, reverse the procedure above.
REMOVING THE SIDE PANEL
(1.) Twist fastener (2.) Li side panel clear (3.) Side panel removed
To reinstall the side panel, reverse the procedure above. Ensure fastener is ghtened securely.
BATTERY REMOVAL
(4.) (5.) (6.)
Please Note:
This secon of the user manual only applies to bikes supplied with an ocial OSET lithium
baery pack & charger. For bikes supplied with other baeries, please see the suppliers
instrucons for baery removal & charging.