1. Remove the five machine screws
located on the rear cover of the device.
2. Separate the rear cover from the front
cover by gently pulling them away from
each other.
3. Carefully separate the PCB (terminal
board) from the front cover.
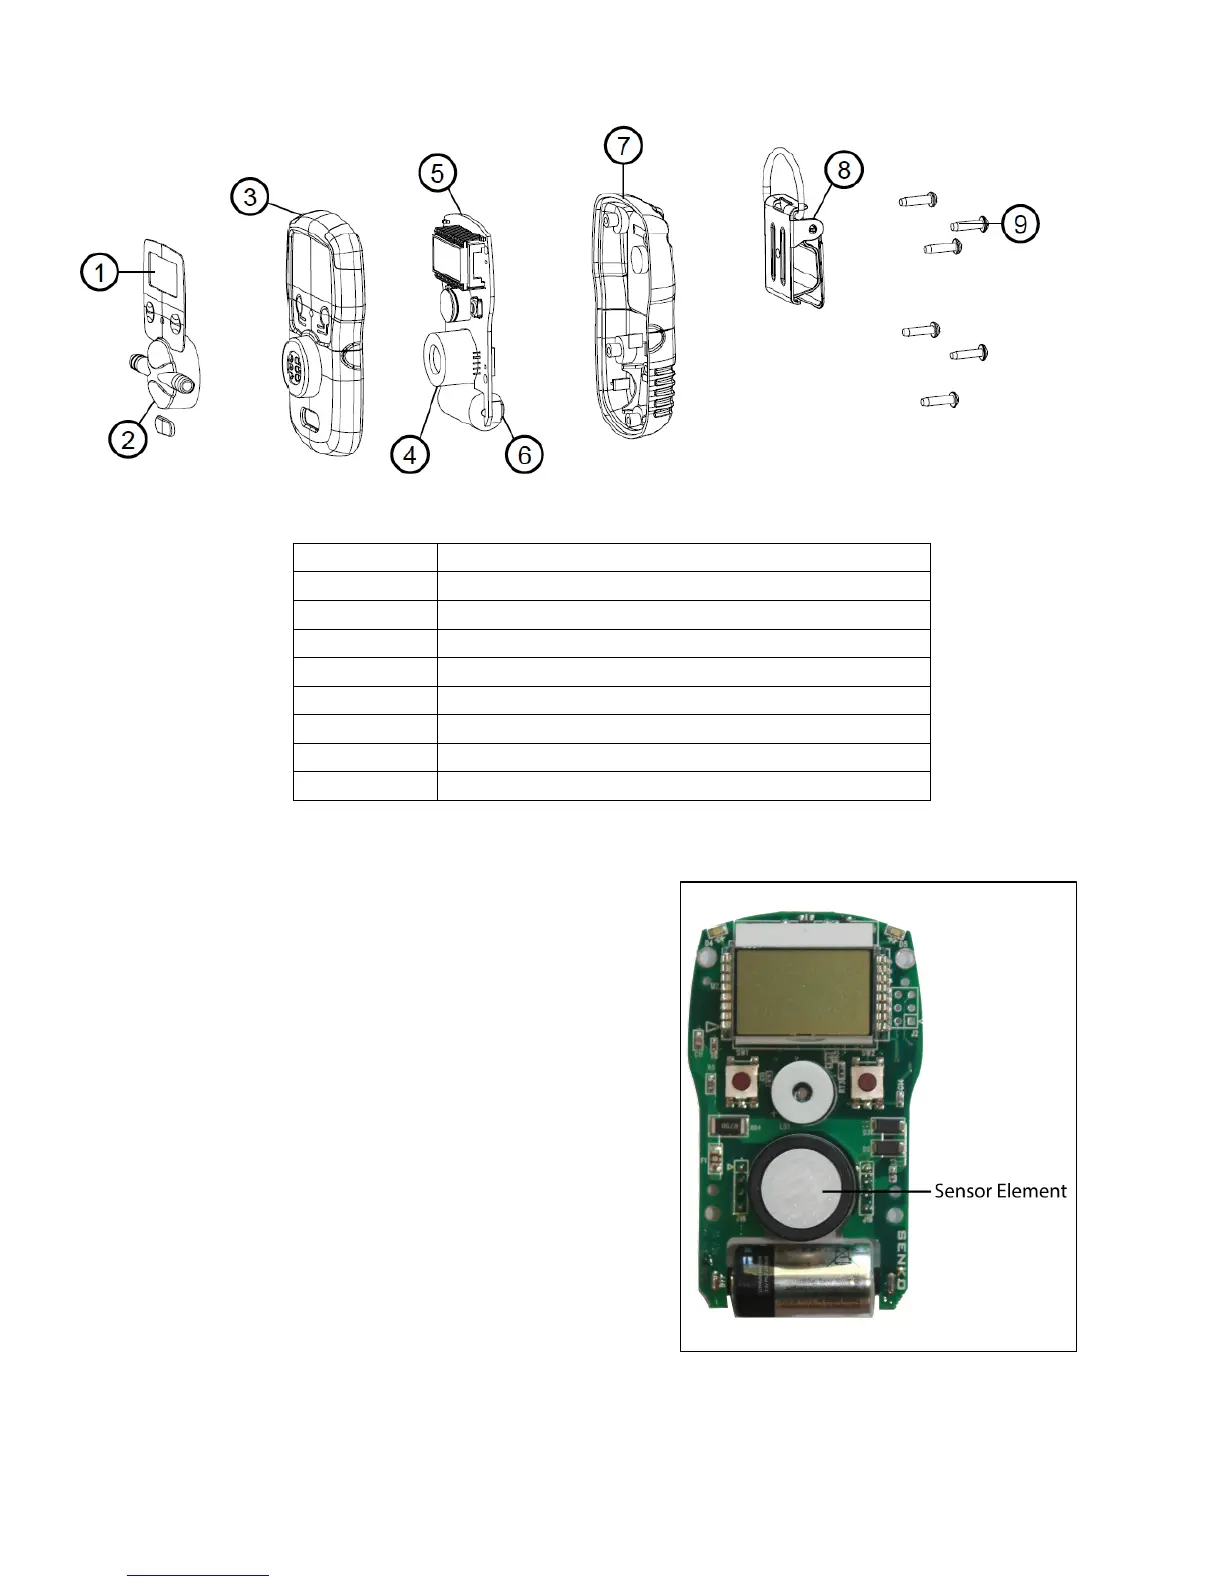
4. Using your thumb and forefinger, gently
pull the sensor element off of the
terminal board.
5. Align the sensor element prongs of a
new sensor element with the eyelets on
the terminal board. Slide the senor
element into place.
6. Place the terminal board back into the
front cover.
7. Place the front and rear covers together, then replace the five machine screws.
 Loading...