31
Deployment
When securing the multiprobe to a structure, carefully place straps such as web belts and
large plastic Ty-wraps on both ends of the mulitiprobe housing (Figure 7). Do not use
clamps to secure the multiprobe to a structure. Also, secure the cable in the same manner
to protect it from floating debris, navigation, and vandalism.
Always make sure the weighted sensor guard is installed to protect the sensors and
provide additional sinking weight to the multiprobe.
Calibration stability is dependent on the environmental conditions in which the sonde is
deployed. For example, a D.O. sensor on a DS5 or MS5 may become fouled if deployed in
a warm, shallow, biologically active lake. However, deployment length can be increased
by a factor of 5 by using a DS5X which periodically cleans the fouling from the sensors.
On the other hand, the same sonde deployed in a clean water environment, or a sonde
configured with sensors impervious to fouling (i.e., Temperature, Conductivity) can be left
unattended for months without the need to recalibrate. Optimal deployment time for a
specific environment can be determined by making periodic measurements of sensitive
parameters with another instrument.
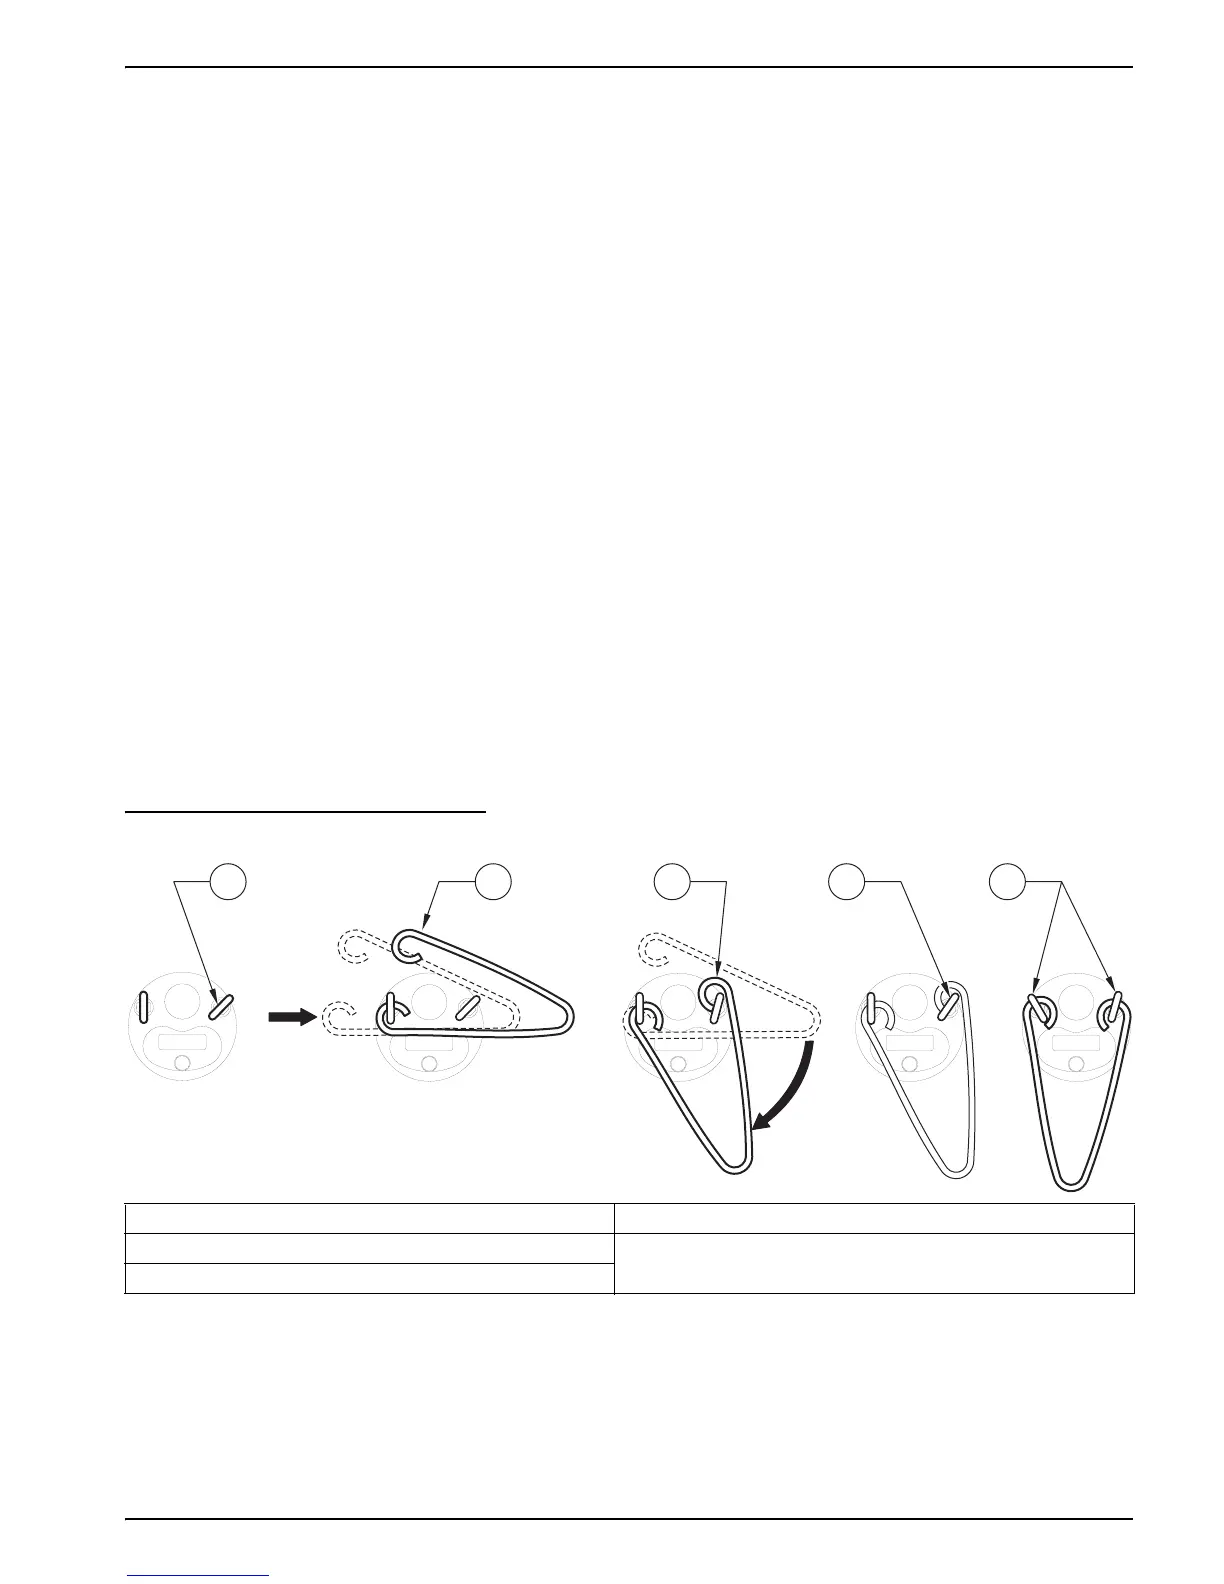
5.2.2.1 Anchoring the DS5 or DS5X using the Support Bail
1. Run a rope or chain through the bail, if the Sonde is equipped with a support bail.
2. Fix the bail into the two eyebolts on the top of the Sonde by first loosening the
lock-nuts and turning the eyebolt 90°, and then back, so that the bail can be looped
through.
3. Securely tighten the lock-nut on each eyebolt. If the mulitprobe is not equipped with
internal batteries, it may not have a bail but can be secured using the locking sleeve.
Figure 8 DS5 Support Bail Installation
1. Turn the eye bolts to the positions shown. 4. Rotate the eye bolt around the bail as shown.
2. Hook the bail into the eye bolt as shown. 5. Finish rotating the eye bolts until the bail cannot
be removed.
3. Rotate the bail into the other eye bolt as shown.
12345