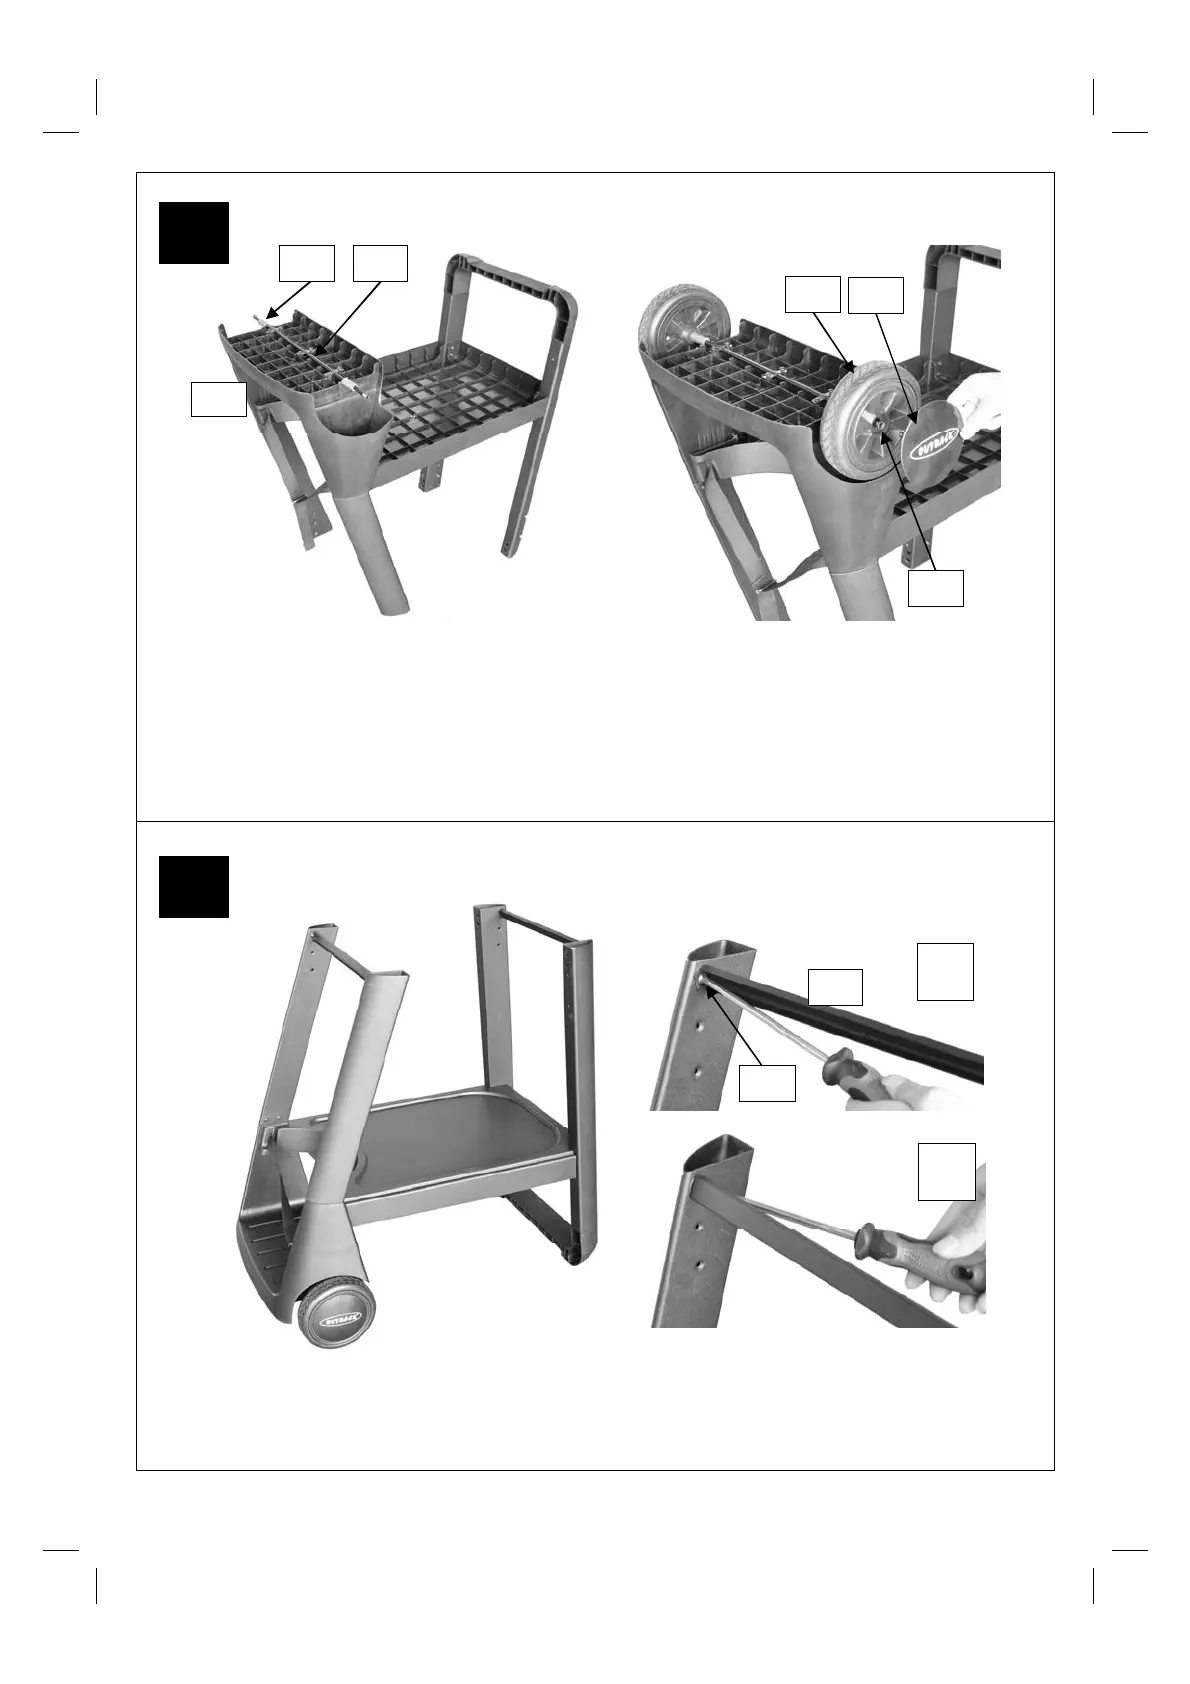
7
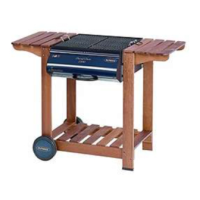
Insert the Axle (C19) through the clamping brackets underneath the Gas Bottle Holder (C14) and
tighten the clamping screws. Take care not to over tighten these screws which will damage the
plastic gas bottle holder.
Slide a Wheel Spacer (C16) over each end of the Axle (C19). Note: the spacers are packed in a
plastic bag with the electrode, grease cup holder and grease cup.
Slide the Wheels (C17) over each end of the axle. Secure the wheels into place with the Locknuts
(D8x2pcs). Place the Wheel Hubcaps (C18) onto the outside of the wheels.
Carefully turn the completed trolley over, right side up.
Attach the Body Supports (B13) to the legs using M6x15 Bolts (D1x4pcs).
D1
B13
√
×
C14
C19 C16
D8
C17
C18
5
6