OWC Data Doubler Installation
28
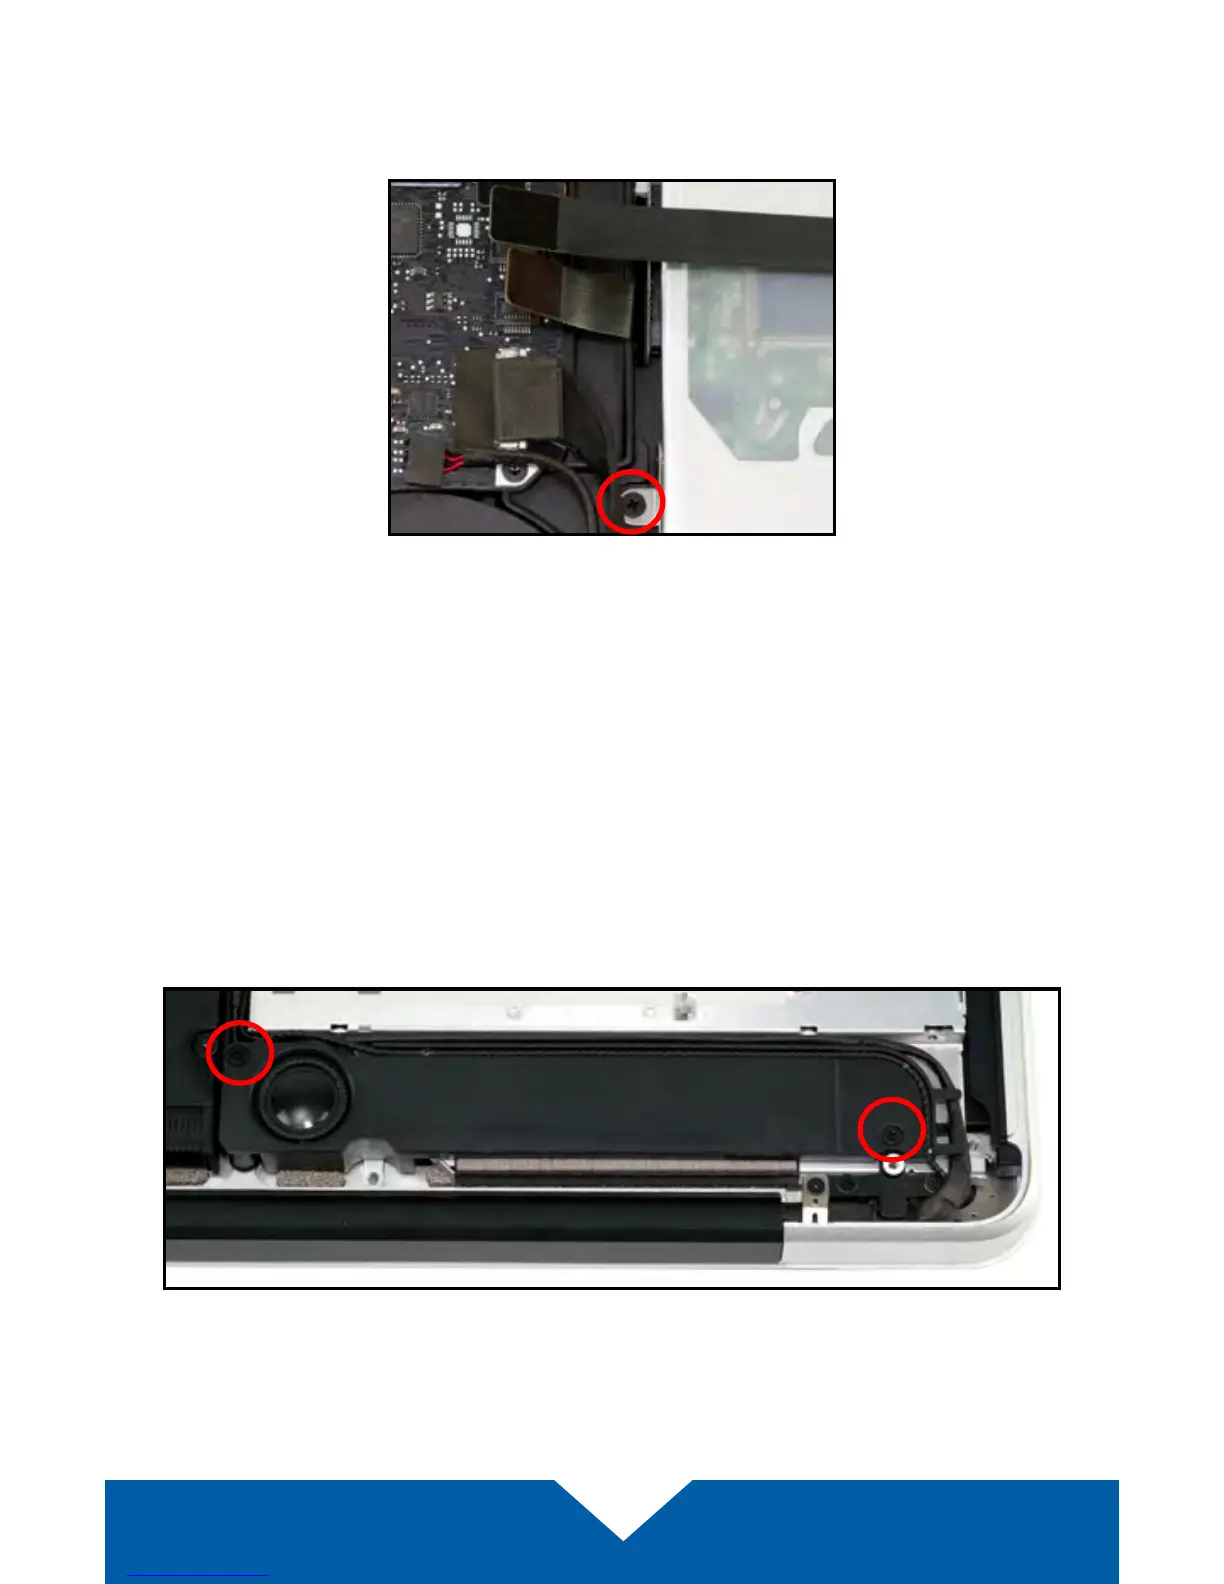
8. Locate the metal bracket that is attached to the left edge of the optical drive
with a small Phillips screw. It is just above the fan and below the cables you
disconnected in Step 7.
9. Remove the Phillips screw, being careful to not damage the small cable that
sits between the logic board and the optical drive. This screw will be used
again later during reassembly.
10. There is a speaker housing with an attached wire that is located beneath
the optical drive; the housing must be detached and set aside before the
drive can be removed. Loosen the two Phillips screws that secure the
housing (shown below in red) and gently lift it out of the chassis. You
do not need to detach it completely. These screws will be used during
reassembly.