OWC Data Doubler Installation
3
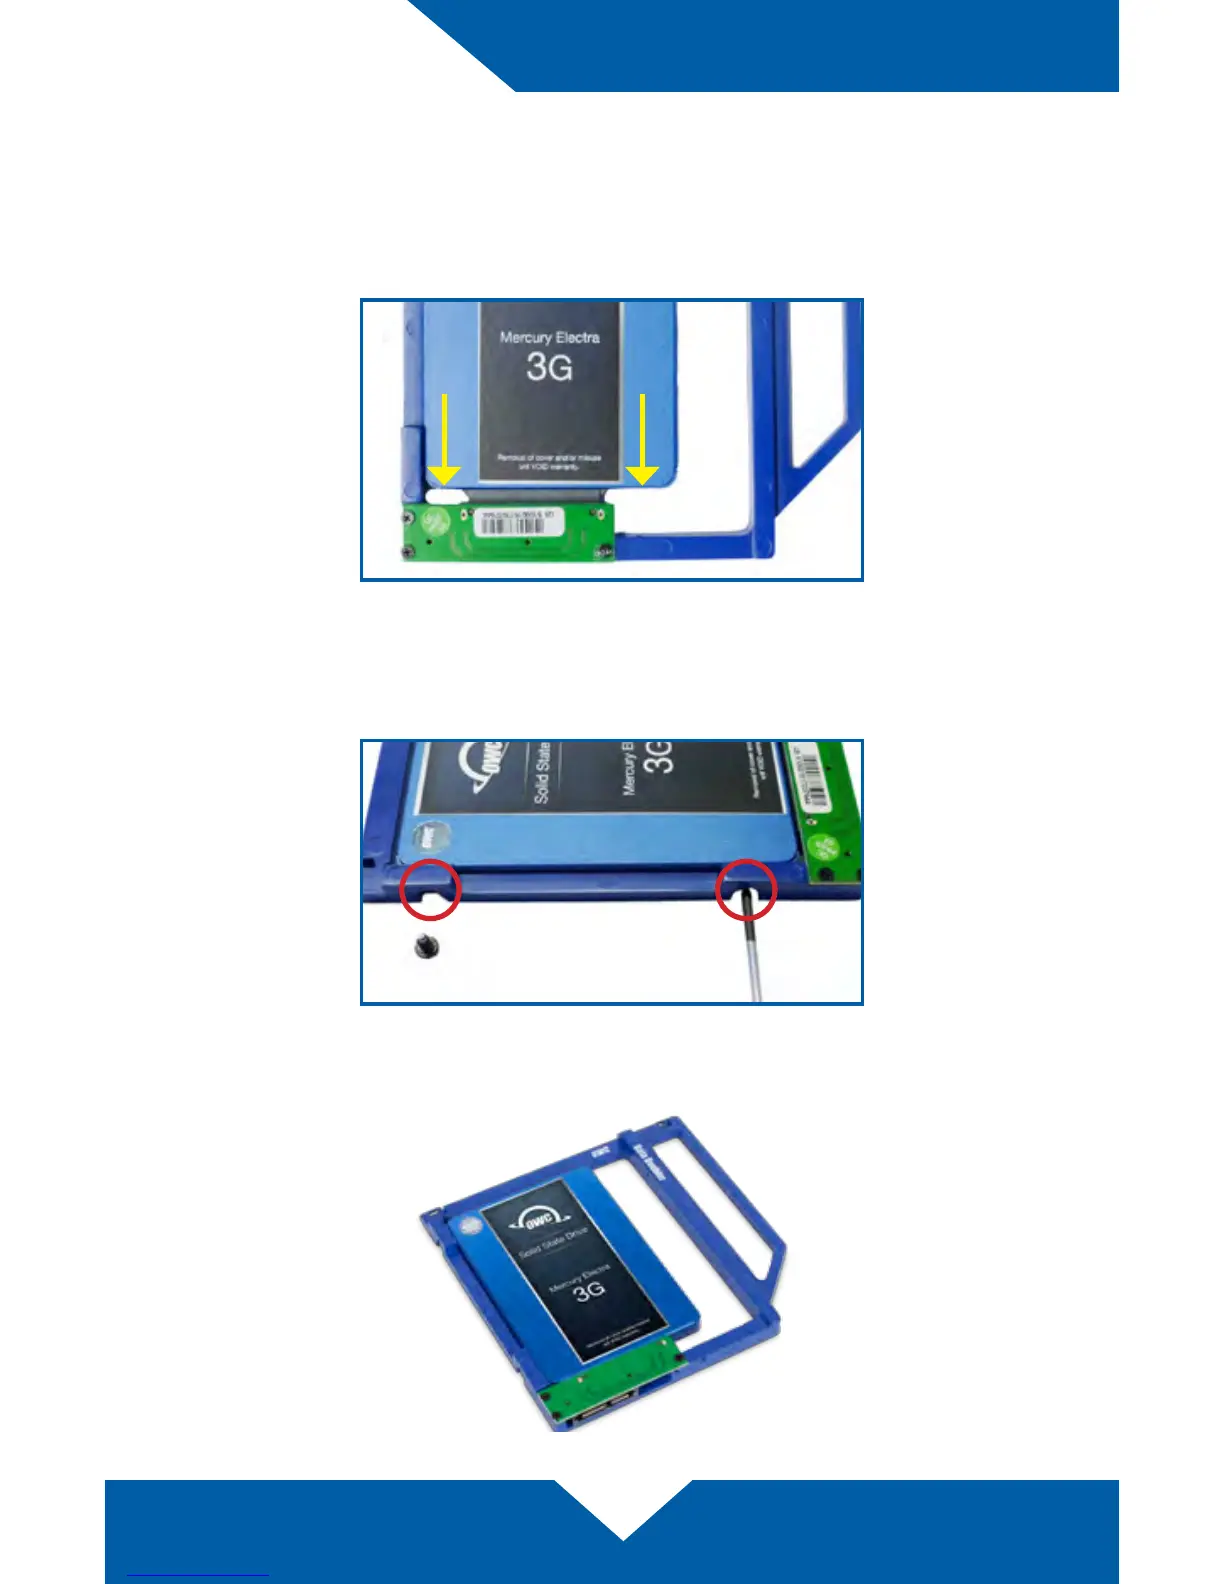
2.1 Mounting a 2.5" SATA Drive to the Bracket
1. Align the drive to the connector on the green circuit board, then apply
gentle pressure in the direction shown below to fully connect the drive.
2. Use the two large, round-head Phillips screws from the kit to ax the drive
to the side of the Data Doubler bracket (screw hole locations shown in red).
The OWC Data Doubler and SATA drive are now ready for installation.
Installation