OWC Mercury Rack Pro Chapter 3 - Formatting
3.3 Formatting your OWC Mercury Rack Pro on Windows 2000 and
later
Instructions for other operating systems can be found at http://www.macsales.com/format.
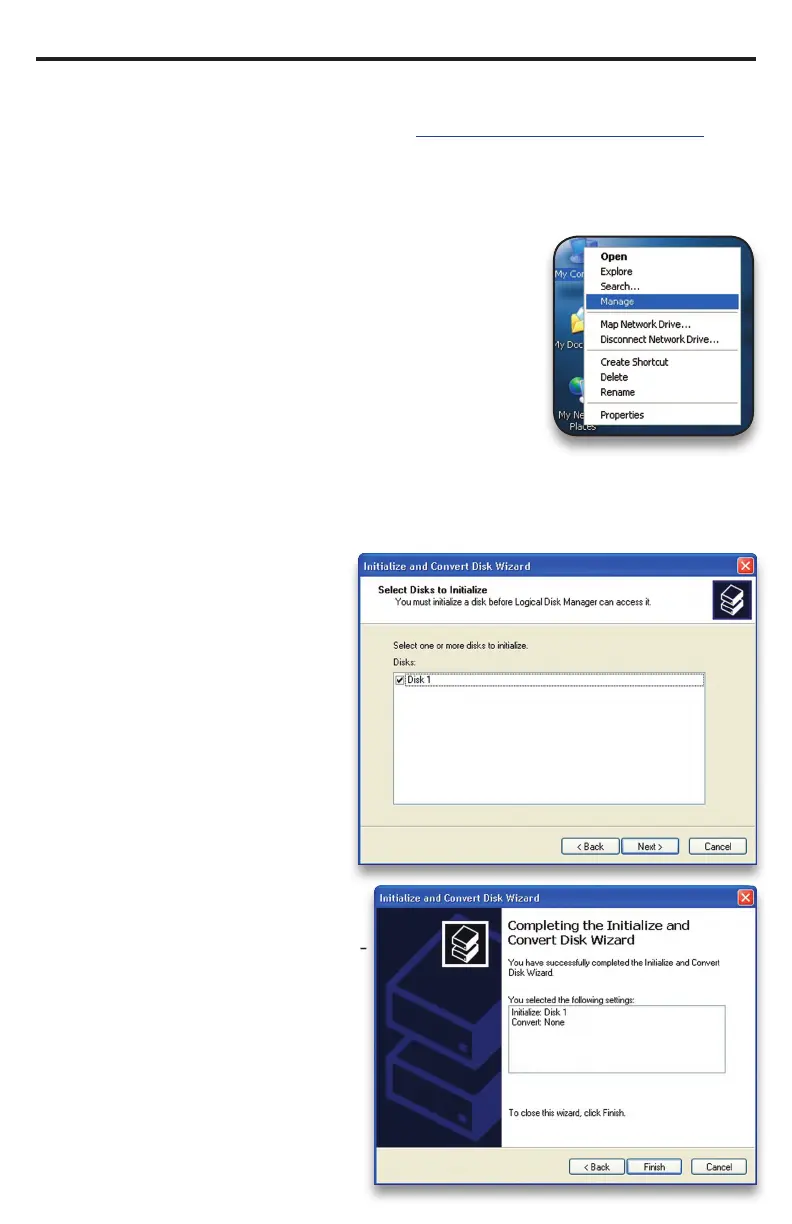
➀ With the drive connected to the computer and
powered on, right click on the “My Computer” icon
and select “Manage” from the menu. The “Initialize
and Convert Disk Wizard” window should appear.
If the Wizard does not appear, expand the Storage
menu by clicking on the plus (+) sign. Then, right
click next to the disk number of the drive that you
have just connected and click Initialize to bring up the Wizard.
➁ In the next window, there
should be only one drive listed.
That will be the drive that you
connected via eSATA, FireWire
or USB. Make sure the box next
to the drive name is checked
and click “Next.”
➂ The Wizard will perform its
tasks, and you will get the follow-
ing screen. You may click “Finish.”
IMPORTANT NOTE: This procedure will erase all data on your disk drives in the OWC
Mercury Rack Pro. Back up any important data before proceeding!
 Loading...