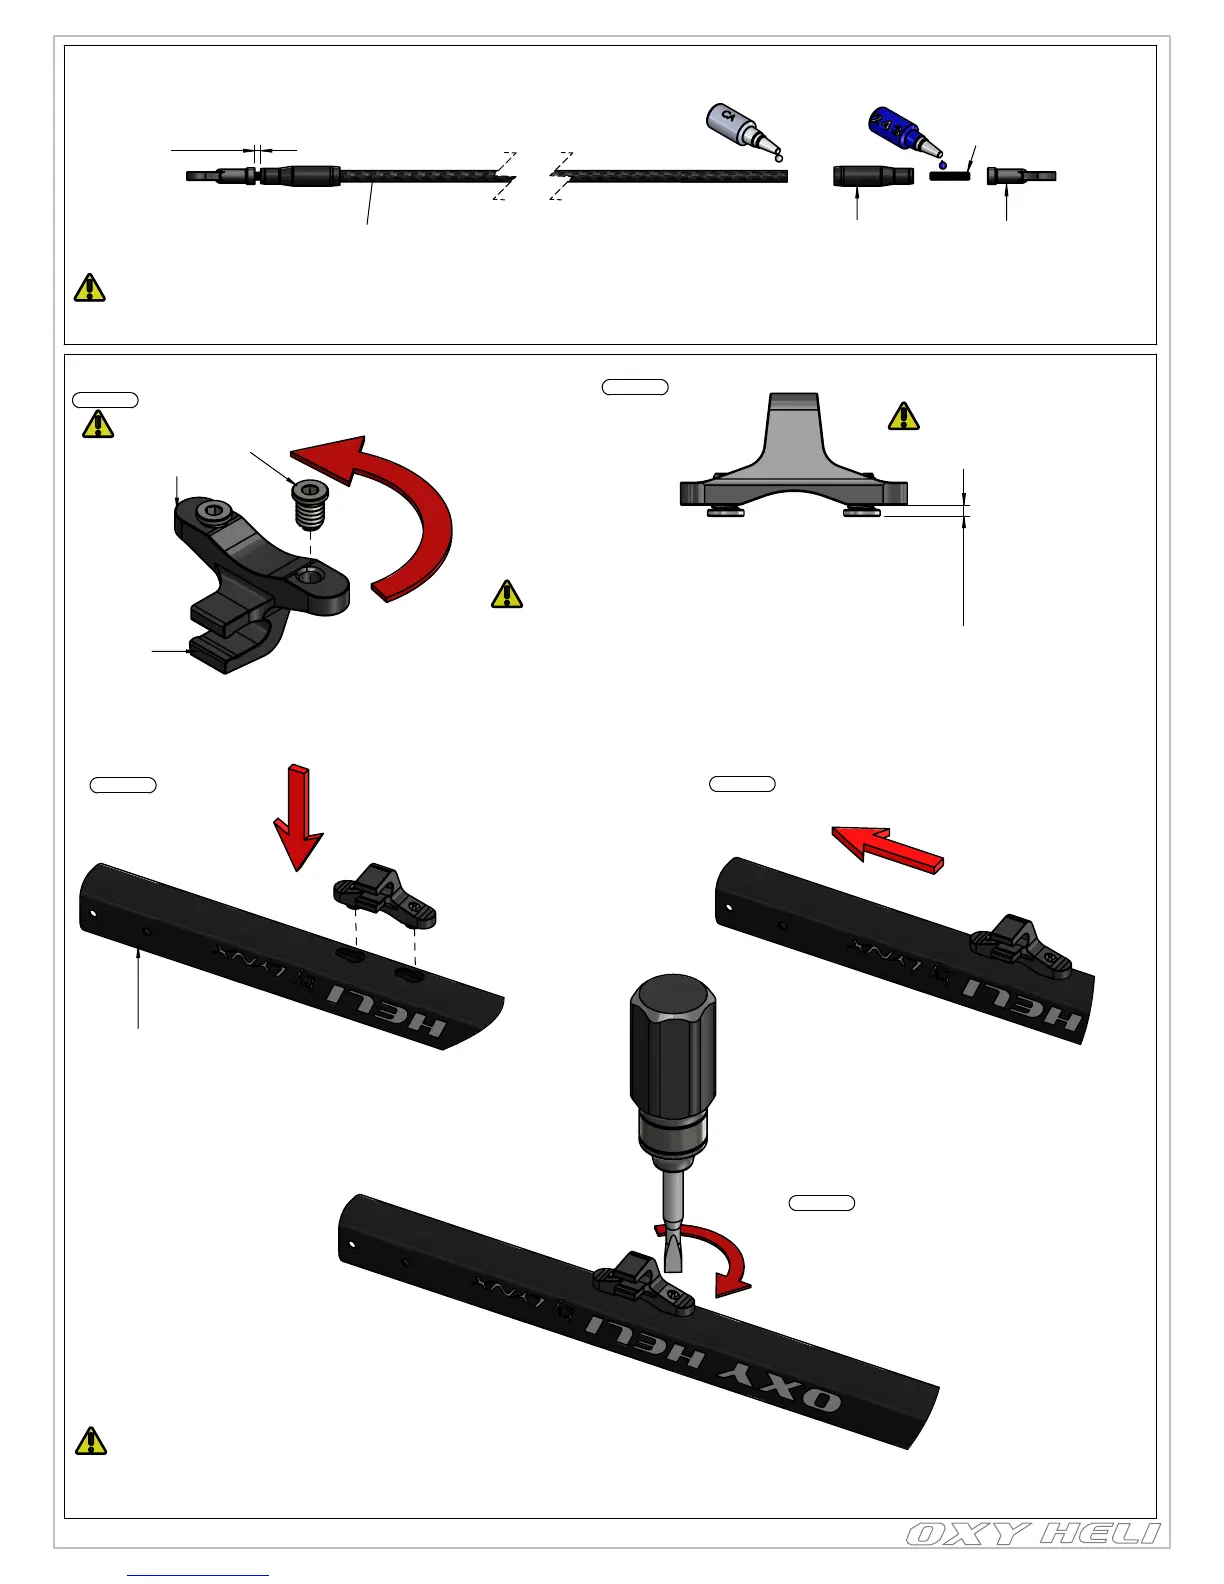
REF 1mm
REF >= 1.3mm
Important Note:
This part, for tuning reasons,
comes factory pre assembly,
it ready to use.
Important Note:
This part, for tuning reasons,
comes factory pre assembly,
it ready to use.
Note: to install this
pin screw rotate
counter clock wire.
Note Pin Screw Thread:
Oxy designed the Pin Screw with
a counter clockwise thread. This
will help on the final locking
operation. Be careful to follow our
instructions to get a perfect assembly.
Step 1:
Step 2:
Step 3:
Step 4:
Step 5:
OXY0067
Guide Push Rod
2 x OXY0539-
Pin Screw
OXY0578 - Tail Boom STD
Push the part inside the
boom sockets as shown.
Slide the parts as shown
In order to lock the tail push rod
support, use a Flat Screw Driver
and turn clockwise. Do not
over tighten.
OXY0584-STD Tail Push Rod
OXY0536-Al Tail Push
Rod Terminal
OXY0519-Threaded
Rod M1.4X7mm
OXY0526-Plastic
Linkage Ball 3mm
Carbon Fiber Tail Push Rod Assembly
(Box 3/Bag 1)
Tail Push Rod Guide Assembly
(Box 3/Bag 1)
Note: Install the Pin Screw
and leavea gap as shown.
Chapter 6: Tail Assembly
page 10