YOUR PERSONAL INFORMATION ORGANIZER
CALENDAR
152
8
CHAPTER
Creating an event
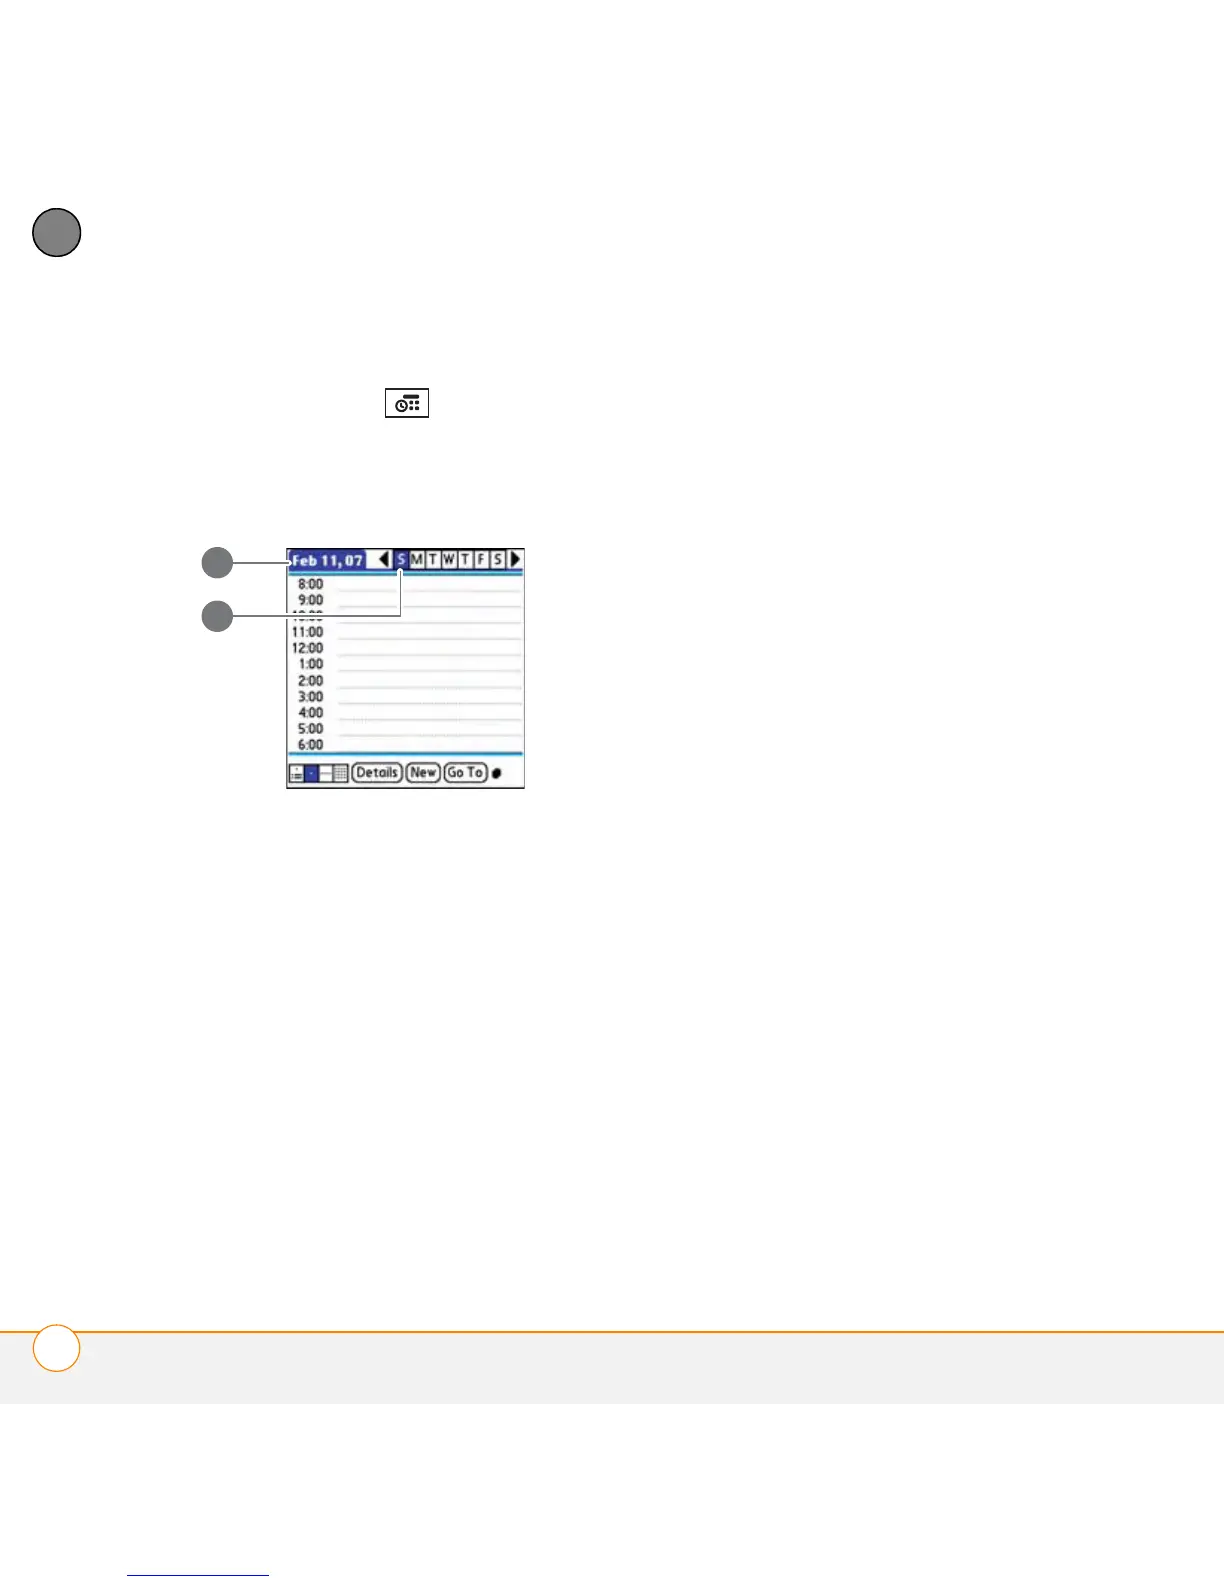
1 Press Calendar until Day View
appears.
2 Select Go To and then select the
desired day.
1 Selected date in Day View
2 Selected day
3 Select New.
4 Using the keyboard, enter a starting
hour and minute for the event, such as
545 for 5:45.
5 Select the End Time box and enter the
ending hour and minute for the event.
6 To assign a time zone to the event,
select the Time Zone pick list and
select a city in the time zone you want.
7 Select OK.
8 Enter a description for the event.
Adding time zone information to events
IMPORTANT If you sync with
Palm Desktop software, do not add time
zones to your events. Palm Desktop does
not support time zones.
If you use Microsoft Outlook, you can use
the time zone feature, but you must install
the conduit that came with your
smartphone (or a subsequent update) on all
the computers with which you sync your
smartphone. Chapura PocketMirror and
other earlier Microsoft Outlook conduits do
not support time zones.
To automatically assign a time zone to your
events, open the Options menu, select
Preferences, and check the New events
use time zones box. All your new events
will be assigned to your local time zone
(existing events aren’t affected), and you
can change the time zone setting for
individual events.