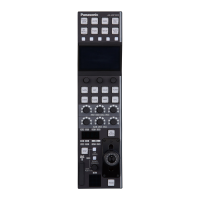
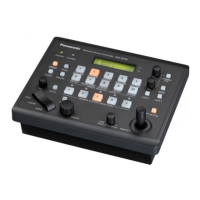
7 [COARSE] dial Adjusts how much the iris is opened or closed when the [IRIS] dial is moved.
Dial operation
This is enabled only when [IRIS LEV MODE] on the [ROP SETTING] menu is set to
“ABS”.
Turn right (clockwise) (OPEN): The [IRIS] dial will operate at its most sens-
itive range.
Turn left (counterclockwise)
(CLOSE):Decreases the iris value.
The [IRIS] dial will operate at its least sens-
itive range.
8 [IRIS] display This display shows the current iris setting.
9 [AUTO] button Use this button to enable the auto iris function.
For details on the auto iris function, see the following page.
“Iris (IRIS)” (see page 45)
Status displays
On: Enables the auto iris function.
Off: Enables manual adjustment of the iris using the [IRIS] lever.
10 [CLOSE] button Use this button to forcibly set the iris to CLOSE (closed).
Status displays
On: Forcibly sets the iris to CLOSE.
Off: Cancels iris CLOSE.
11 [M.PED] display This display shows the master pedestal value.
12 [IRIS LOCK] button Use this button to disable (lock) iris operation.
Lock range
Status displays
Off: Iris can be controlled.
Lit red: Iris operation is disabled (locked).
Flashing
red:
Due to iris adjustment from another device, the adjustment value and the [IRIS]
lever position do not match.
n If you adjust the [IRIS] lever to match the iris position of the camera while viewing the iris
gauge that appears at the bottom of the LCD panel (status screen), the button will turn
off and normal control will be possible.
A.
IRIS position of the camera
B.
[IRIS] lever position
n This also flashes if the camera adjustment values and [IRIS] lever position are offset
when the control target camera is switched. At the point in time when the [IRIS] lever is
moved to the position that matches the camera adjustment values, the button turns off
and normal control becomes possible.
- 31 -
Parts and their functions
 Loading...