33
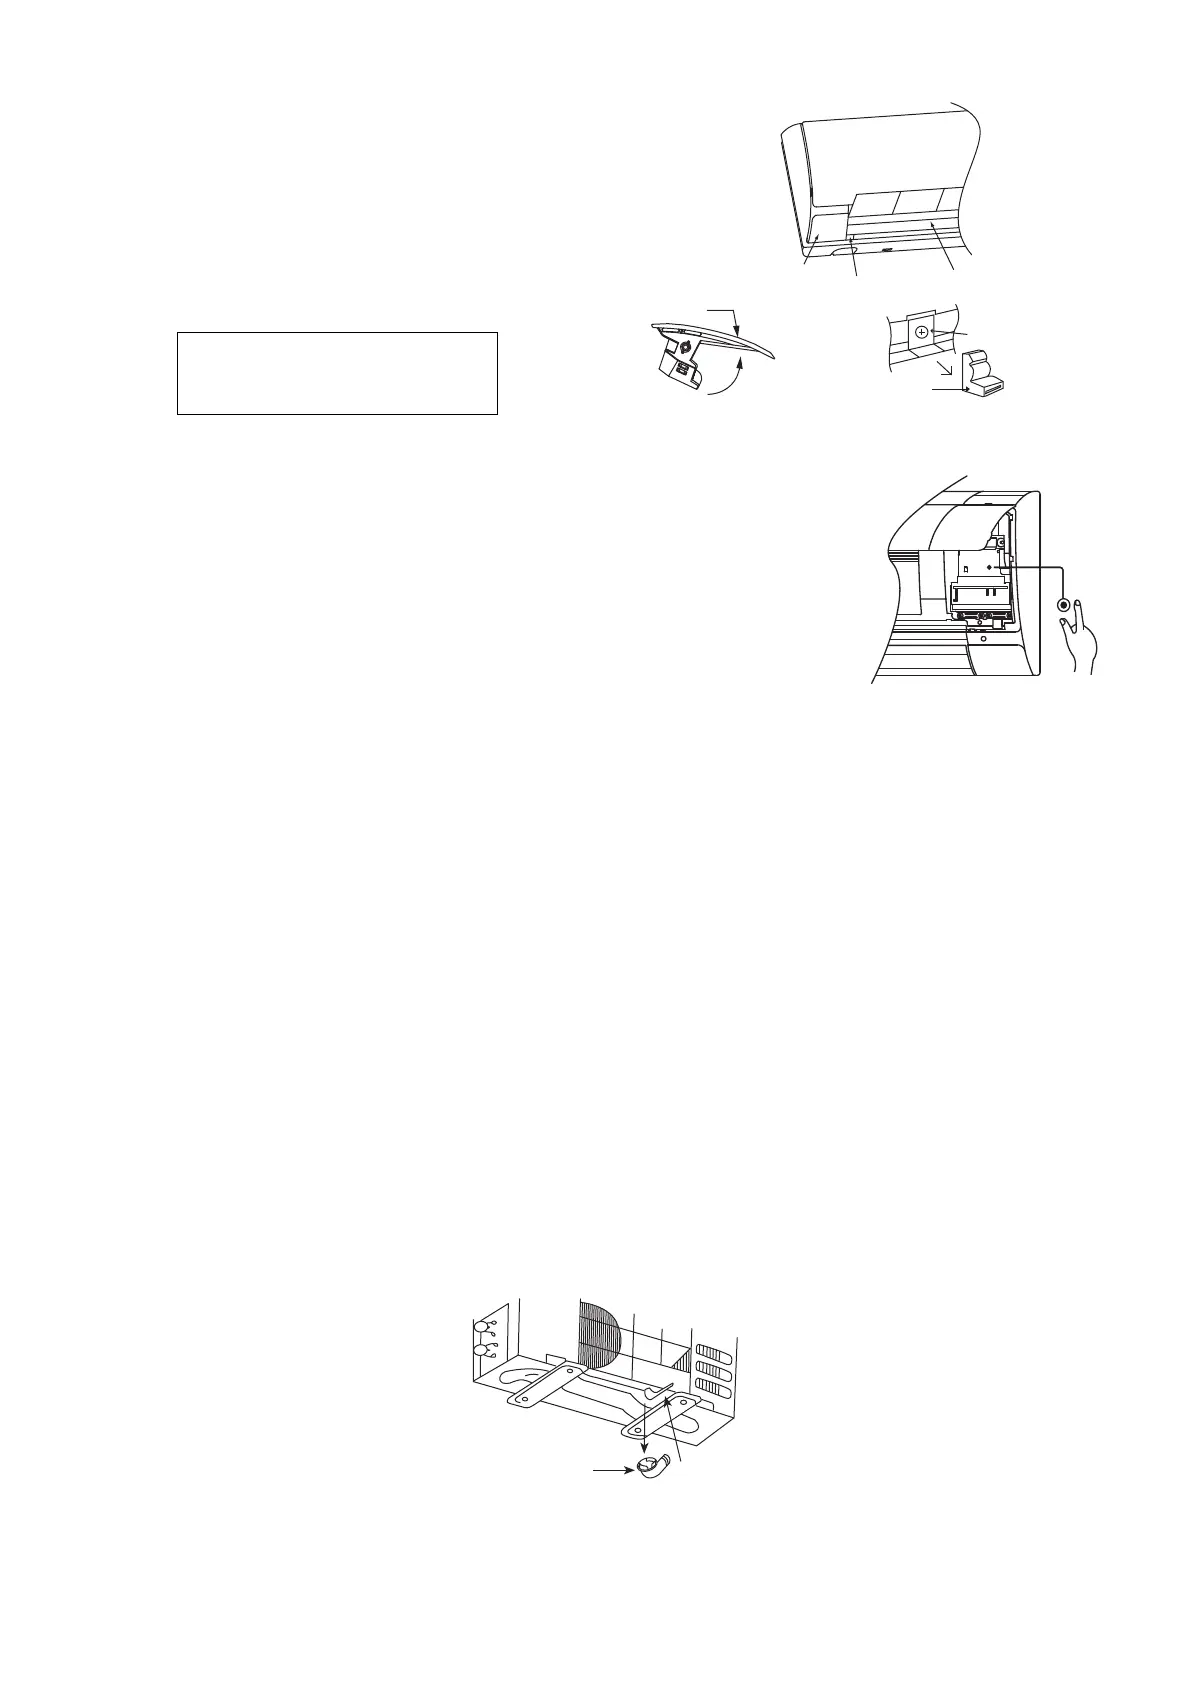
11.3.7 How to Take Out Front Grille
Please follow the steps below to take out front grille if
necessary such as when servicing.
1 Set the vertical airflow direction louvers to the
horizontal position.
2 Slide down the 2 caps on the front grille as
shown in the illustration at right, and then
remove the 2 mounting screws.
3 Pull the lower section of the front grille
towards you to remove the front grille.
When reinstalling the front grille, first set
the vertical airflow direction louver to the
horizontal position and then carry out
above steps 2 - 3 in the reverse order.
11.3.8 Auto Switch Operation
The below operations will be performed by pressing the “AUTO” switch.
1 AUTO OPERATION MODE
The Auto operation will be activated immediately once the Auto
Switch is pressed and release before 5 sec..
2 TEST RUN OPERATION (FOR PUMP DOWN/SERVICING
PURPOSE)
The Test Run operation will be activated if the Auto Switch is
pressed continuously for more than 5 sec. to below 8 sec..
A “pep” sound will occur at the fifth sec., in order to identify the
starting of Test Run operation.
3 HEATING TRIAL OPERATION
Press the “AUTO” switch continuously for more than 8 sec. to below 11 sec. and release when a “pep pep”
sound is occured at eight sec. (However, a “pep” sound is occurred at fifth sec..) Then press Remote
controller “A/C Reset” button once.
Remote controller signal will activate operation to force heating mode.
4 REMOTE CONTROLLER RECEIVING SOUND ON/OFF
The ON/OFF of Remote controller receiving sound can be change over by the following steps:
a) Press “AUTO” switch continuously for more than 16 sec. to below 21 sec..
A “pep”, “pep”, “pep”, “pep” sound will occur at the sixteenth sec..
b) Press the “AC Reset” button once, “pep” sound will occur indicates that Remote controller receiving sound
setting mode is activated.
c) Press “AUTO” switch again. Everytime “AUTO” switch is pressed (within 60 sec. interval), Remote
controller receiving sound status will be reversed between ON and OFF.
Long “peep” sound indicates that Remote controller receiving sound is ON.
Short “pep” sound indicates that Remote controller receiving sound is OFF.
5 HEATING ONLY OPERATION
Press the “AUTO” switch continuously for more than 8 sec. to below 11 sec. and release when the “pep pep”
sound is occurred at eight sec. (however, a “pep” sound is occurred at fifth sec.) .Then press Remote
controller “Check” button once. Remote controller signal will activate heating only operation mode.
11.3.9 Disposal of Outdoor Unit Drain Water
If a drain elbow is used, the unit should be placed on a stand which is taller than 3 cm.
If the unit is used in an area where temperature falls below 0°C for 2 or 3 days in succession, it is recommended
not to use a drain elbow, for the drain water freezes and the fan will not rotate.
Screw
Vane
Vane
Front grille
(Move the vane
to upward)
Cap
Cap
Hose
Install the hose at an angle so that the
water smoothly fl ows out.
Drain elbow
7
 Loading...