17
Getting To Know
Your Machine
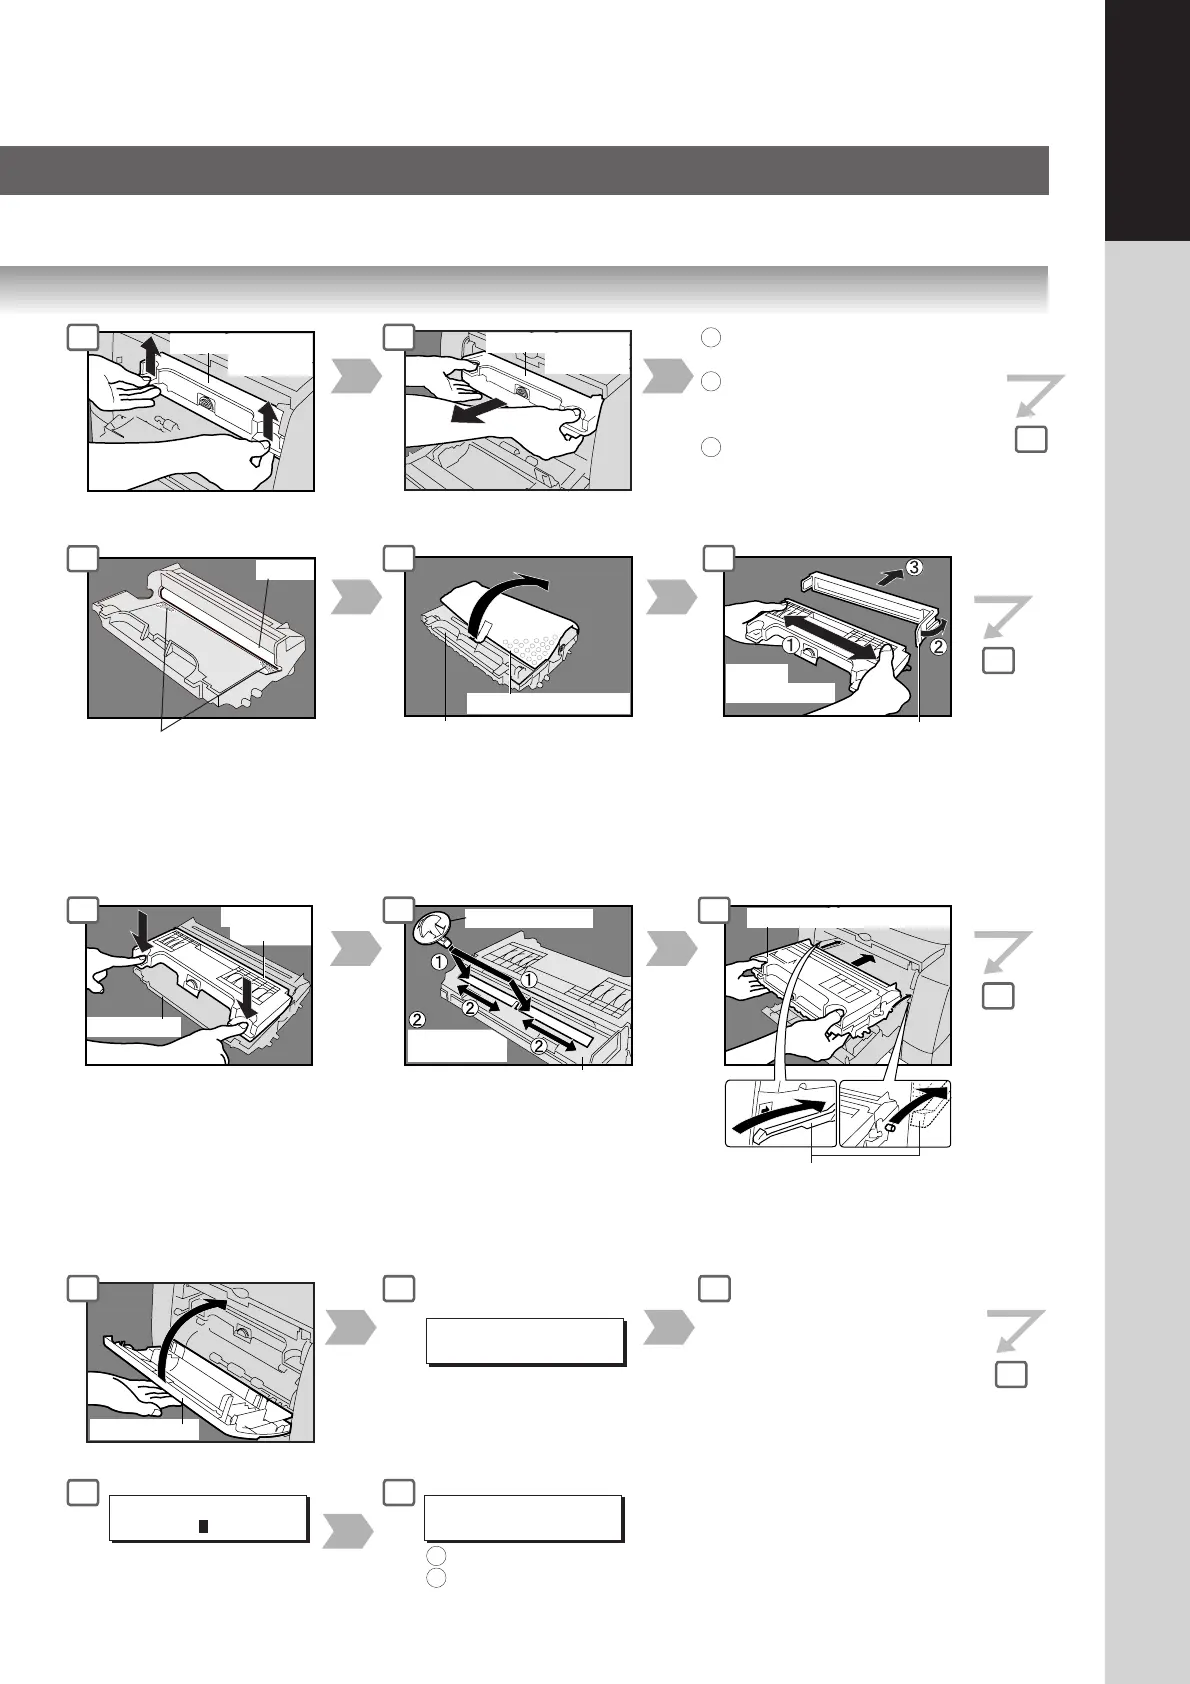
Clean the excess toner
with a soft cloth.
Drum
Drum Unit/Toner Cartridge
Cleaning Tool
A cleaning tool is included
with the Toner Cartridge.
Slide 3 times
on each side
Guide Rails
Drum Unit/Toner Cartridge
Place the Drum Unit/Toner
Cartridge over the Guide Rails
and insert it until it stops.
Protective Sheet
New Drum Unit
Shake
10-15 times
Tape and Protective Cover
New Toner
Cartridge
*
Drum Unit
Drum Unit/Toner
Cartridge
4
3
ATTENTION
● Do not remove the
protective cover unless
you are ready to use it.
Drum Unit/Toner
Cartridge
2
Front Cover
6
7
8
13
To replace the Drum Unit:
To replace the Toner Cartridge:
Perform steps (4 - 14). (Skip step 6)
To replace the Drum Unit:
Perform steps (4 - 18).
(Skip steps 5, 7 and 10)
To replace the Toner Cartridge
and Drum Unit:
Perform steps (4 - 18).
14
Perform steps (15 - 18) for
Drum Replacement only:
If the unit is in other than
Copy Mode, press the COPY
Key.
Press the FUNCTION Key on
the Control Panel.
GENERAL PARAM.(0-9)
ENTER NO. OR ∨
^
15
Press "5" and SET Keys.
5: Drum Replacement
NEW TONER REPLACED?
1:YES 2:NO
18
Press "1" Key.
Press RESET Key on the Control Panel.
1
2
DRUM REPLACEMENT?
1:YES 2:NO
When Drum Unit is replaced.
ATTENTION
● Be careful not to scratch the surface of the Drum Unit (Green),
and not to touch it with bare hands.
To replace the Toner Cartridge only:
5
9
10
11
12
16
17
To replace the Toner Cartridge only:
1:Select "1: YES" if a new toner
cartridge was installed.
2:Select "2: NO" in all other
cases.
NOTE:
Keep this Cleaning Tool for
future use.
1
2
3
When Toner Cartridge has
been replaced.
 Loading...