1-12-2-2-4
1
9
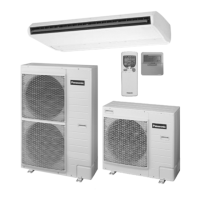
Placing the Unit Inside the Ceiling
This unit is equipped with the drain pump. Check a tape
measure or carpenter’s level.
Before installing the panel for cassette, complete the
work of drain pipe and refrigerant pipe installation.
(1) When placing the unit inside the ceiling, determine the
pitch of the suspension bolts using the supplied full-scale
installation diagram.
Tubing and wiring must be laid inside the ceiling when
suspending the unit. If the ceiling is already constructed,
lay the tubing and wiring into position for connection to
the unit before placing the unit inside the ceiling.
(2) The length of suspension bolts must be appropriate for a
distance between the bottom of the bolt and the bottom
of the unit of more than 18 mm.
(3) Thread the 3 hexagonal nuts and 2 washers onto each
of the 4 suspension bolts
. Use 1 nut and 1 washer for the
upper side, and 2 nuts and 1 washer for the lower side,
so that the unit will not fall off the suspension lugs.
Nuts and washers
(use for upper and lower)
Double nut
12 ~ 17 (mm)
Notch
Suspension lug
Suspension bolt
(4) Adjust so that the distance between the unit and the
ceiling bottom is 12 to 17 mm. Tighten the nuts on the
upper side and lower side of the suspension lug.
(5) Remove the protective polyethylene used to protect the
fan parts during transport.
(6) Check with a tape measure or carpenter’s level.
Full-scale installation diagram
(printed on top of container box)
Indoor unit
Indoor unit
Paper model
for installation
Paper model
for installation
Screw for
attaching paper
(4 points)
Open the ceiling
board as large as this
paper outline
Ceiling
board
Ceiling
board
Over 18 mm
12 ~ 17 mm
281258_EU.indb 9 2016-9-1 13:03:41
Installing the Drain Pipe
Before Performing the Installation Drain Piping
(1) Limitations of Raising the Drain Pipe Connection
CAUTION
●
The drain pipe can be raised to a maximum height of
850 mm from the bottom of the ceiling.
Do not attempt to raise it higher than 850 mm.
Doing so will result in water leakage.
A
B
300 mm or less
Indoor unit
Bottom of the Ceiling board
* Length of supplied drain pipe = 250 mm
A : 850 mm or lower
B : 666 mm or lower
(as short as possible)
(2) Limitations of Drain Pipe Connection
CAUTION
●
Do not install the drain pipe with an upward gradient from
the drain port connection. This will cause the drain water
to flow backward and leak when the unit is not operating.
●
Do not install an air bleeder as this may cause water to
spray from the drain pipe outlet.
●
Do not provide U-trap or bell-shaped trap in the middle of
the drain pipe. Doing so will cause abnormal sound.
Indoor unit
Air bleeder prohibited
Trap prohibited
Upward gradient
prohibited
●
Make sure the drain pipe has a downward gradient (1/100
or more; downward from drain port connection).
Indoor unit
Separation of support bracket = 1.5 m ~ 2 m
Downward gradient = 1/100 or more
(3) Limitations of Drain Hose Connection
CAUTION
●
Do not bend the supplied drain hose 90° or more.
Bend it less than 45°.
Bend angle 90° prohibited
Bend angle less than 45°
●
Do not make a trap in the middle of the supplied drain
hose. Doing so will cause abnormal sound.
Trap prohibited
281258_EU.indb 10 2016-9-1 13:03:42
SM830276-00_欧州向け R32シングル TD&SM.indb 4 2019/02/27 11:54:52
 Loading...