9. Help
39
“COVER OPEN”
“CHECK PAPER”
L The cover is open. Close it and press {FAX/START} to clear the message.
L The unit has run out of recording paper. Install recording paper (page 5) and
press {FAX/START} to clear the message.
“FAX IN MEMORY” L The unit has a document in memory. See the other displayed message
instructions to print out the document. For fax memory capacity, see page
47.
“FAX MEMORY FULL” L The memory is full of received documents due to a lack of recording paper
or a recording paper jam. Install paper (page 5) or clear the jammed paper
(page 44).
L When performing broadcast transmission, the document being stored
exceeded the memory capacity of the unit. Send the entire document
manually.
“PHONEBOOK FULL” L There is no space to store new items in the phonebook. Erase unnecessary
items (page 14).
“MESSAGE FULL” L There is no memory available to record voice messages. Erase unnecessary
messages (page 30).
“MODEM ERROR” L There is something wrong with the unit’s modem. Contact our service
personnel.
“NO FAX REPLY” L The other party’s fax machine is busy or has run out of recording paper. Try
again.
“PAPER JAMMED”
“CHECK STACKER”
*1
L A recording paper jam occurred. Clear the jammed paper (page 44).
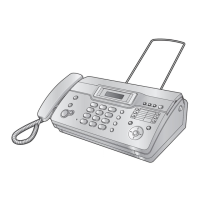
*1 Make sure the paper stacker is inserted (page 4) (KX-FT988 only).
“PLEASE WAIT” L The unit is checking and initializing the paper. Wait for a moment while the
check is completed.
“POLLING ERROR” L The other party’s fax machine does not support polling. Check with the other
party.
“REDIAL TIME OUT” L The other party’s fax machine is busy or has run out of recording paper. Try
again.
“REMOVE DOCUMENT” L The document is jammed. Remove the jammed document (page 44).
L Press {STOP} to eject the jammed document.
“TRANSMIT ERROR” L A transmission error occurred. Try again.
“UNIT OVERHEATED” L The unit is too hot. Stop using the unit for a while and let the unit cool down.
Display Cause & Solution
 Loading...

